7. Calibration
Power-up Calibration, Background Calibration and User Recalibration are the main types of calibration.
- Power-up calibration occurs automatically at device power-up. It runs during device configuration.
- After you enable background calibration, background calibration continuously runs in the background.
- Use dynamic reconfiguration to trigger user recalibration. In this case, you are responsible for enabling the required calibration sequence.
When you upgrade from a previous version of the Quartus® Prime software to Quartus® Prime software version 18.1 or above, the Native PHY IP automatically upgrades any H-tile GXT design transceiver link operating at datarates ≥ 17.5 Gbps to Enable background calibration. Refer to Background Calibration for more information about specific requirements and how to control the background calibration.
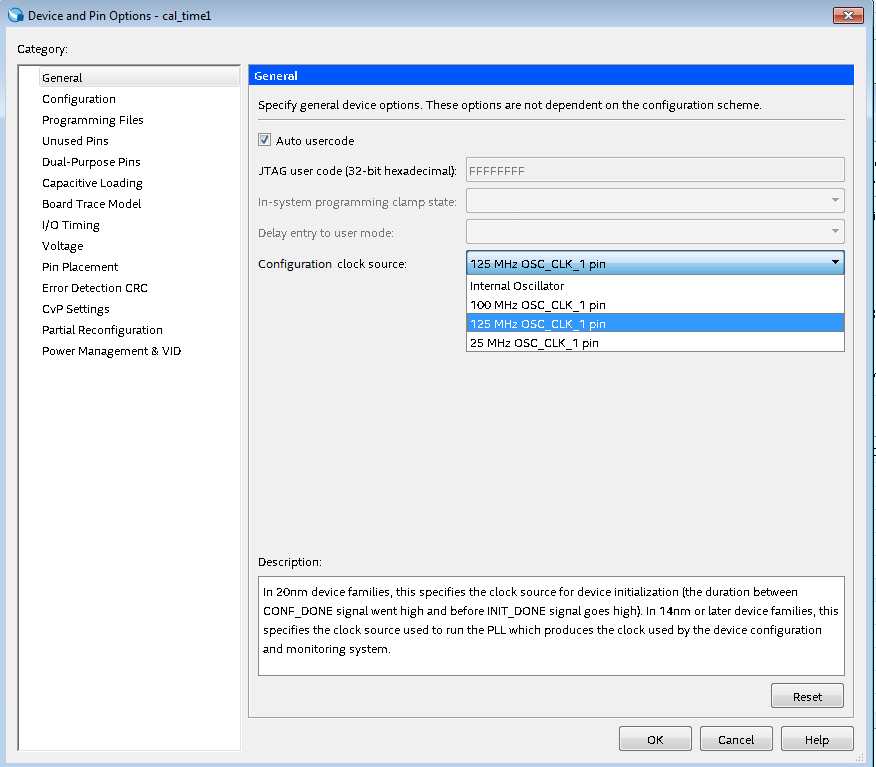
Stratix® 10 devices use the OSC_CLK_1 pin to provide the transceiver calibration clock source. You must provide a 25, 100, or 125 MHz free running and stable clock to OSC_CLK_1.
The FPGA's Internal Oscillator cannot be used for transceiver calibration. Do not select this clock source as the Configuration clock source in the Quartus® Prime settings.
In addition to providing this clock, you must also choose the appropriate frequency in Quartus assignments:
- Scroll down menu
- Choose 25, 100, or 125 MHz OSC_CLK_1 pin option.

You see the selected clock source in .qsf as follows:
set_global_assignment -name DEVICE_INITIALIZATION_CLOCK OSC_CLK_1_125MHz
There is a PLL inside the FPGA that receives the clock from OSC_CLK_1 and provides a 250-MHz calibration clock to PreSICE. All reference clocks driving transceiver PLLs (ATX PLL, fPLL, CDR/CMU PLL) must have a stable frequency and be free running before the start of FPGA configuration (pull the FPGA’s nCONFIG input high). For more information about OSC_CLK_1 pin requirements, refer to the Stratix® 10 GX and SX Device Family Pin Connection Guidelines.