2.2.1. Building Hardware Design in Platform Designer Overview
2.2.2. Building Hardware Design in Platform Designer — Manual Instantiation
2.2.3. Building Hardware Design in Platform Designer — Board-Aware Flow
2.2.4. Building Hardware Design in Platform Designer — Configurable Example Design
2.2.5. Building Software Design with Ashling* RiscFree* IDE for Altera® FPGAs
2.2.2.2.1. Adding Nios® V/m Processor IP
2.2.2.2.2. Adding On-Chip Memory II (RAM or ROM) IP
2.2.2.2.3. Adding JTAG UART IP
2.2.2.2.4. Adding Reset Release IP
2.2.2.2.5. Connect Interfaces and Signals
2.2.2.2.6. Clear System Warnings and Errors
2.2.2.2.7. Configuring the Reset Vector of the Nios® V Processor
2.2.2.2.8. Saving and Generating System HDL
2.2.3.2.1. Adding Nios® V/m Processor IP
2.2.3.2.2. Adding On-Chip Memory (RAM or ROM) IP
2.2.3.2.3. Adding JTAG UART IP
2.2.3.2.4. Adding System ID Peripheral IP
2.2.3.2.5. Adding Reset Release IP
2.2.3.2.6. Connect Interfaces and Signals
2.2.3.2.7. Clear System Warnings and Errors
2.2.3.2.8. Saving and Generating System HDL
3.2.1.3. Configuring Assignment and Constraint
Add Synopsys Design Constraint (SDC) File
- Click New, select Synopsys Design Constraint File and click OK.
- Add the following constraint:
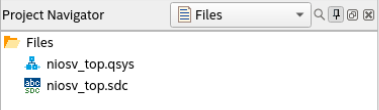
create_clock -name {altera_reserved_tck} -period 62.500 -waveform { 0.000 31.250 }[get_ports {altera_reserved_tck}] create_clock -name {clk} -period 20.0 [get_ports clk_clk] set_clock_groups -asynchronous -group [get_clocks {altera_reserved_tck}] - Save as niosv_top.sdc.
Adding Design Files
- In Quartus® Prime software, navigate to Assignments menu bar and click Settings.
- Navigate to Files category. Click Add All to add the QSYS file to your project.
- Click OK to exit the Settings window.
Figure 117. Settings – Files CategoryFigure 118. Project Navigator
Configuration Mode
- In Quartus® Prime software, navigate to Assignments menu bar and click Device.
- Click Device and Options.
- Navigate to Configuration category, set the Configuration mode to Single Uncompressed Image with Memory Initialization.
Figure 119. Configuration Mode
- Click OK to exit Device and Options window.
- Click OK to exit Device window.
Pin Assignment
- In Quartus® Prime software, navigate to Processing menu bar and click Start > Start Analysis & Elaboration.
- Once the analysis is complete, navigate to Assignments menu bar and click Pin Planner. For this example, there are 2 pins assignments:
- clk_clk assigned to PIN_J10
- reset_reset_n assigned to PIN_D9
- Close Pin Planner and return to the project front page.