3.3. MAX® 10 System Controller Updates
The MAX® 10 System Controller manages several features on the Stratix® 10 SX SoC Development kit, including clocks, I2C, and some configuration signals. In certain situations, it may be necessary to ensure the MAX® 10 System Controller internal flash contains the latest available design. This may include the Stratix® 10 device failing to configure from OSC_CLK_1, or when other unexpected issues arise. The latest System Controller design is included in the Stratix® 10 SX Soc Development Kit Installer Package, in the “system_max10” folder inside the “examples” folder.
To update the internal flash, follow the steps outlined in the procedure below:
- Power off the Stratix® 10 SX SoC Development Kit.
- Ensure SW1 and SW2 are set to the default settings so the System MAX® 10 is on the JTAG chain and the Stratix® 10 device does not automatically configure itself.
- Connect a micro USB cable to J57 for JTAG access and power on the board.
- Open the Quartus® Prime Programmer and scan the device chain.
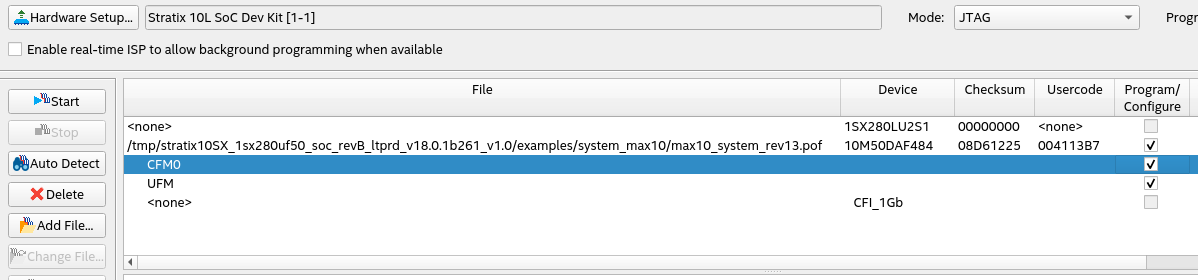
- Right click on the MAX® 10 and select “Change File”. Navigate to the “system_max10” folder and select the .pof file, for example, “max10_system_rev13.pof”.
- Check the Program/Verify box in the row with the .pof and the MAX® 10 Device. The Program/Verify boxes in the immediately following rows, CFM0 and UFM, will auto-check as well. Refer to the following screenshot:
- Click Start and wait for the programming cycle to finish.
- Power off the board and reset SW1 and SW2 to prior settings, if any.