Advantages of Partial Reconfiguration
Scope of This Document
Prerequisites for Using This Document
Partial Reconfiguration Tools and Methods
Arria 10 SoC Partial Reconfiguration Workflow
Partial Reconfiguration Limitations
Creating the PR Example Design
Generating the Example Software Image
Loading Partial Reconfiguration Designs Using Linux
Important Partial Reconfiguration Terminology
Revision History
Qsys Partial Reconfiguration Freeze Logic
Importing the GHRD Project
Add a Partial Reconfiguration Region to the GHRD
Building the Base Revision with the Reconfigurable Design Partition
Synthesizing an Alternate Persona
Implementing the Alternate Persona
Generating the RBF FPGA Image Files
Design Handoff to Software Developer
Importing the GHRD Project
- Extract the .tar file provided with the SoC EDS GHRD hardware example, as follows:
$ mkdir ghrd_pr $ cd ghrd_pr/ $ tar xvfz ~/intelFPGA/16.1/embedded/examples/hardware/ \ a10_soc_devkit_ghrd/tgz/ghrd_10as066n2_16_1_*.tar.gz (…) $ which quartus ~/intelFPGA_pro/16.1/quartus/bin/quartus $ quartus & - Open the GHRD Quartus project file.
- Open the GHRD Qsys design saved in the ghrd_10as066n2.qsys file with the Qsys Pro tools. Point to Tools and click Qsys Pro to start the tool.
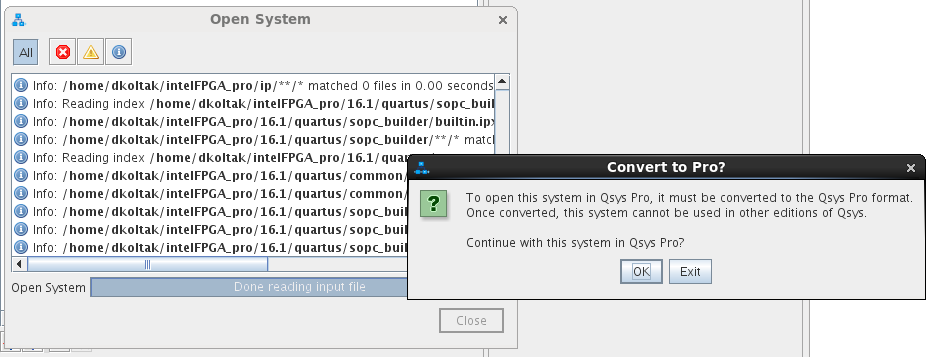
- The copied design is in the standard Qsys tool format and must be converted to the Qsys Pro format. A dialog box confirming this action pops up automatically after opening the Qsys design. Click OK to perform the conversion.
Figure 5. Converting to Qsys Pro Format

- Save the converted design and click Generate RTL to ensure that the conversion process was successful.
- Close the Qsys Pro tool.
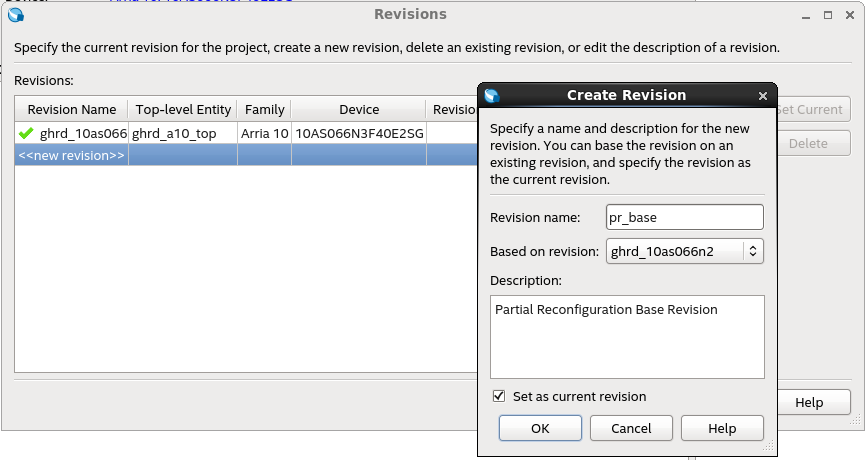
- In the main Quartus window, point to Project and click Revisions. Create a new revision for the PR base configuration. Double click << new revision >> and enter the revision information as shown below. This revision is based on the existing revision.
Figure 6. Creating the Base Revision

- Click OK to create the revision and open it as the current revision.
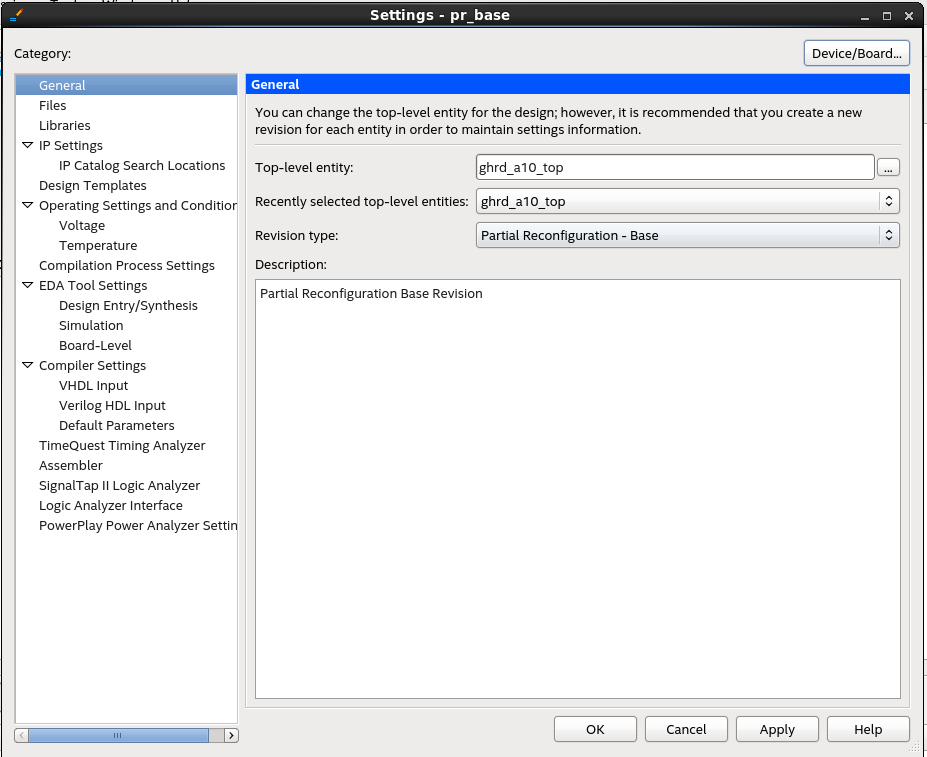
- To set the revision type of the new revision, point to Assignments, click Settings, choose the General category, and change the Revision Type field to Partial Reconfiguration – Base as shown below.
Figure 7. Setting the Revision Type
