AN 1006: Multi-Project Analysis with Exploration Dashboard
ID
816589
Date
9/29/2025
Public
2.1. Step 1: Create an Exploration Dashboard Workspace
2.2. Step 2: Add Projects to Exploration Dashboard
2.3. Step 3: Launch Connections and Compile the Projects
2.4. Step 4: Analyze Timing Summary Reports
2.5. Step 5: Analyze the Results of Report Timing
2.6. Step 6: Disconnecting Interactive Connections
2.2. Step 2: Add Projects to Exploration Dashboard
There are multiple methods of adding Quartus® Prime projects to the Exploration Dashboard for analysis, including adding projects from specific directories, and adding projects from Quartus® Prime project archive files (.qar).
Follow these steps to create a project group for this example:
- From the Tasks list, double-click Add Projects under Workspace Management.
Figure 9. Add Projects Task
- In the Add projects to the workspace dialog box, select Add projects under a directory option. Other import methods are available.
Figure 10. Add Projects to the Workspace
- In the Add Projects Under Directory dialog box, click the (...) button to specify the Quartus Prime project directory in the Path to directory field. (When adding under a directory, you want to pick the lowest parent directory that contains all the projects you want to find, not the directory that contains any individual project.)
- To create a new group ID for easy interaction with all the projects, and to dispatch all the work to each project to run in parallel, double-click the <<New group>> text in the ID column. Then, type All_Seeds to create the group. Finally, select the newly created All_Seeds group by checking the respective checkbox.
Figure 11. Add Projects Under Directory
Figure 12. All_Seeds Group

- In the Confirm Projects to Add from Directory dialog box, turn on the check boxes for the seed_1, seed_2, and seed_3 projects to add them to the recently created All_Seeds group. You can modify the predefined project ID of each project by double-clicking in the respective project ID and typing a new ID.
- Click OK to confirm the additions to your Exploration Dashboard workspace.
Figure 13. Confirm Addition of Projects to Group
- In the Object Status panel, view the members of the All_Seeds group.
Figure 14. Three Projects Combined Into Single All_Seeds Group
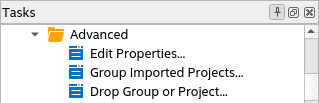
Note: To define a new project group at any time, you can double-click Group Imported Projects on the Tasks list, then provide a new Group ID and specify the projects to include in the new group in the Create Project Group dialog box.Figure 15. Group Imported Projects