A newer version of this document is available. Customers should click here to go to the newest version.
2.1. Installation and Licensing
2.2. Generating CPRI Intel® FPGA IP Core
2.3. CPRI Intel® FPGA IP File Structure
2.4. CPRI Intel® FPGA IP Core Parameters
2.5. Integrating Your Intel® FPGA IP Core in Your Design: Required External Blocks
2.6. Simulating Intel FPGA IP Cores
2.7. Understanding the Testbench
2.8. Running the Design Example
2.9. Compiling the Full Design and Programming the FPGA
2.5.1. Adding the Transceiver TX PLL IP Core
2.5.2. Adding the Reset Controller
2.5.3. Adding the Transceiver Reconfiguration Controller
2.5.4. Adding the Off-Chip Clean-Up PLL
2.5.5. Adding and Connecting the Single-Trip Delay Calibration Blocks
2.5.6. Transceiver PLL Calibration
2.5.7. Reference and System PLL Clock for your IP Design
3.1. Interfaces Overview
3.2. CPRI Intel® FPGA IP Core Clocking Structure
3.3. CPRI Intel® FPGA IP Core Reset Requirements
3.4. Start-Up Sequence Following Reset
3.5. AUX Interface
3.6. Direct IQ Interface
3.7. Ctrl_AxC Interface
3.8. Direct Vendor Specific Access Interface
3.9. Real-Time Vendor Specific Interface
3.10. Direct HDLC Serial Interface
3.11. Direct L1 Control and Status Interface
3.12. L1 Debug Interface
3.13. Media Independent Interface (MII) to External Ethernet Block
3.14. Gigabit Media Independent Interface (GMII) to External Ethernet Block
3.15. CPU Interface to CPRI Intel® FPGA IP Registers
3.16. Auto-Rate Negotiation
3.17. Extended Delay Measurement
3.18. Deterministic Latency and Delay Measurement and Calibration
3.19. CPRI Intel® FPGA IP Transceiver and Transceiver Management Interfaces
3.20. Testing Features
3.19.1. CPRI Link
3.19.2. Main Transceiver Clock and Reset Signals
3.19.3. Arria V, Arria V GZ, Cyclone V, and Stratix V Transceiver Reconfiguration Interface
3.19.4. Intel® Arria® 10, Intel® Stratix® 10, and Intel® Agilex™ Transceiver Reconfiguration Interface
3.19.5. RS-FEC Interface
3.19.6. Interface to the External Reset Controller
3.19.7. Interface to the External PLL
3.19.8. Transceiver Debug Interface
2.2. Generating CPRI Intel® FPGA IP Core
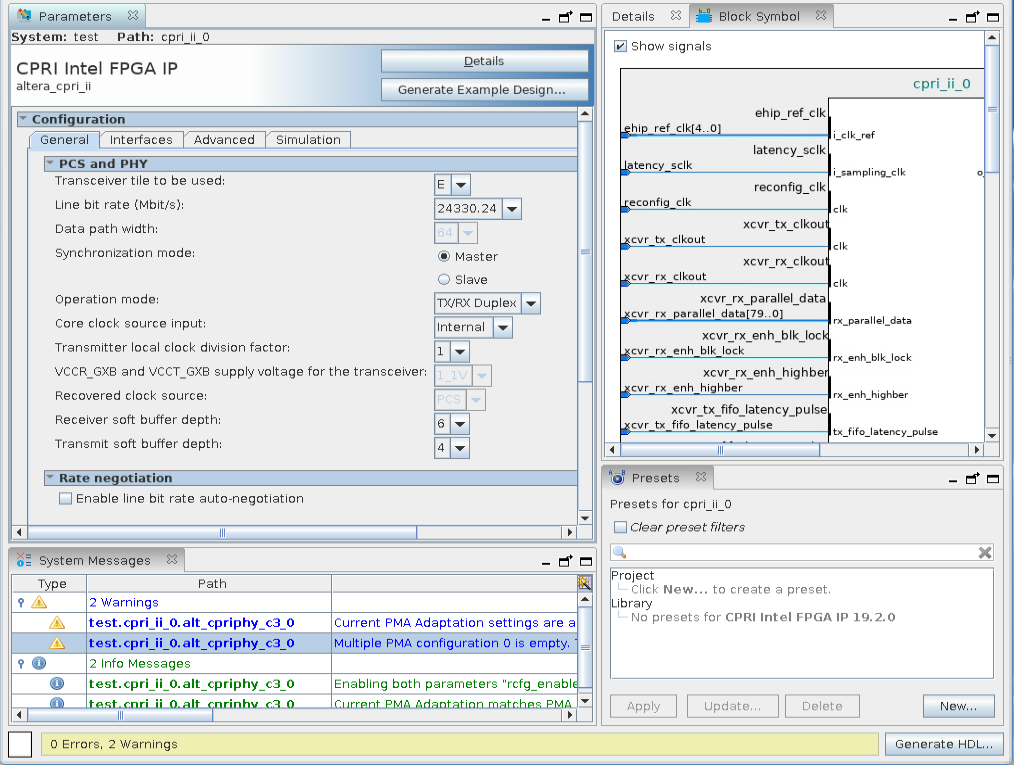
You can configure a custom Intel® FPGA IP variation in the parameter editor. Use the following steps to specify CPRI IP core options and parameters in the parameter editor.
Figure 4. IP Parameter Editor
- In the Intel® Quartus® Prime Pro Edition software, click File > New Project Wizard to create a new Intel® Quartus® Prime project, or File > Open Project to open an existing Intel® Quartus® Prime project. The wizard prompts you to specify a device. In the Intel® Quartus® Prime Standard Edition software, this step is not required.
- In the Intel® FPGA IP Catalog (Tools > IP Catalog), locate and double-click the name CPRI Intel FPGA IP. The parameter editor appears.
- Specify a top-level name for your custom Intel® FPGA IP variation. The parameter editor saves the IP variation settings in a file named <your_ip> .ip (in Intel® Quartus® Prime Pro Edition) or <your_ip>.qsys (in Intel® Quartus® Prime Standard Edition). Click OK.
- Specify the parameters and options for your IP variation in the parameter editor, including one or more of the following. Refer to CPRI Intel FPGA IP Core Parameters for information about specific IP parameters.
- Specify parameters defining the IP core functionality, port configurations, and device-specific features.
- Specify options for processing the IP core files in other EDA tools.
- Click Generate HDL. The Generation dialog box appears.
- Specify output file generation options, and then click Generate. The IP variation files generate according to your specifications.
- To generate a simulation testbench, click Generate Example Design. Please refer to the instructions in the Running the Testbench section.
- To generate an HDL instantiation template that you can copy and paste into your text editor, click Generate > Show Instantiation Template.
- Click Finish. The parameter editor adds the top-level .qsys or .ip file to the current project automatically. If you are prompted to manually add the .qsys file to the project, click Project > Add/Remove Files in Project to add the file.
For Intel® Agilex™ F-tile devices, perform these additional steps:
- Copy the cpri_ii_tile_ip_gen.tcl from <your_ip>/altera_cpri_ii_c2p_top_<c2p version>/sim/ or <your_ip>/altera_cpri_ii_c2p_top_<c2p_version>/synth/ into the same level as <your_ip>.ip
- Execute this file using:
quartus_sh -t cpri_ii_tile_ip_gen.tcl <your_ip> skip_qtlg
- After generating and instantiating your IP variation, make appropriate pin assignments to connect ports.