1.1. Acronyms and Definitions
1.2. Recommended System Requirements
1.3. Installation Folders
1.4. Boot Flow Overview
1.5. Getting Started
1.6. Enabling the UEFI DXE Phase and the UEFI Shell
1.7. Using the Network Feature Under the UEFI Shell
1.8. Creating your First UEFI Application
1.9. Using Arm* DS-5* Intel® SoC FPGA Edition (For Windows* Only)
1.10. Pit Stop Utility Guide
1.11. Porting HWLIBs to UEFI Guidelines
1.12. Tera Term Installation
1.13. Minicom Installation
1.14. Win32DiskImager Tool Installation
1.15. TFTPd64 By Ph.Jounin Installation
1.16. Revision History of Intel® Arria® 10 SoC UEFI Boot Loader User Guide
1.5.1. Compiling the Hardware Design
1.5.2. Generating the Boot Loader and Device Tree for UEFI Boot Loader
1.5.3. Building the UEFI Boot Loader
1.5.4. Creating an SD Card Image
1.5.5. Creating a QSPI Image
1.5.6. Booting the Board with SD/MMC
1.5.7. Booting the Board with QSPI
1.5.8. Early I/O Release
1.5.9. Booting Linux* Using the UEFI Boot Loader
1.5.10. Debugging an Example Project
1.5.11. UEFI Boot Loader Customization
1.5.12. Enabling Checksum for the FPGA Image
1.5.13. NAND Bad Block Management
1.5.4.4.2. Programming the Integrity Real-Time Operating System Image
This task describes how to boot the Integrity Real-Time Operating System (RTOS) automatically on your target board after power up.
- Open a terminal window and enter the following command:
$ cd <your_uefi_directory>/uefi-socfpga - Run the following command to open and edit the <your_uefi_socfpga>/uefi-socfpga/AlteraPlatformPkg/Arria10SoCPkg/Arria10SoCPkg.dsc file.
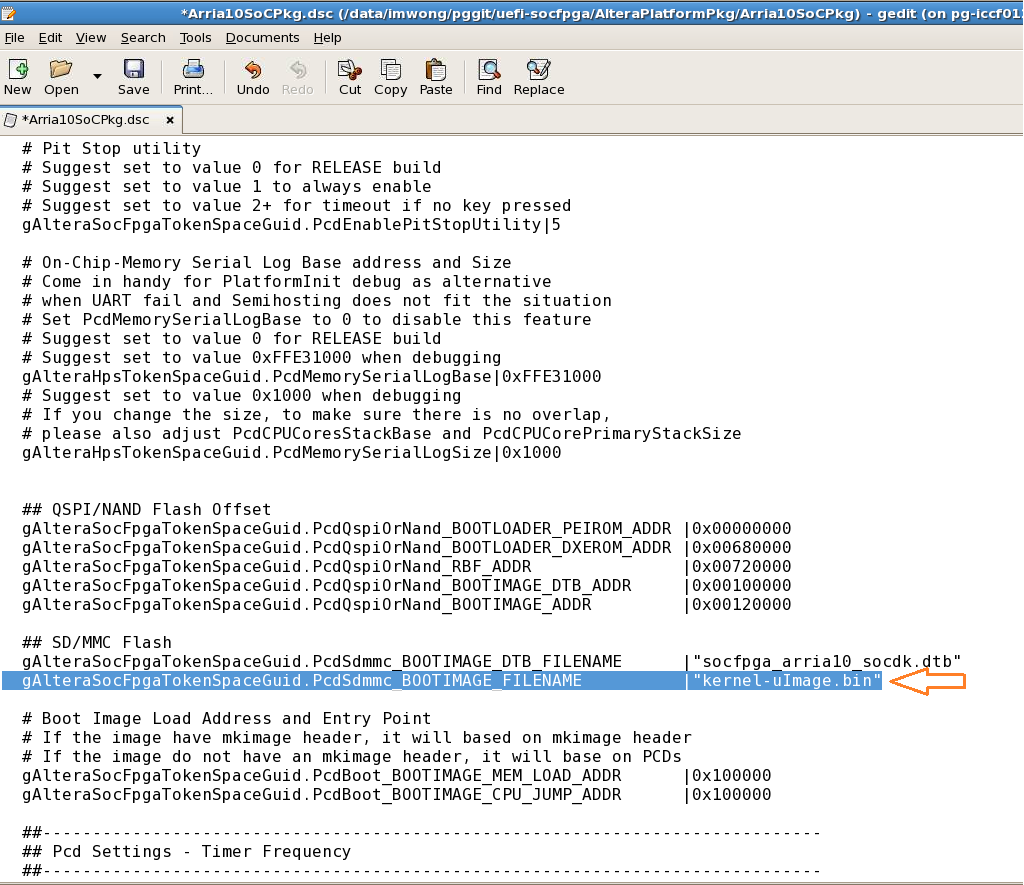
$ gedit AlteraPlatformPkg/Arria10SoCPkg/Arria10SoCPkg.dsc - Set the PcdSdmmc_BOOTIMAGE_FILENAME parameter in the file to kernel-uImage.bin.
Figure 51. Editing Arria10SoCPkg.dsc Parameters
- Click Save.
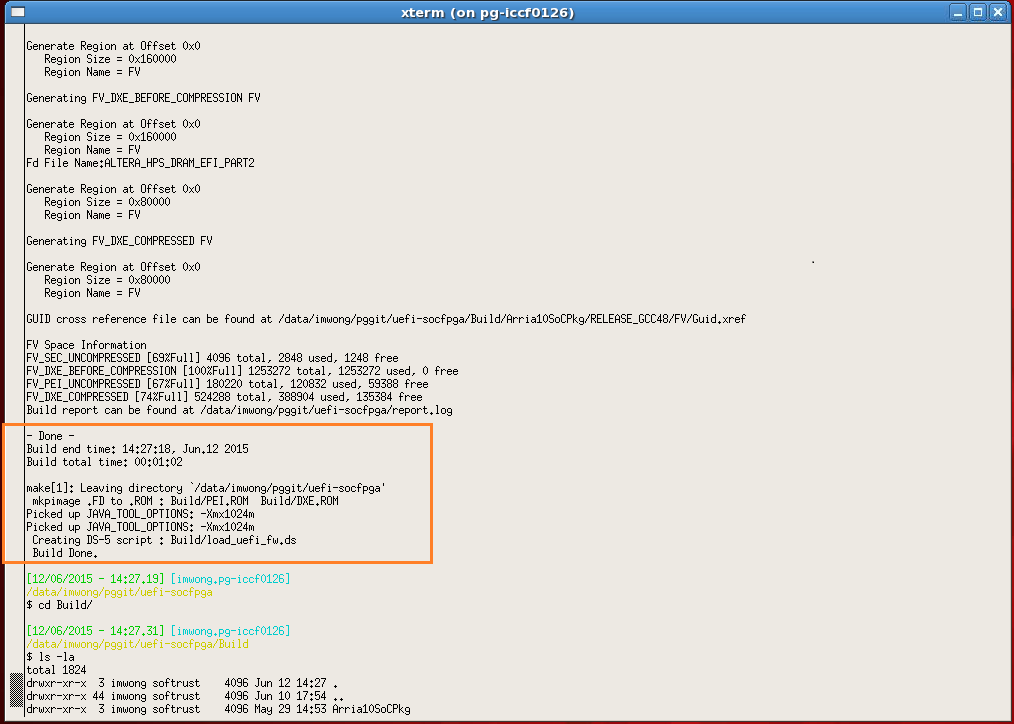
- Re-compile the UEFI Bootloader for the Intel® Arria® 10 SoC FPGA device using the following command. The build process takes less than 3 minutes.
$ make fast - When the build completes successfully, a Build Done message appears.
Figure 52. Build Done Message
- Use the dd utility to overwrite the sd_card_linux_boot_image.img file with the generated PEI.ROM.
$ cd <your_uefi_directory>/uefi-socfpga $ dd if=Build/PEI.ROM of=/<your_SDCard_directory>/sd_card_linux_boot_image.img bs=512 seek=2048 conv=notrunc - Insert the SD card reader into your host machine.
- Use the dd utility or Win32DiskImager to write the sd_card_linux_boot_image.img into the SD Card.
If you are using the dd utility type:
If you are using the Win32DiskImager:$ sudo dd if=/<your_SDCard_directory>/sd_card_linux_boot_image.img of=/dev/sdb bs=1M- Double-click the Win32DiskImager Icon.
- When the Win32 Disk Imager dialog box appears, browse to select the sd_card_linux_boot_image.img file and click Open.
- Select the Write button.
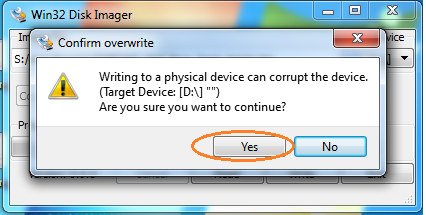
- When the Confirm overwrite dialog box appears, click Yes to continue. A progress bar appears.
Figure 53. Win32 Disk Imager Overwrite Confirmation
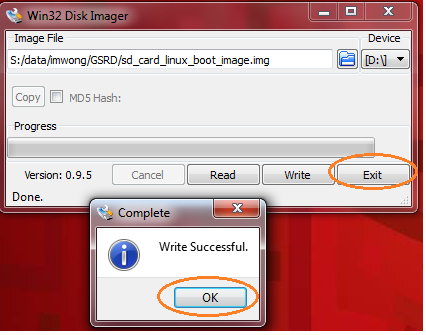
- After the write operation completes, a Complete dialog box appears. Click OK to exit the dialog box and then click Exit in the Image File window.
Figure 54. Exit Win32 Disk Imager
- Remove the SD card reader from your host.