3. Customizing the HLS AFU
To integrate an HLS component into an AFU, the AFU must provide the interfaces that your HLS component needs. You might need to update your host code as well.
At a high-level, to create an AFU from an HLS component, you must generate RTL for your component with the i++ command and then create a new UUID for the new AFU.
For details about how to create a UUID, see the Accelerator Functional Unit (AFU) Developer's Guide.
The steps that follow provide an example of how to replace the HLS component in the design example by replacing the fpVectorReduce_float component with the fpVectorReduce_ac_int component.
To replace the HLS component in the design example:
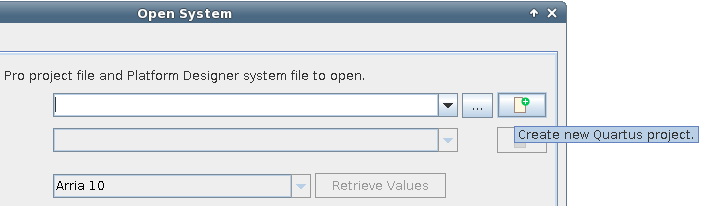
- To edit hls_afu_container.qsys, create an Intel® Quartus® Prime project by clicking Create New Quartus Project.
Figure 5. New Quartus Project
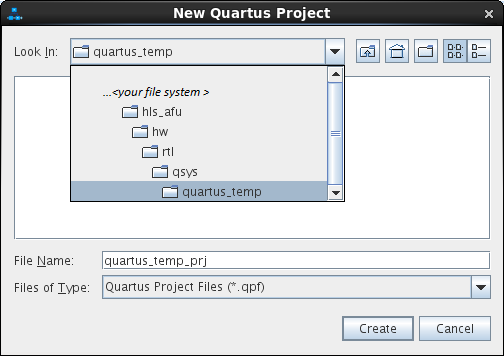
- Create a quartus_temp_prj project in the quartus_temp folder.
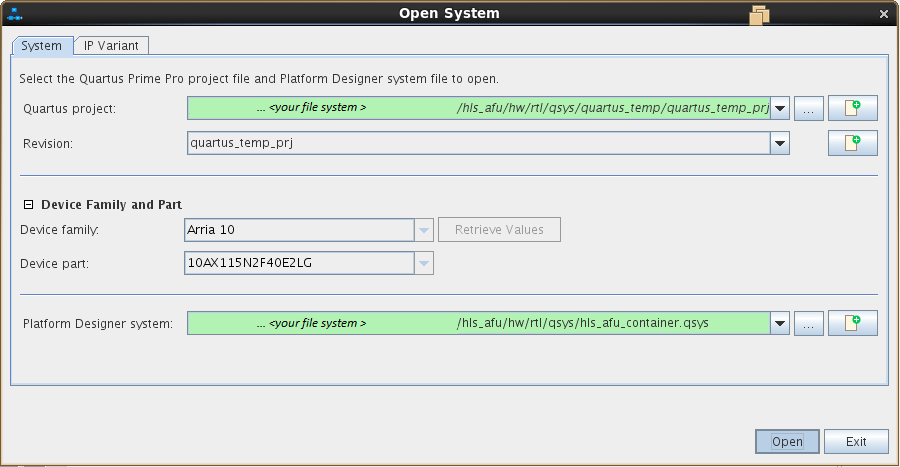
- Click Open on the Open System window.
Figure 6. Open System
- Optional: If you have a custom HLS component that has a new UUID for your component, enter the UUID it in the afu_id_avmm_slave component parameters.
Enter the UUID as follows:
- In the AFU_ID_H field, enter the upper 64 bits of the UUID.
- In the AFU_ID_L field, enter the lower 64 bits of the UUID.
Figure 7. UUID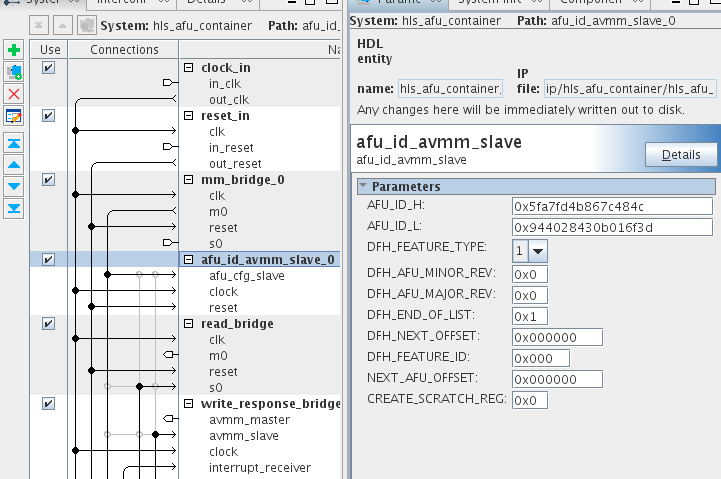
- Remove the fpVectorReduce_float component by right-clicking it and clicking Remove.
Figure 8. Remove Component

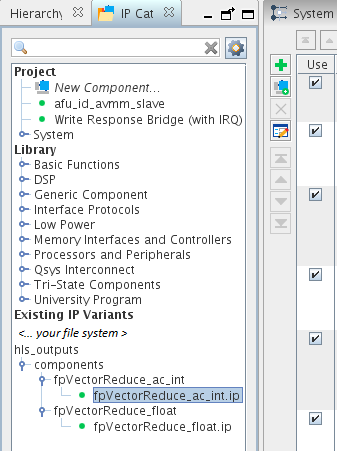
- Search for the fpVectorReduce_ac_int component in IP Catalog. Double-click the component to add it to the system.
Figure 9. Add Component
- In the Component Instantiation window, convert the absolute path for the IP file information to a relative path.
To convert the path to a relative path, edit the location of the IP file information to delete all the text preceding the hls folder (including the leading "/" character) and replace it with ".." (two periods).
Having a relative path here gives the .qsys file a relative path to your .ip file, so you can move your AFU project safely to a different file system.
Figure 10. Absolute Path Before Deleting Text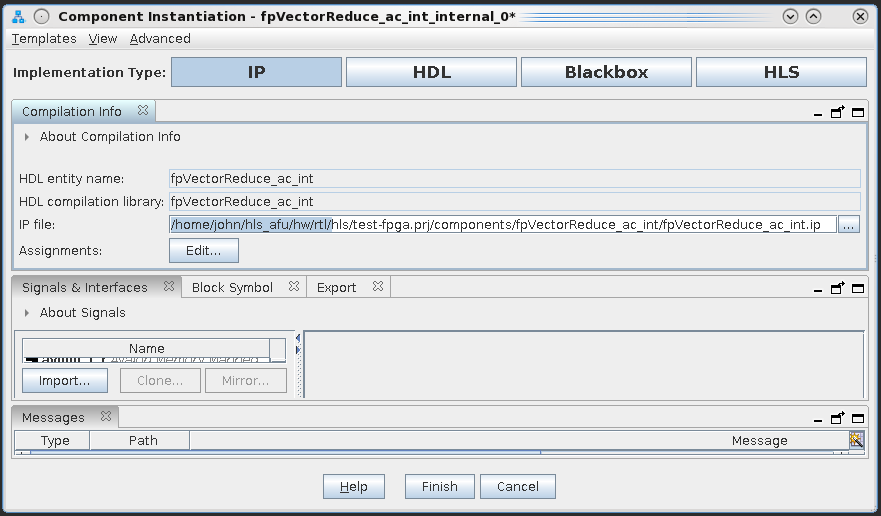 Figure 11. Relative Path After Deleting Text
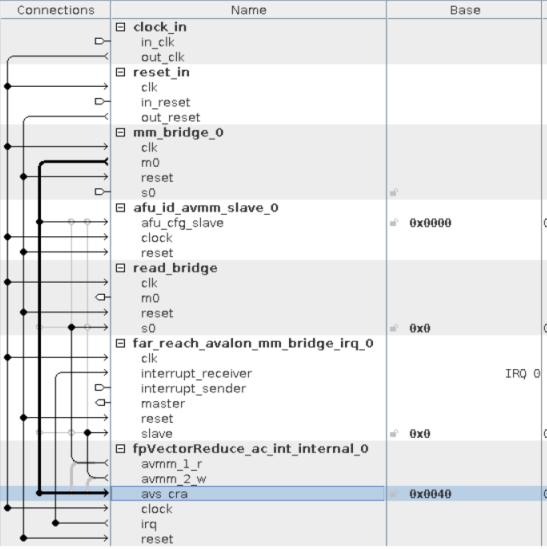
- Connect the new HLS component. In this case, the new component is the fpVectorReduce_ac_int component.
Make sure that you set the base address of your component Avalon-MM slave to 0x0040, so that the HLS component and AFU ID slave can share the same memory space, and the host application can access both.Figure 12. Set Base Address
After you have customized the HLS AFU: