2.1. Synthesizing the Design Example
Follow these steps to create a MIPI DSI-2 TX design for synthesis:
- Create a new project in Quartus® Prime Pro Edition software and specify a device for your design (Refer to Device Family Support for the supported devices).
- In the IP Catalog, select Library > Interface Protocols > Audio & Video > MIPI DSI-2 IP.
Figure 4. MIPI DSI-2 IP in the IP Catalog
- Set up the parameters for the MIPI DSI-2 IP as required for your design:
- Configure the parameters on the Video Timing tab according to your design. Refer Video Timing Tab for more information.
- In the Design Example tab, select the MIPI DSI-2 TX Synthesis.
Figure 5. MIPI DSI-2 Design Example Tab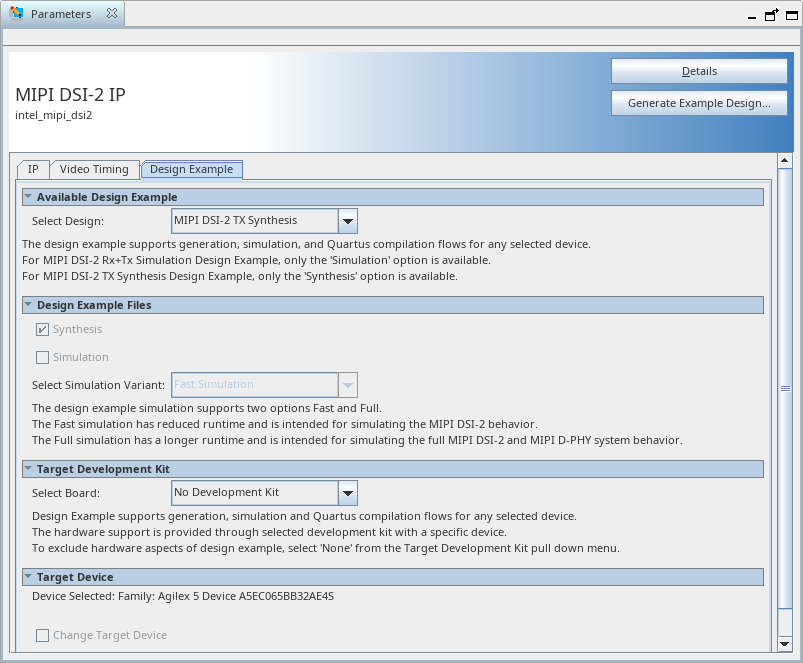
- Click the Generate Design Example to generate the design.
- Open the generated example design project in Quartus® Prime Pro Edition.
- Configure the I/O as appropriate for your development board. You may need to open the Platform Designer system and ensure that the MIPI D-PHY IP configuration matches your hardware – particularly the byte location for the enabled MIPI link.
- Add a video source and connect to the AXI4-Stream video input to the MIPI DSI-2 IP.
- Compile the project and test.
Note: No host processor is required to initialize or control the MIPI interface. Without a controller, the interface operates from power-up in the pre-configured mode.
The reset on the MIPI DSI-2 IP should always be asserted for at least 256 cycles of the clk clock input to the MIPI DSI-2 before starting operation.
Related Information