3.1. Design Migration
There are two methods for migrating a design between a standard Intel® Stratix® 10 FPGA and an Intel® Stratix® 10 I/O Limited (IOL) FPGA.
Design Migration Method 1: Change the Device OPN
- In the Intel® Quartus® Prime software, click and select your targeted device.
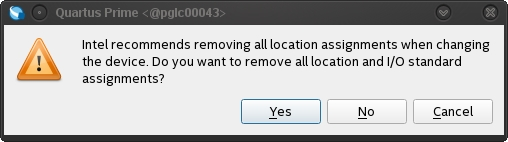
- You have the flexibility to change location and pin assignments, if desired. Click Yes when prompted, to have the Intel® Quartus® Prime software remove location and I/O assignments, or click No to keep your existing assignments.
Figure 2. Dialog Box to Remove Location and I/O Assignments
Design Migration Method 2: Use the Migration User Interface
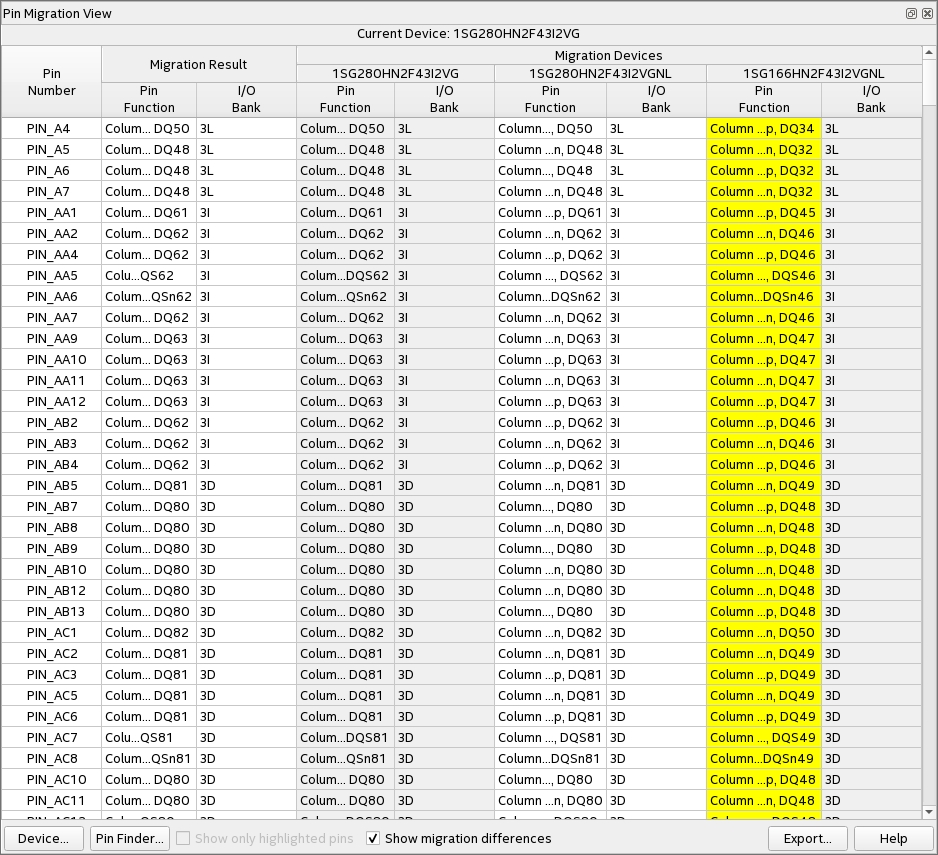
The Migration User Interface helps in checking device compatibility and provides a comparison table—accessible from the Pin Migration View in the Pin Planner—showing migration results between the devices chosen for migration.
- In the Intel® Quartus® Prime software, click .
- Click the Migration Devices button at the bottom-right of the Device window.
Figure 3. Example of the Device Dialog Box
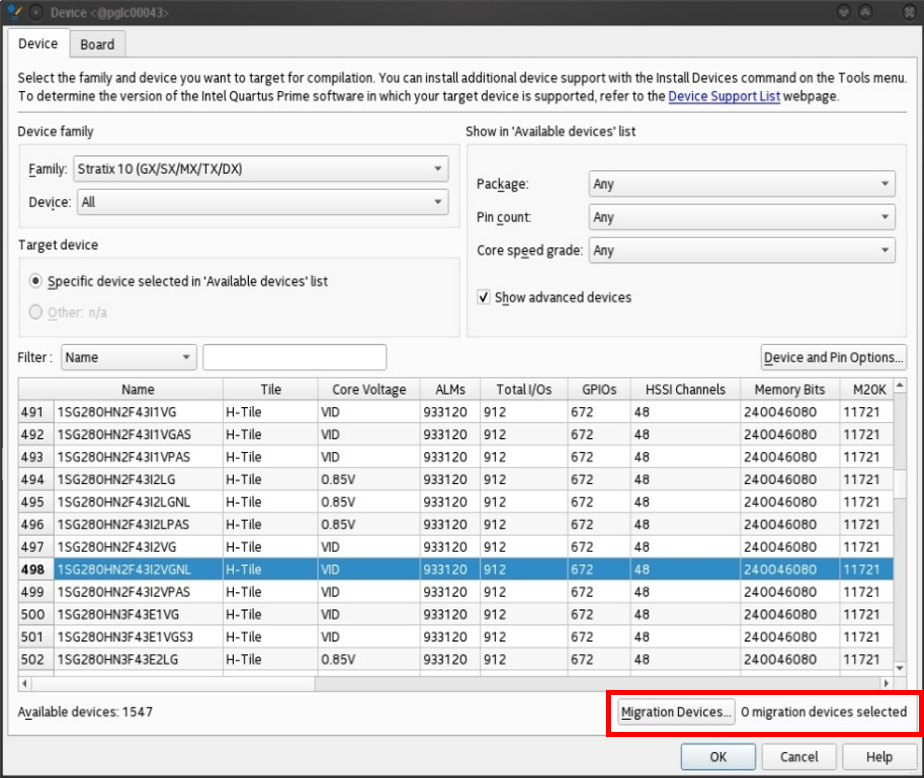
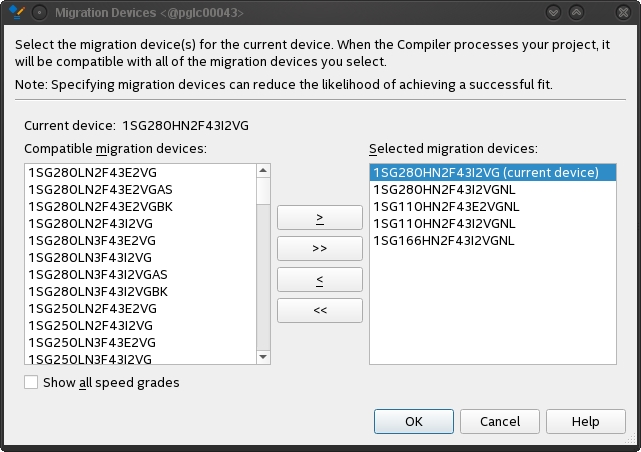
- In the Migration Devices dialog box, choose the compatible migration device that you want to target.
Figure 4. Example of the Migration Devices Dialog Box
- The Pin Migration View is available in the Pin Planner, and facilitates comparison between migration devices; it provides the following information:
- Pin number
- Migration devices
- Pin finder
- Migration result
- Show only highlighted pins
- Show migration differences
- Export
- Show column
Figure 5. Example of the Pin Migration View