ModelSim* - Intel® FPGA Edition Simulation Quick-Start: Intel® Quartus® Prime Standard Edition
1.2. Specify EDA Tool Settings
Specify EDA tool settings to generate simulation files for supported simulators.
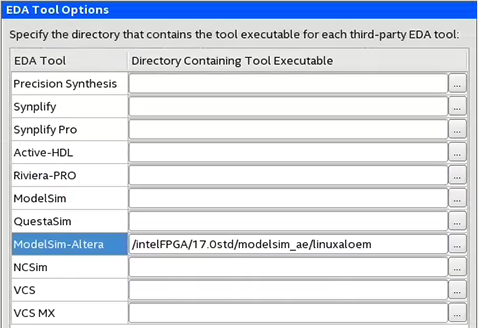
- To specify the location of your simulator for integration with the Intel® Quartus® Prime software, click .
Figure 1. EDA Tool Options
- On the Simulation page, specify the following values for the options:
Option Value Tool name ModelSim-Altera Run gate-level simulation automatically after compilation Disable checkbox Format for output netlist Verilog HDL Map illegal VHDL characters Disable checkbox Enable glitch filtering Disable checkbox Generate Value Change Dump (VCD) file script Disable checkbox Figure 2. Simulation Options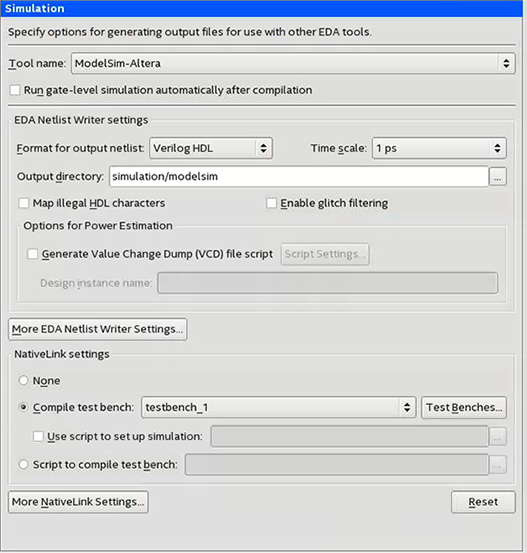
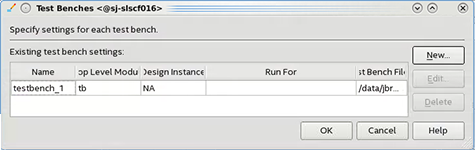
- Under Test bench and simulation files, enter or select the testbench_1.v file, click Add, and then click OK. The Test Benches dialog box displays the properties of the testbenches in your project.
Figure 3. Test Benches Dialog Box