Quartus® Prime Pro Edition User Guide: Design Compilation
1.2.2.2. Object Set Console
The Object Set Console is split into a top pane and a bottom pane, which are explained in the following sections:
Top Pane of the Object Set Console Window
The top pane displays the design's currently selected, highlighted, or colored nodes.
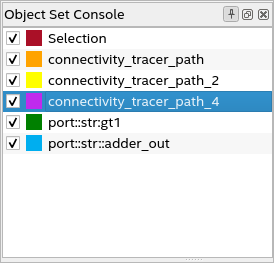
Consider an example where you traced fan-in or fan-out connectivity of your design. When you view a specific traced path, it gets highlighted in the schematic viewer. When you click Show Path for one or more traced paths, the top pane lists all paths in different color codes, as shown in the following image:
Use the context-sensitive menu to change node color, rename the traced path identifier, toggle a node's visibility, hide one or more traced paths. or delete a node from the list, as shown in the following image:
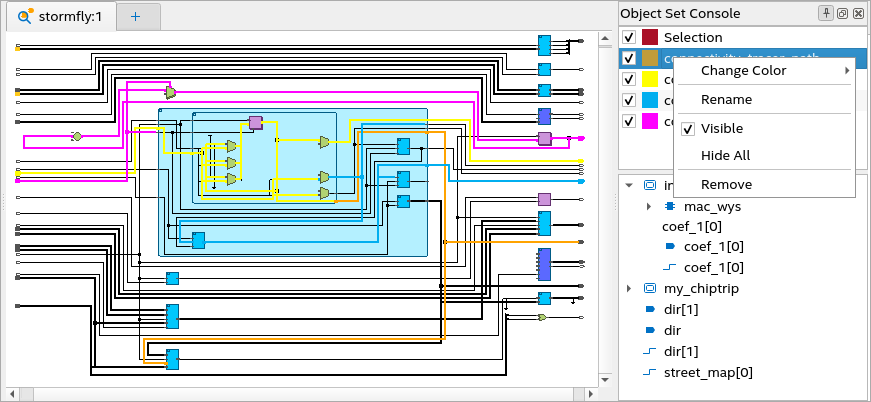
To change the node color, use the Change Color option. Alternatively, you can directly use the Highlight option in the bottom pane to select a color and highlight the traced path in the desired color.

Bottom Pane of the Object Set Console Window
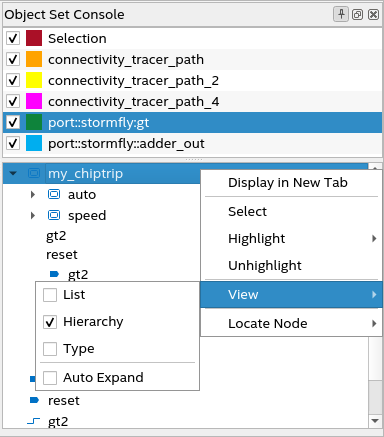
When you select one of the nodes in the top pane, the bottom pane displays a tree or list view of all netlist objects (ports, instances, instance ports, and nets) that are part of that node. Using the context-sensitive menu, you can select and view the desired node in a new tab within the schematic viewer and highlight/unhighlight the path with a different color.
- List lists out all the netlist objects.
- Hierarchy arranges the netlist objects in the traced path hierarchically. This is the default view.
- Type categorizes and lists netlist objects by type (for example, Ports and Nets).
Bottom Pane
The bottom pane lists all netlist objects, such as ports, instances, instance ports, and nets, currently selected in the schematic viewer. Using the context-sensitive menu, you can view the object in a new tab or locate the node in the design file.