5.7.1.2.2. Software Design Flow
This section provides the software design flow to generate and build the Nios® V processor software project. To ensure a streamline build flow, you are encouraged to create similar directory tree in your design project. The following software design flow is based on this directory tree.
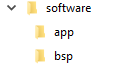
- In your design project folder, create a folder named software.
- In the software folder, create two folders named app and bsp.
Creating the BSP Project Application
You must edit the BSP editor settings according to the selected Nios® V processor boot options.
To launch the BSP Editor, perform the following steps:
- In the Platform Designer window, select File > New BSP. The Create New BSP windows appears.
- For BSP setting file, navigate to the software/bsp folder and name the BSP as settings.bsp.
BSP path: <project directory>/software/bsp/settings.bsp
- For System file (qsys or sopcinfo), select the Nios® V processor Platform Designer system (.qsys) file.
Note: For Quartus® Prime Standard Edition software, generate the BSP file using SOPCINFO file. Refer to AN 980: Nios V Processor Intel Quartus Prime Software Support for more information.
- For Quartus project, select the Quartus Project File.
- For Revision, select the correct revision.
- For CPU name, select the Nios® V processor.
- Select the Operating system as Altera HAL.
- Click Create to create the BSP file.
Configuring BSP Editor and Generating the BSP Project
- Go to Main > Settings > Advanced > hal.linker.
- Leave all settings unchecked.
Figure 134. hal.linker Settings
- Click the BSP Linker Script tab in the BSP Editor.
- Set all the Linker Section Name list to the OCRAM or external RAM.
Figure 135. Linker Region Settings
- Click Generate BSP. Make sure the BSP generation is successful.
- Close the BSP Editor.
Generating the Application Project File
- Navigate to the software/app folder and create your Nios® V application source code.
- Launch the Nios V Command Shell.
- Execute the command below to generate the application CMakeLists.txt.
niosv-app --app-dir=software/app --bsp-dir=software/bsp \
--srcs=software/app/<Nios V application source code>
Building the Application Project
You can choose to build the application project using the RiscFree* IDE for Altera FPGAs or through the command line interface (CLI).
With the CLI, you can build the user project using the following commands:
cmake -G "Unix Makefiles" -DCMAKE_BUILD_TYPE=Debug \
-B software/app/debug -S software/app
make -C software/app/debug
The application (.elf) file is created in software/app/debug folder.
Generating HEX File
You must generate a .hex file from your application .elf file, so you can create a .jic file suitable for programming flash devices.
- Launch the Nios V Command Shell.
- For Nios® V processor application copied from QSPI flash using boot copier, use the following command line to generate the .hex file for your application.
- Refer to the table Bootloader via GSFI for Nios® V Processor Core in the topic Bootloader via GSFI for the suitable bootloader via GSFI that you can use in the elf2flash command.
elf2flash
  --boot <Intel Quartus Prime installation directory>/
      niosv/components/bootloader/<Bootloader via GSFI>
  --input software/app/debug/<Nios V application>.elf \
  --output flash.srec --reset <reset offset + base address of GSFI AVL MEM> \
  --base <base address of GSFI AVL MEM> \
  --end <end address of GSFI AVL MEM>
riscv32-unknown-elf-objcopy --input-target srec --output-target ihex \
  flash.srec <Nios V application>.hex