How To Enable Extended Desktop Mode
Content Type: Install & Setup | Article ID: 000005599 | Last Reviewed: 02/05/2025
With extended desktop mode, you can get a larger Windows* desktop area spanning multiple displays. You can move applications from one display to the other.
All Intel® graphics products support extended desktop mode across two displays. More displays may be supported, to check if your system supports extended desktop across more than two displays, see What is the Maximum Number of Displays that My Intel® Graphics Can Support?
Method 1: Enable extended desktop mode using Windows Display Settings
Method 2: Enable extended desktop mode in the Intel Graphics Command Center:
Before continuing: Confirm that the Intel Graphics Command Center is installed. See How to Install the Intel® Graphics Command Center for installation instructions:
 on the primary display (in the Connected Displays window).
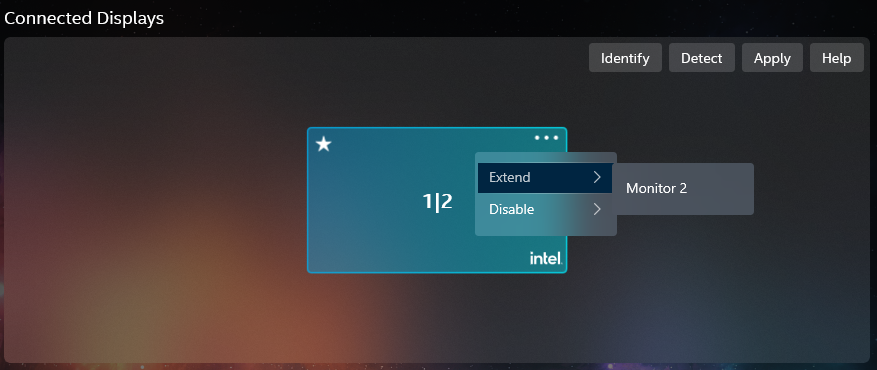
After completing the previous steps:
The primary display is signified with star. 
Click Apply to save changes.
| Note | For troubleshooting information regarding various displays, see Troubleshooting Issues With Multiple Displays. |