F-Tile Avalon® Streaming IP for PCI Express* Design Example User Guide
ID
683372
Date
10/20/2025
Public
3.6. Program the FPGA
Prerequisite: Generate and compile the example design in the Quartus® Prime Pro Edition software before starting to test the design example on hardware.
This section describes how to configure the Agilex™ 7 F-Series F-Tile FPGA Development Kit.
- Install the Agilex™ 7 F-Series F-Tile FPGA Development Kit into a PCIe Gen4 x16 slot on the host system, connect the ATX 6-pins power supply.
- Connect the Agilex™ 7 F-Series F-Tile FPGA Development Kit to a computer system on which the Quartus® Prime Pro Edition software is installed using the USB cable shipped along with the development kit for FPGA configuration.
- Power on the host system and turn on the power switch on the development kit.
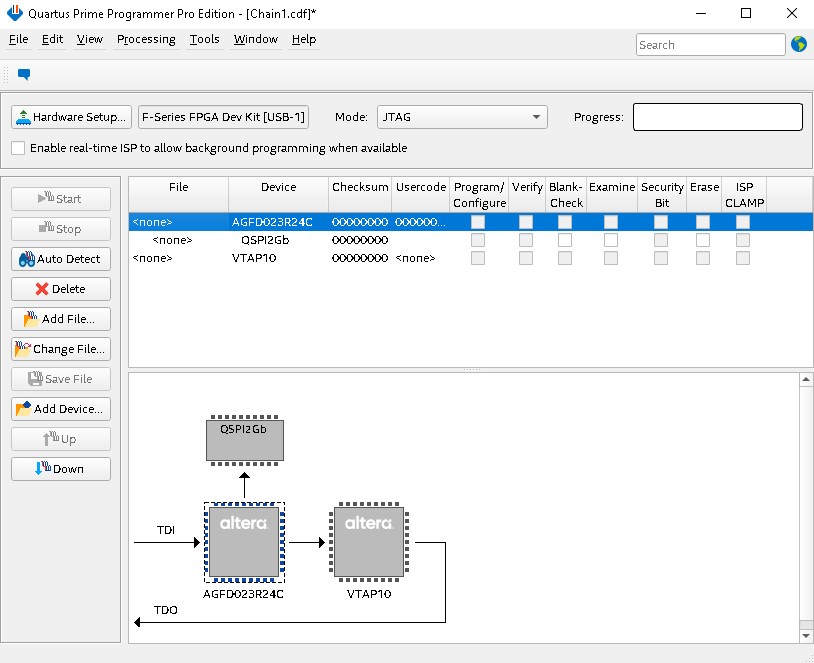
- In the Quartus® Prime Pro Edition software, invoke the programmer by clicking Tools > Programmer.
- In the Programmer, click Hardware Setup and verify the Agilex™ 7 F-Series F-Tile FPGA Development Kit is detected in the Hardware Settings tab.
Figure 26. Hardware Settings
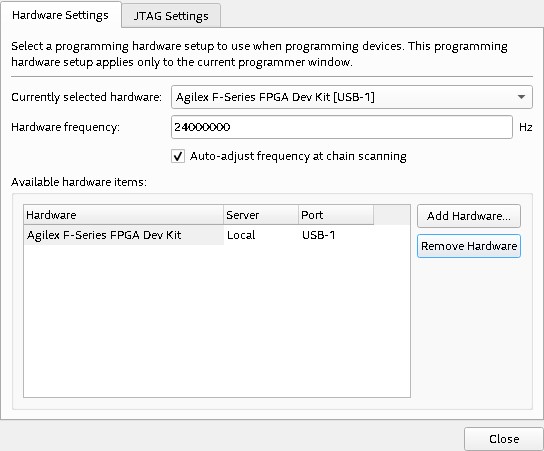
- For Currently selected hardware, select the Agilex™ 7 F-Series F-Tile FPGA Development Kit and then click Close.
- Click Auto Detect to detect the JTAG device chain.
- Select the target FPGA device in the JTAG chain, click Change File, and select the FPGA configuration file, pcie_ed.sof. Then, click Open.
- Check the Program/Configure option, and click Start to start the FPGA configuration.
- Perform a warm reboot for the host system once the Agilex™ 7 FPGA is successfully configured.
- Check the enumeration of the PCIe Endpoint device ( Agilex™ 7 F-Series F-Tile FPGA Development Kit) on the host system by running the “lspci –d 1172:” command in a Linux Terminal.
Expected result:
BDF Unassigned class [ff00]: Altera Corporation Device 0000 (rev 01)