Get Updates
The combined Intel installer makes it easy to get updates for Intel software products, including Intel® VTune™ Profiler.
Windows
To update VTune Profiler on Windows:
- On your Windows system, open Settings > Apps.
- Locate VTune Profiler in the list of applications and click Modify.
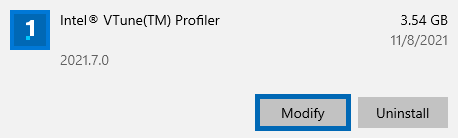
The Intel product installer launches.
The installer automatically checks for updates for all installed Intel software products. If an update is available, an Update Available button displays.
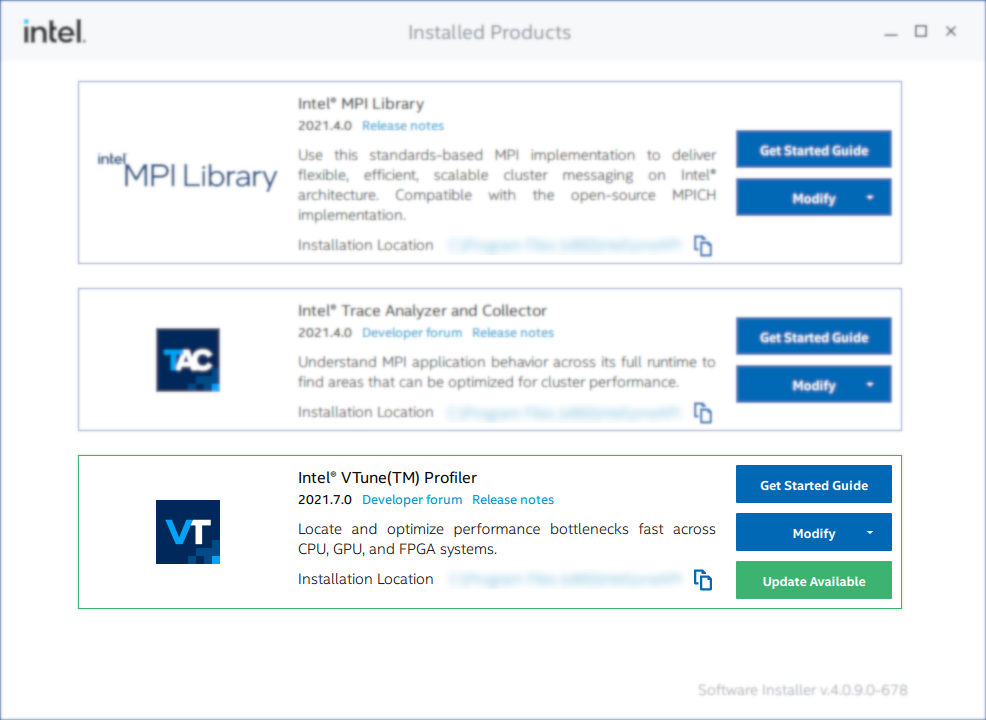
- Click the Update Available button and review the new product version.
- Click Install to install the update.
The installer downloads all necessary files and installs the update.
Linux
Using Package Managers
If you installed VTune Profiler using package managers, regular system-wide package updates should keep VTune Profiler updated to the latest version without additional action. If you wish to update VTune Profiler separately, use these commands:
APT:
sudo apt install intel-oneapi-vtuneYUM:
yum upgrade intel-oneapi-vtuneDNF:
dnf upgrade intel-oneapi-vtuneZypper:
zypper up intel-oneapi-vtuneUsing the Installer
To update VTune Profiler using the installer, you can reuse the installer left from a previous version or download the installer from the Download page.
Once the installer application is acquired, follow these steps to update:
- Open a terminal window and navigate to the directory where the installer is located.
- If necessary, allow the execution of the installer with this command:
chmod +x <installer-package-name>.sh
- Run the installer executable as superuser (recommended):
sudo ./<installer-package-name>.sh
The installer window appears.
The installer automatically checks for updates for all installed Intel software products. If an update is available, an Update Available button displays.
- Click the Update Available button and review the new product version.
- Click Install to install the update.
The installer downloads all necessary files and installs the update.