Low Latency E-Tile 40G Ethernet Intel® FPGA IP Design Example User Guide
ID
683747
Date
7/12/2024
Public
1.1. Generating the Design Example
1.2. Directory Structure
1.3. Simulating the Design Example Testbench
1.4. Compiling and Configuring the Design Example in Hardware
1.5. Changing Target Device in Hardware Design Example
1.6. Testing the Low Latency E-Tile 40G Ethernet Intel® FPGA IP Design in Hardware
1.5. Changing Target Device in Hardware Design Example
If you have selected Stratix 10 TX E-Tile Transceiver Signal Integrity Development Kit as your target device, the Low Latency E-Tile 40G Ethernet Intel® FPGA IP core generates a hardware example design for target device 1ST280EY2F55E2VG .
If you have selected Intel Agilex 7 F-series Transceiver-SoC Development Kit as your target device, the Low Latency E-Tile 40G Ethernet Intel® FPGA IP core generates a hardware example design for target device AGFB014R24A2E2VR0 .
The specified target device may differ from the device on your development kit.
To change the target device in your hardware design example, follow these steps:
- Launch the Quartus® Prime Pro Edition software and open the hardware test project file /hardware_test_design/eth_ex_40g.qpf.
- On the Assignments menu, click Device. The Device dialog box appears.
- In the Device dialog box, select an E-tile based target device table that matches the device part number on your development kit. Refer to the development kit link on the Intel® website for more information.
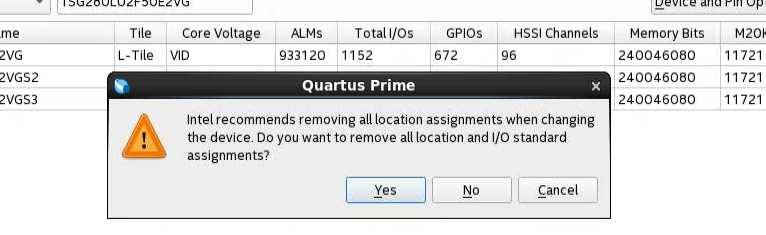
- A prompt appears when you select a device, as shown in the figure below. Select No to preserve the generated pin assignments and I/O assignments.
Figure 5. Quartus® Prime Prompt for Device Selection
- Perform full compilation of your design.
You can now test the design on your hardware.