Using the NicheStack TCP/IP Stack - Nios II Edition Tutorial
1.5.2. Configuring the BSP
After you create a new BSP, you might want to customize its configuration (for example, defining stdin, stdout, stderr, and other parameters).
For this tutorial, you must configure the MicroC/OS-II RTOS kernel and NicheStack TCP/IP Stack software components. To do so, follow these steps:
- In the Project Explorer view, right-click the niosII_simple_socket_server_bsp project, point to Nios II, and click BSP Editor. The Nios II BSP Editor appears.
- On the Main tab expand Settings in the left pane, and click Common. Verify that the settings for the stdout, stdin, and stderr parameters are jtag_uart, as shown in the "BSP Editor Main Tab" figure.
Figure 3. BSP Editor Main Tab

- On the Main tab expand Advanced in the left pane, and click ucosii. Settings for the MicroC/OS-II RTOS appear, as shown in the "MicroC/OS-II RTOS Options" figure.
Figure 4. MicroC/OS-II RTOS Options
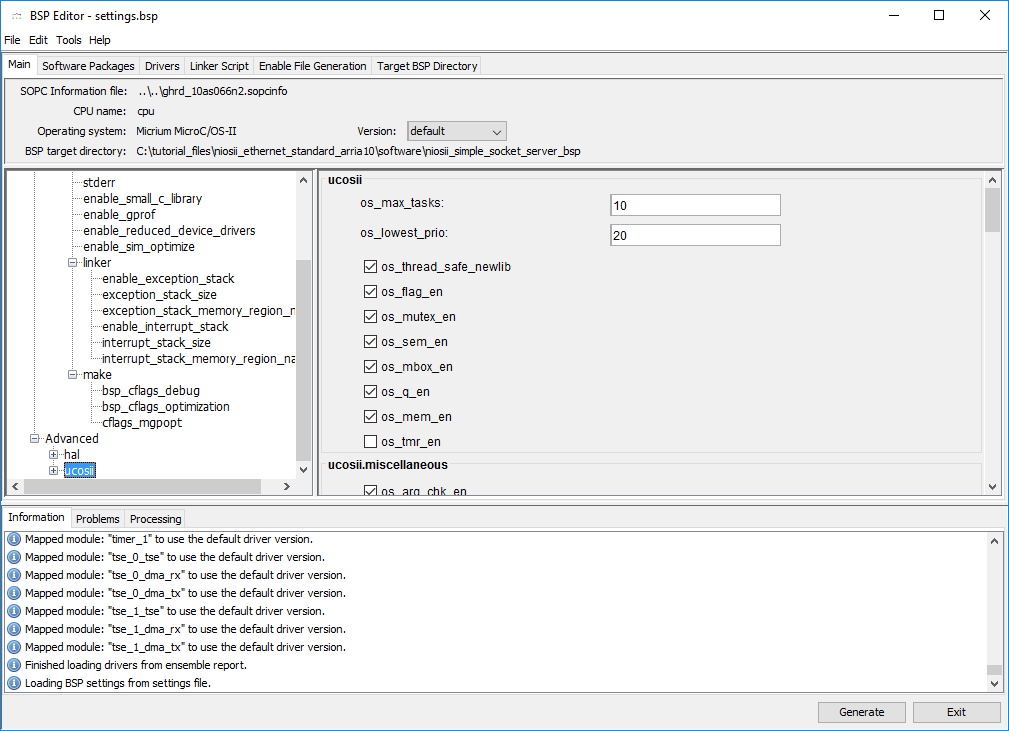
The MicroC/OS-II kernel is highly configurable. The options that you set in this dialog box determine which MicroC/OS-II options are included in the binary image. Examine the configurable options by clicking each of the options categories under ucosii in the left pane. For this tutorial, do not change any of the settings.
Although this example software design does not use all the MicroC/OS-II system calls, the NicheStack TCP/IP Stack internally uses many more MicroC/OS-II system calls, more than the Nios II Simple Socket Server application itself uses. Do not disable any system calls unless you need to be very conservative with your code size requirements. You must re-enable system calls that you try to disable if the link stage of the build fails with unresolved symbols.
For more information about the various MicroC/OS-II features, refer to the MicroC/OS-II Real-Time Operating System chapter in the Nios II Software Developer's Handbook.
- On the Software Packages tab, turn on Enable for the altera_iniche software package, as shown in the "NicheStack TCP/IP Stack Options" figure.
Figure 5. NicheStack TCP/IP Stack Options

- If a DHCP server is available on your network, turn on enable_dhcp_client. If no DHCP server is available, turn off enable_dhcp_client and specify your IP addresses, gateway, and network mask in <tutorial_files> \nichestack_tutorial\niosII_simple_socket_server.h.
Take care when choosing your default IP and gateway addresses. Some secure router configurations block DHCP request packets on local subnetworks such as the 192.168.X.X subnetwork. If you do encounter problems, try using 0.0.0.0 as your default IP and gateway addresses.
- Click Generate. When prompted to save your changes, click Yes, Save.
- Click Exit on the File menu to close the BSP Editor and return to the Nios II SBT for Eclipse.
- In BSP project, you must add -DTSE_MY_SYSTEM to your defined symbols. Right-click the niosII_simple_socket_server_bsp project and click Properties. The Nios II BSP Properties page appears. On the left pane, click Nios II BSP Properties. In the Defined symbols box, type -DTSE_MY_SYSTEM.
- Click Apply and OK.