Configure Your System
Intel® oneAPI HPC Toolkit
The Intel® oneAPI Base Toolkit (Base Kit) is required if you want to run the samples in the Intel® oneAPI HPC Toolkit. If you have not installed the Base Kit please return to the Installation Guide and install the Toolkit.
Before accessing the tools, you must source the setvars.sh script. If you have installed the Intel® oneAPI HPC Toolkit and sourced this script, you may proceed to Run a Sample Project Using the Command Line.
To set up your system, you need to:
- Install CMake* and pkg-config to build many of the samples
- Set environment variables for CPU/GPU or FPGA
- Disable hangcheck for applications with long running GPU compute workloads
- For GPU users, install GPU drivers
- For GPU users, add a user to the video group
- For Eclipse* users, install a recent release of the Eclipse IDE for C/C++ Developers, then install the oneAPI Eclipse plugins.
Install CMake*, pkg-config, and GNU* Dev Tools to Build Samples
Although the CMake and pkg-config build tools are not required by the oneAPI tools and toolkits, many oneAPI samples are provided as CMake projects and require CMake to build them. In some cases pkg-config is necessary to locate libraries needed to complete a build of the application.
The Intel compilers utilize the existing GNU build toolchains to provide a complete C/C++ development environment. If your distribution of Linux does not include the complete suite of GNU development tools, you need to install these tools.
To install CMake, pkg-config, and the GNU development tools on your Linux system, open a terminal session and enter the following commands:
Ubuntu*
sudo apt update
sudo apt -y install cmake pkg-config build-essential
Red Hat* and Fedora*
sudo yum update
sudo yum -y install cmake pkgconfig
sudo yum groupinstall "Development Tools"
SUSE*
sudo zypper update
sudo zypper --non-interactive install cmake pkg-config
sudo zypper --non-interactive install pattern devel_C_C++
Verify the installation by displaying the installation location with this command:
which cmake pkg-config make gcc g++One or more of these locations will display:
/usr/bin/cmake
/usr/bin/pkg-config
/usr/bin/make
/usr/bin/gcc
/usr/bin/g++
For more information about CMake, refer to CMake.org. If you are unable to install CMake using your Linux distribution's standard package manager, see the CMake.org downloads page for additional installation options.
Set Environment Variables for CLI Development
For working at a Command Line Interface (CLI), the tools in the oneAPI toolkits are configured via environment variables. Set up your CLI environment by sourcing the setvars script:
Option 1: Source setvars.sh once per session
Source setvars.sh every time you open a new terminal window:
You can find the setvars.sh script in the root folder of your oneAPI installation, which is typically /opt/intel/oneapi/ for system wide installation and ~/intel/oneapi/ when installed as a private installation. Note that system wide installation requires root or sudo privileges.
For system wide installations:
. /opt/intel/oneapi/setvars.shFor private installations:
. ~/intel/oneapi/setvars.shOption 2: One time setup for setvars.sh
Environment variables can be set up to automatically set using one of the methods below:
- Use a startup script, as described on this page
- Use modulefiles
- Use a setvars.sh configuration file
To have the environment automatically set up for your projects, include the command source <install_dir>/setvars.sh in a startup script where it will be invoked automatically (replace <install_dir> with the path to your oneAPI install location). The default installation locations are /opt/intel/oneapi/ for system wide installations and ~/intel/oneapi/ for private installations.
For example, you can add the source <install_dir>/setvars.sh command to your ~/.bashrc or ~/.bashrc_profile or ~/.profile file. To make the settings permanent for all accounts on your system, create a one-line .sh script in your system's /etc/profile.d folder that sources setvars.sh (for more details, see Ubuntu documentation on Environment Variables).
The setvars.sh script can be managed using a configuration file, which is especially helpful if you need to initialize specific versions of libraries or the compiler, rather than defaulting to the "latest" version. For more details, see Using a Configuration File to Manage Setvars.sh.. If you need to setup the environment in a non-POSIX shell, seeoneAPI Development Environment Setup for more configuration options.
For GPU Users, Install GPU Drivers
If you followed the instructions in the Installation Guide to install GPU Drivers, you may skip this step. If you have not installed the drivers, follow the directions in the Installation Guide.
GPU: Disable Hangcheck
This section applies only to applications with long-running GPU compute workloads in native environments. It is not recommended for virtualizations or other standard usages of GPU, such as gaming.
A workload that takes more than four seconds for GPU hardware to execute is a long running workload. By default, individual threads that qualify as long-running workloads are considered hung and are terminated. By disabling the hangcheck timeout period, you can avoid this problem.
- Open a terminal.
- Open the grub file in /etc/default.
- In the grub file, find the line GRUB_CMDLINE_LINUX_DEFAULT="" .
- Enter this text between the quotes (""):
i915.enable_hangcheck=0
- Run this command:
sudo update-grub
- Reboot the system. Hangcheck remains disabled.
GPU: Add User to Video Group
For GPU compute workloads, non-root (normal) users do not typically have access to the GPU device.
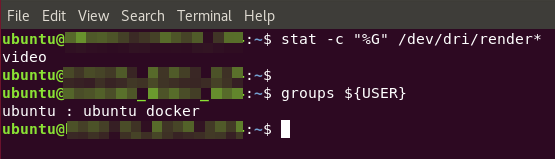
- To give a user access, first determine which group name is assigned ownership of the render nodes:
stat -c "%G" /dev/dri/render* groups
In this example, the video group is assigned ownership of the render nodes:

- Determine if the current user is a member of that render node group:
groups ${USER}In this example the current user is not included in the video group.
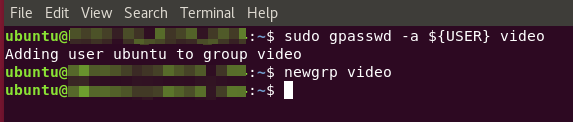
- Add the user to the group using gpasswd:
sudo gpasswd -a ${USER} video - Activate the video group:
newgrp video