Introduction
Intel® oneAPI AI Analytics Toolkit (AI Kit) gives data scientists, AI developers, and researchers familiar Python* tools and frameworks to accelerate end-to-end data science and analytics pipelines on Intel® architectures.
This article covers how to use quantization method to accelerate AI inference by Intel® AI Analytics Toolkit container on Alibaba Cloud. In same time, it shows the inference of quantized AI model to be accelerated more by Intel® Deep Learning Boost in Intel® Xeon® 2nd Generation Scalable Processor and later.
There is an end-to-end pipeline demo to show how to deploy Intel® AI Analytics Toolkit container on Alibaba Cloud; how to train and quantize an AI model by Intel® Optimization for Tensorflow* in Intel® AI Analytics Toolkit; the final acceleration result based on Intel® Deep Learning Boost in Alibaba Cloud.
There are involved 3 software components and 1 hardware technology to accelerate the AI inference:
| Type | Name | Feature | Provider |
|---|---|---|---|
| Software | Intel® Distribution for Python* | Get faster Python application performance right out of the box, with minimal or no changes to your code. | Intel® AI Analytics Toolkit |
| Software | Intel® Optimization for TensorFlow* | Integrates primitives from oneDNN into the TensorFlow runtime for accelerated performance. | Intel® AI Analytics Toolkit |
| Software | Intel® Neural Compressor | Provide a unified, low-precision inference interface across multiple deep learning frameworks optimized by Intel with this open-source Python library. | Intel® AI Analytics Toolkit |
| Hardware | Intel® Deep Learning Boost | Built-in acceleration for training and inference workloads. Including Vector Neural Network Instructions (VNNI). | CPU: Intel® Xeon® 2nd Generation Scalable Processor and later |
Getting Started with Alibaba Cloud
This article assumes you are familiar with Alibaba Cloud environment. To learn more about working with Alibaba Cloud, please refer to Elastic Compute Service (ECS).
Specifically, this article assumes:
- You have an Alibaba Cloud account.
- You are familiar with creating instances within the Alibaba Cloud environment.
- To learn more about launching an instance see Create and manage an ECS instance by using the ECS console (express version).
- Developers are familiar with Python, AI model training and inference based on Tensorflow*.
Setting Up an Ubuntu* Instance
Creating an Instance
- Log in to your Alibaba Cloud account.
- Navigate to the Elastic Compute Service dashboard.
- Click the Create ECS Instance button.

Basic Configurations
- Step 1 – Choose Billing Method: Select the billing type to launch as instance. Suggested: Pay-As-You-Go.
Note When you want to stop billing, please release the instance totally.
- Step 2 – Choose an Instance Type: Use the ecs.c6e.2xlarge instant type: 8 vCPUs, 16 GiB, Intel Xeon (Cascade Lake) Platinum 8269CY.
Note For using Intel® Deep Learning Boost, please choose Intel® Cascade Lake or later Xeon CPU.
- Step 3 – Choose Image: Choose Ubuntu 20.04 64-bit.
- Step 4 – Choose Storage: Set the instance storage to a minimum of 40GB.
Click Next
Networking
- Step 1 – Choose Bandwidth Billing: Recommend to Pay-By-Traffic.
- Step 2 – Choose Peak Bandwidth: Recommend maxing value 100M if Bandwidth Billing is Pay-By-Traffic.
- Step 3 – Choose Security Group: Enable Port 80, Port 22.
Note Port 80 is used to access Jupyter Notebook in demo, and Port 22 is used to access the instance by SSH.
Click Next
System Configuration
- Step 1 – Set Logon Credentials: Choose Password.
- Step 2 – Set Login Password: Set a password.
- Step 3 – Set Confirm Password: Set the same password.
- Step 4 – Set Instance Name: Set to the name as you want.
Click Preview
Preview
Step 1 – Set Automatic Release: It’s recommended to set the automatic release time, to make sure the instance won’t take more money after work.
Click Create Instance
When the instance is created, go to the Instance Dashboard, and check the status. This process may take a few minutes before the instance is running.
Connecting to the Alibaba Cloud Instance
This instruction below assume you are working from within a Linux* or Mac OS* environment. For more information or if you are working from a Windows* environment see Connect to a Linux instance by using a password.
Prerequisites
- Install an SSH client.
Your Linux computer most likely includes an SSH client by default. You can check for an SSH client by typing ssh at the command line. If your computer doesn't recognize the command, the OpenSSH project provides a free implementation of the full suite of SSH tools. For more information, see the OpenSSH web page.
Connecting using SSH
- In Instance Dashboard, get the public IP address of the instance status.
- In a command-line shell, use the ssh command to connect to the instance. The username is root. The password is the value to be set during create instance.
ssh root@xxx.xxx.xxx.xxx
Check Intel® Deep Learning Boost
After login the instance, use lscpu command to check the CPU info in Ubuntu. The flag: avx512_vnni means the CPU support Intel® Deep Learning Boost.
$lscpu

Architecture:         x86_64
CPU op-mode(s):       32-bit, 64-bit
Byte Order:           Little Endian
CPU(s):               8
On-line CPU(s) list:  0-7
Thread(s) per core:   2
Core(s) per socket:   4
Socket(s):            1
NUMA node(s):         1
Vendor ID:            GenuineIntel
CPU family:           6
Model:                106
Model name:           Intel(R) Xeon(R) Platinum XXXX CPU @ 2.70GHz
Stepping:             6
CPU MHz:              2699.998
BogoMIPS:             5399.99
Hypervisor vendor:    KVM
Virtualization type:  full
L1d cache:            48K
L1i cache:            32K
L2 cache:             1280K
L3 cache:             49152K
NUMA node0 CPU(s):    0-3
Flags:                fpu vme de pse tsc msr pae mce cx8 apic sep mtrr pge mca cmov pat pse36 clflush mmx fxsr sse sse2 ss ht syscall nx pdpe1gb rdtscp lm constant_tsc rep_good nopl nonstop_tsc cpuid tsc_known_freq pni pclmulqdq monitor ssse3 fma cx16 pcid sse4_1 sse4_2 x2apic movbe popcnt aes xsave avx f16c rdrand hypervisor lahf_lm abm 3dnowprefetch cpuid_fault invpcid_single ibrs_enhanced fsgsbase tsc_adjust bmi1 avx2 smep bmi2 erms invpcid avx512f avx512dq rdseed adx smap avx512ifma clflushopt clwb avx512cd sha_ni avx512bw avx512vl xsaveopt xsavec xgetbv1 xsaves wbnoinvd arat avx512vbmi avx512_vbmi2 gfni vaes vpclmulqdq avx512_vnni avx512_bitalg avx512_vpopcntdq rdpid arch_capabilities
Deploy Intel® AI Analytics Toolkit Container
Intel® AI Analytics Toolkit supports to deploy by installation (online, offline) and container. The container is chosen in this article.
Install Docker in Ubuntu*
Install docker and other tools in Ubuntu*.
$apt update && apt install docker.io vim git
Check docker service status
Make sure docker service is active before going to next steps.
$service docker status
● docker.service - Docker Application Container Engine
Loaded: loaded (/lib/systemd/system/docker.service; enabled; vendor preset: enabled)
Active: active (running) since Tue 2021-12-14 17:53:32 CST; 31s ago
TriggeredBy: ● docker.socket
Docs:        https://docs.docker.com
Main PID:    2542 (dockerd)
Tasks:       11
Memory:      42.9M
CGroup:      /system.slice/docker.service
└─2542 /usr/bin/dockerd -H fd:// --containerd=/run/containerd/containerd.sock
Download Intel® AI Analytics Toolkit Container
$docker pull intel/oneapi-aikit

docker pull intel/oneapi-aikit
Using default tag: latest
latest: Pulling from intel/oneapi-aikit
284055322776: Pull complete
aa3d94bd2fc1: Pull complete
624a0a5c6308: Pull complete
38541cbaa97b: Pull complete
b1e58c228680: Pull complete
7a8c1a4d95a3: Pull complete
97fe3bf139a0: Pull complete
5178fd8f3083: Pull complete
44d06efd05ba: Pull complete
6cb1f050cdec: Pull complete
Digest: sha256:b33336bbda43d9a8b6bddee32db0b0f43e3eae0827f7f632f61f87f8922c330f
Status: Downloaded newer image for intel/oneapi-aikit:latest
docker.io/intel/oneapi-aikit:latest
Prepare Demo and Jupyter Notebook Running Time in Container
Startup Container and Jupyter notebook
In host (Alibaba Cloud Instance), startup container with share folder and port mapping:
- Mount the host folder “/root/share” to container folder “/host”.
- Map host port 80 to the container network port 8888.
mkdir -p share

docker run -v /root/share:/host -p 80:8888 -it "intel/oneapi-aikit:latest"
Download Demo Code
Use the opensource oneAPI samples demo code provided by Intel®.
In container, run following commands to download the demo code.
apt update && apt install git vim
cd /host
git clone https://github.com/oneapi-src/oneAPI-samples.git
Prepare Jupyter Notebook Running Time
In container, run following commands to create Conda* virtual environment and install Intel® Optimization for Tensorflow*, Intel® Neural Compressor and other depended libraries from oneAPI local channel.
conda init bash
source ~/.bashrc
conda env remove -n user_tensorflow
conda create --name user_tensorflow -y
conda activate user_tensorflow
conda install -c ${ONEAPI_ROOT}/conda_channel tensorflow python-flatbuffers -y
conda install -c ${ONEAPI_ROOT}/conda_channel neural-compressor -y
conda install runipy notebook -y
Run Demo in Jupyter Notebook
- Startup Jupyter notebook by running script run_jupyter.sh
cd oneAPI-samples/AI-and-Analytics/Getting-Started-Samples/INC-Sample-for-Tensorflow / (user_tensorflow) root@62d78d432e05:/host/oneAPI-samples/AI-and-Analytics/Getting-Started-Samples/INC-Sample-for-Tensorflow# ./run_jupyter.sh (user_tensorflow) root@62d78d432e05:/host/oneAPI-samples/AI-and-Analytics/Getting-Started-Samples/INC-Sample-for-Tensorflow# [I 06:53:28.569 NotebookApp] Writing notebook server cookie secret to /root/.local/share/jupyter/runtime/notebook_cookie_secret [I 06:53:28.702 NotebookApp] Serving notebooks from local directory: /host/oneAPI-samples/AI-and-Analytics/Getting-Started-Samples/INC-Sample-for-Tensorflow [I 06:53:28.702 NotebookApp] Jupyter Notebook 6.4.6 is running at: [I 06:53:28.702 NotebookApp] http://62d78d432e05:8888/?token=29fa5d5464a7be9c1de4f21afb35f400ddb5affde14709e3 [I 06:53:28.702 NotebookApp] or http://127.0.0.1:8888/?token=29fa5d5464a7be9c1de4f21afb35f400ddb5affde14709e3 [I 06:53:28.702 NotebookApp] Use Control-C to stop this server and shut down all kernels (twice to skip confirmation). [C 06:53:28.705 NotebookApp] To access the notebook, open this file in a browser: file:///root/.local/share/jupyter/runtime/nbserver-108-open.html Or copy and paste one of these URLs: http://62d78d432e05:8888/?token=29fa5d5464a7be9c1de4f21afb35f400ddb5affde14709e3 or http://127.0.0.1:8888/?token=29fa5d5464a7be9c1de4f21afb35f400ddb5affde14709e3 - Open the url http://public_ip by Chrome. The public_ip is the IP address of the Instance.
The web page needs the password or token. Input the token value in previous step output, like:
29fa5d5464a7be9c1de4f21afb35f400ddb5affde14709e3 - Click Jupyter file: inc_sample_tensorflow.jpynb to open it and startup Jupyter kernel.
Note If there is “Not Trusted” flag in kernel status, please click “Not Trusted”. Then, in pop up window, click “Trusted”
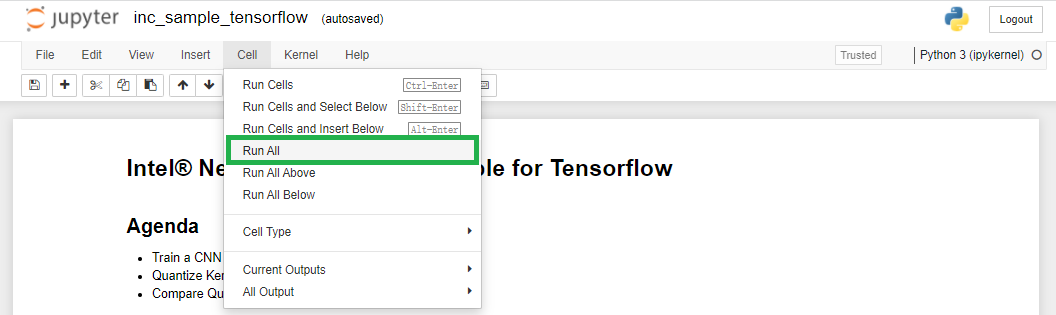
- In menu, click Cell -> Run All. Run the demo in Jupyter notebook.
It will take 10-30 minutes to run all the steps. It depended on the number of vCPU in the instance.
Demo
The demo includes 4 stages: Training, Quantization, Test Performance, Compare Performance. Please refer to the description in the Jupyter notebook file for detailed info.
Training
The demo uses AlexNet model to classify handwriting number defined in MNIST dataset. It will take a little more time to train the model. After it’s finished, the model will be frozen and saved as PB format.
Note The default number of epochs is 3. Increase epochs to get higher accuracy.
Quantization
The trained model will be quantized by Intel® Neural Compressor. This tool will apply different parameters & methods to quantize the model and find the best result. Finally, it will output the first INT8 model which match the requirement (better performance and less accuracy lost). The result will be saved as PB file: alexnet_int8_model.pb.
Test Performance
Use same test script and setting to test the performance of FP32 and INT8 models. The test results include throughput, latency & accuracy and are saved to JSON format files.
Compare Performance
There are figures to compare the performance: throughput, latency& accuracy.
Summary
According to the result, it’s easy to learn the INT8 model has obviously performance increase than FP32 model in throughput and latency. In same time, the accuracy lost is limited to small range as we expected.
It’s the result to bind the Intel software (Intel® oneAPI AI Analytics Toolkit) and hardware (Intel® Deep Learning Boost) technology.
Intel® oneAPI AI Analytics Toolkit includes more Intel® optimized framework, library, and tools: PyTorch*, Modin*, scikit-learn*, and XGBoost. They are optimized for Intel® Architecture and have good performance in related instance of Alibaba Cloud.