Article ID: 000093779 Content Type: Troubleshooting Last Reviewed: 04/11/2023

"Automatic Overclock Failed" Message with Disabled Buttons Using Intel® XTU

Environment

Intel® Extreme Tuning Utility (Intel® XTU)

Windows 11* Family, Windows® 10 family

BUILT IN - ARTICLE INTRO SECOND COMPONENT
Summary

How to fix the error message "Automatic Overclock failed. Manual Tuning is currently Active" when overclocking with Intel® Extreme Tuning Utility (Intel® XTU)

Description

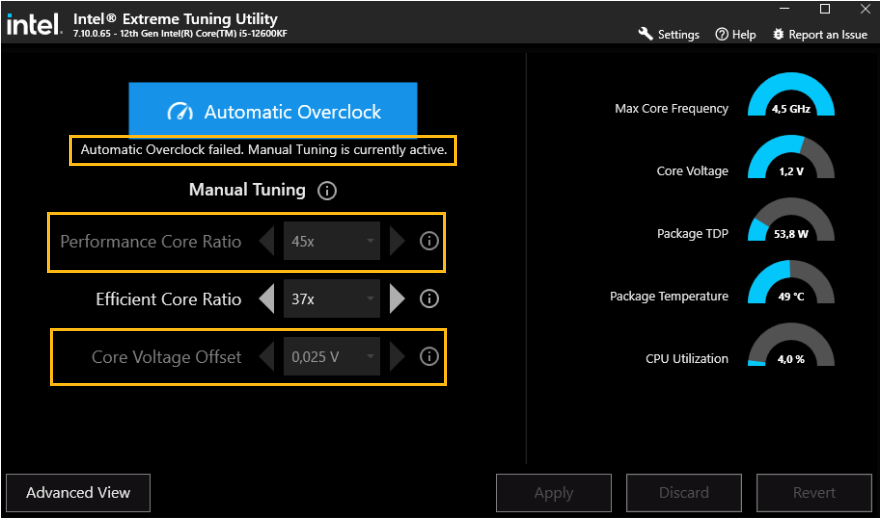
An Overclock failed. Manual Tuning is currently Active message is displayed when attempting to use Automatic Overclock with Intel® XTU, and buttons are disabled/grayed out.

There can be a couple of reasons to why Intel® XTU Automatic Overclock Failed and some Overclocking (OC) buttons are disabled/grayed out:

  1. Using a chipset/motherboard, that does not support advanced overclocking.
  2. Overclock (OC) settings are not fully enabled in BIOS (Basic Input Output System).
Resolution
  • Ensure your motherboard allows for overclocking . Depending on your processor, the Z and X series can be used for advanced OC. As an example: Intel® Core™ i7-13700K Processor is compatible with Intel® Z790 Chipset or Intel® Z690 Chipset that support overclocking (Intel® Architecture (IA), BCLK, Memory). Other chipsets might only support Memory Overclocking.
  • Enable OC settings in the BIOS by following the steps below:
    1. Reboot your computer and press the key to enter the BIOS setup. The key to enter the BIOS varies depending on the manufacturer, but it is often Del, Esc, or F2.
    2. Navigate to the Advanced or Overclock section of the BIOS.
    3. Look for options related to manual tuning or overclocking, such as CPU frequency, voltage control, or memory timing.
    4. Change the setting for each option from manual to automatic or enabled to disabled, depending on the BIOS option.
    5. Save your changes and exit the BIOS.
Note
  • The exact steps and options may vary depending on your computer's BIOS version and manufacturer. If you're not familiar with the BIOS or overclocking, it's best to leave these settings in place to avoid causing harm to your system.
  • Altering clock frequency or voltage may void any product warranties and reduce stability, security, performance, and life of the processor and other components.
Additional information

When Overclocking your processor consider the following:

  • Compatibility: An unlocked Intel® Processor (K or X at the end of the name) with compatible Chipset (Z or X series) that supports advanced overclocking (IA, BCLK, Memory).
  • BIOS setting: Overclocking is often controlled by the BIOS, which may have limits set by the manufacturer. Check your BIOS settings to make sure that overclocking is enabled and that you have the necessary permissions to make changes.
  • System stability: Overclocking can push your system beyond its limits, causing crashes, freezes, or other stability issues. Ensure that your system is stable and free from any issues before attempting to overclock.
  • Power and cooling: Overclocking requires more power and generates more heat, so it is important to have sufficient power and cooling to support the increased performance. Make sure your system has adequate power and cooling before attempting to overclock.
  • Overclocking increments: Overclocking beyond the limits of your system can cause stability issues and can potentially damage your hardware. Try overclocking in smaller increments to find the maximum stable frequency for your system.

Related Products

This article applies to 1 products