Skip To Main Content
Support Knowledge Base

How to Uninstall or Roll Back to an Older Version of Intel® Connectivity Performance Suite Software

Content Type: Install & Setup   |   Article ID: 000093451   |   Last Reviewed: 01/04/2023

Environment

Operating System

Windows 11*, Windows® 10, 64-bit*

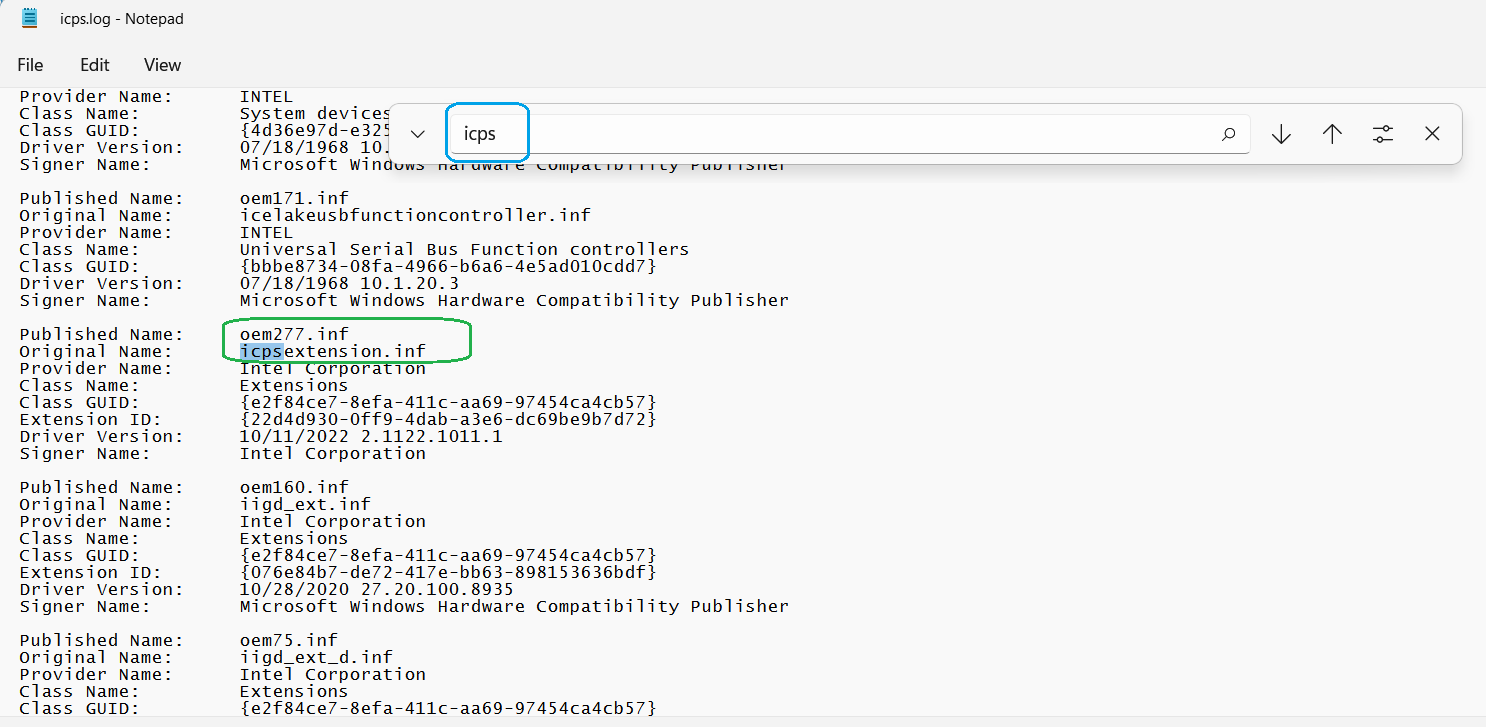
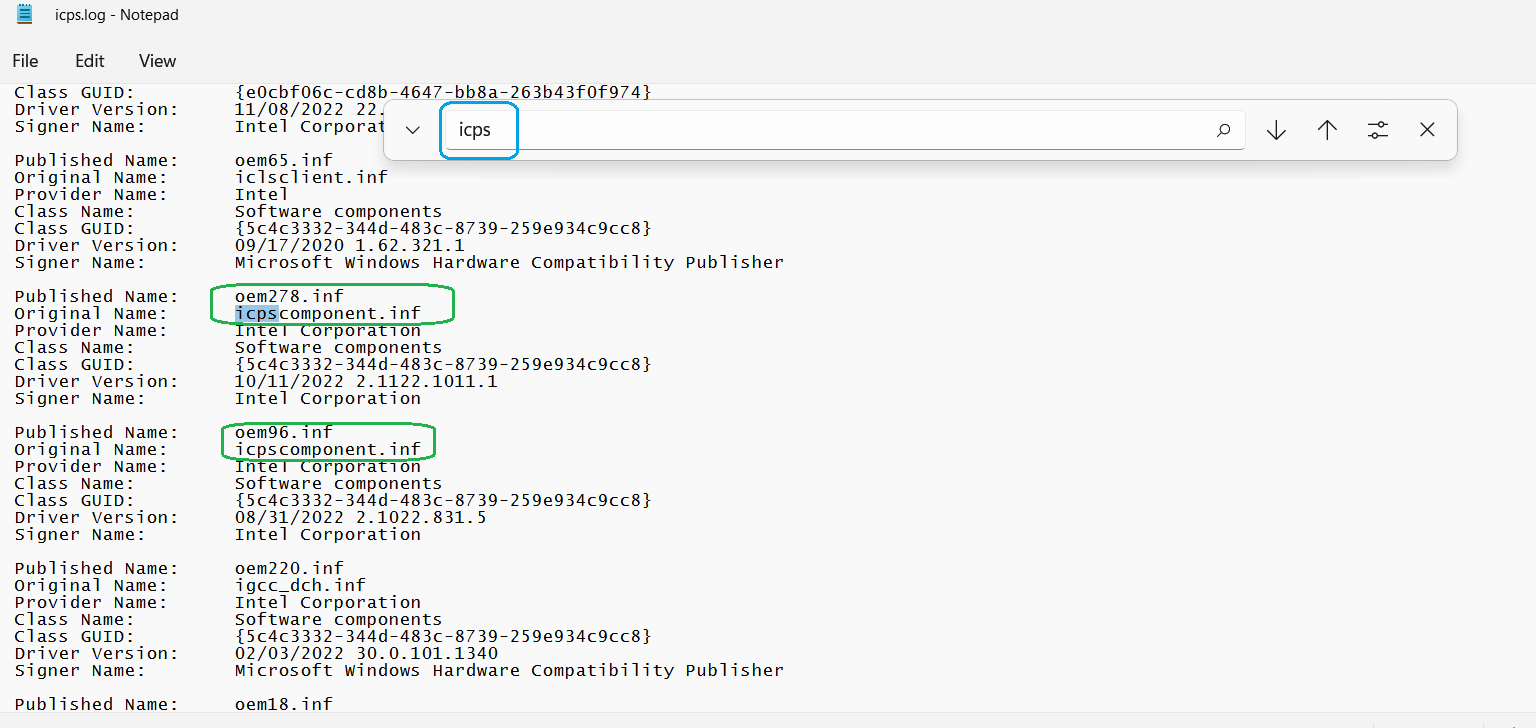
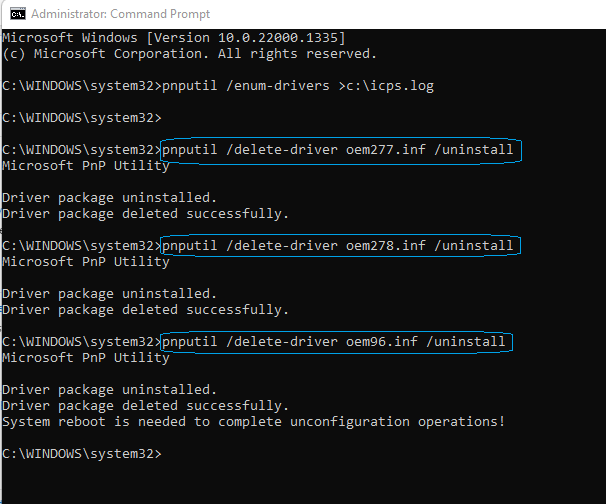
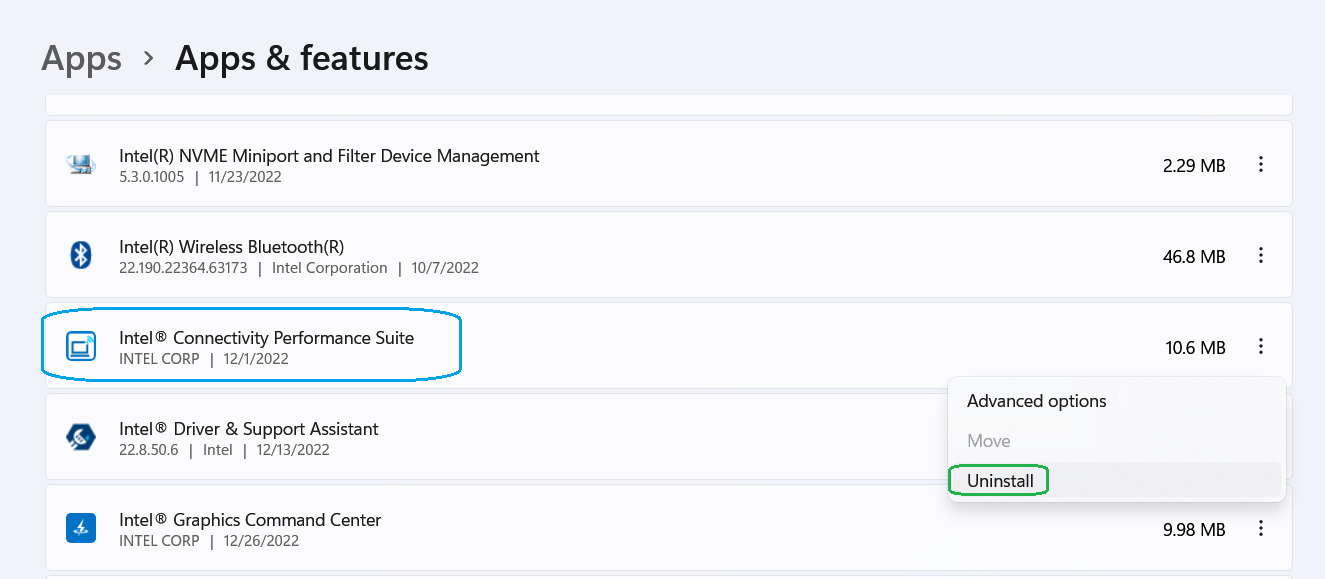
Perform the following steps to uninstall Intel® Connectivity Performance Suite software from the PC or to Downgrade to an older version of Intel® Connectivity Performance Suite software:

  1. Open a command prompt as Administrator.
  2. In the command prompt, type the following command and press Enter
    pnputil /enum-drivers >c:\icps.log
    example image
  3. Go to c:\ and open the icps.log, press Ctrl+F to bring up a search box. Type "icps" in the search box to find all the "oem#.inf" with icpsExtension and icpsComponent.
    ( # is some number. e.g. In the following example, 3 drivers 'oem277.inf', 'oem278.inf' and 'oem96.inf' match the icpsExtension or icpsComponent )
    example image
    example image
  4. Switch back to the command prompt, type the following command to completely uninstall all the drivers:
    pnputil /delete-driver oem#.inf /uninstall
    example image
  5. Go to Add or Remove Programs and uninstall the Intel® Connectivity Performance Suite software
    example image
  6. Reboot the system.
  7. (Optional) Reinstall the Intel® Connectivity Performance Suite, or downgrade to an older version if needed.

Related Products

This article applies to 1 products.