Skip To Main Content
Support Knowledge Base

Creating Intel® VROC RAID Volume on Intel® Server M50CYP Family

Content Type: Install & Setup   |   Article ID: 000089810   |   Last Reviewed: 11/20/2025

Environment

Intel® Server M50CYP Family

Description

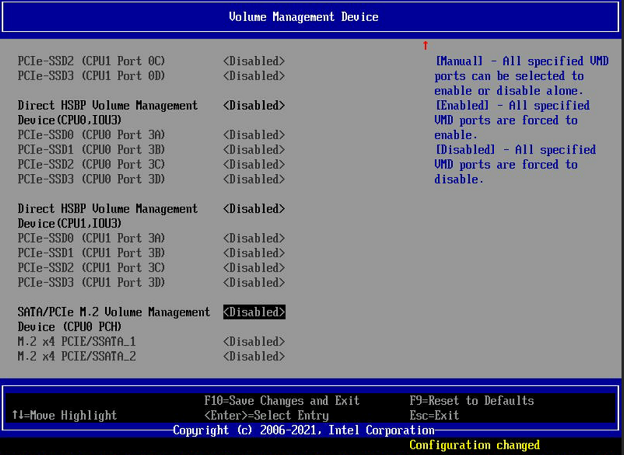
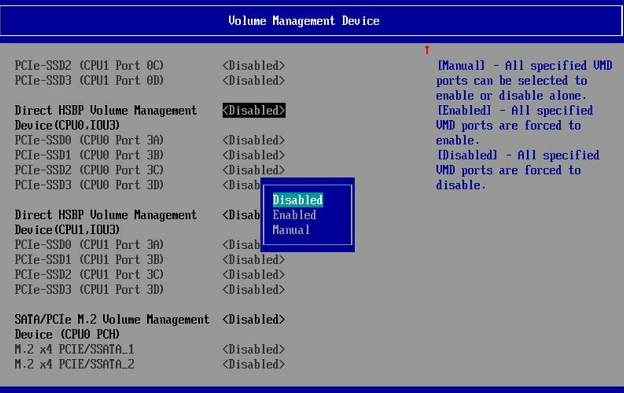
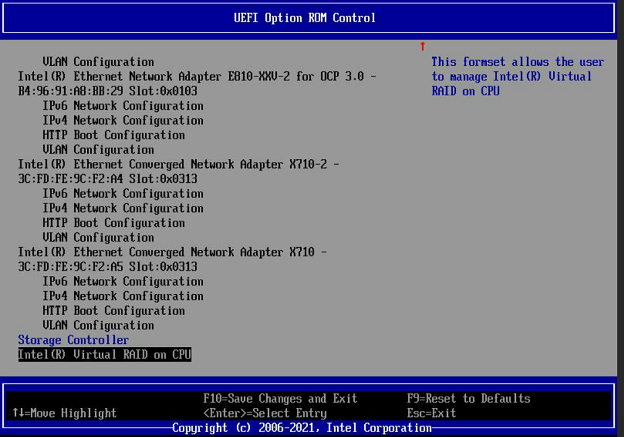
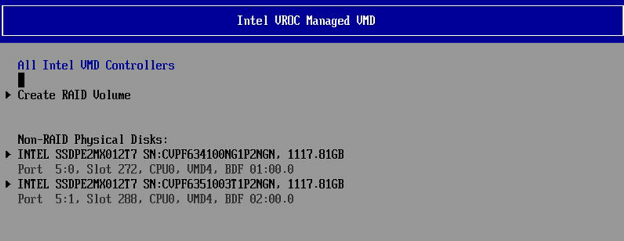
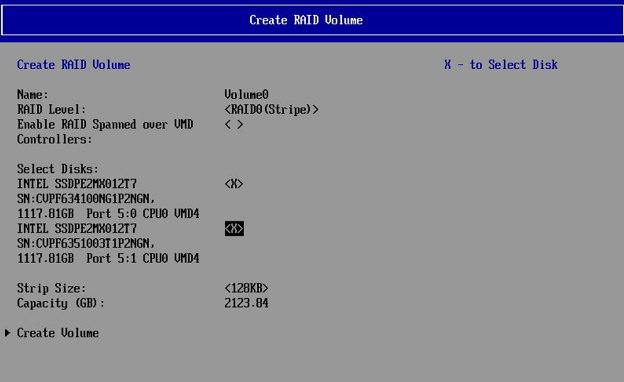
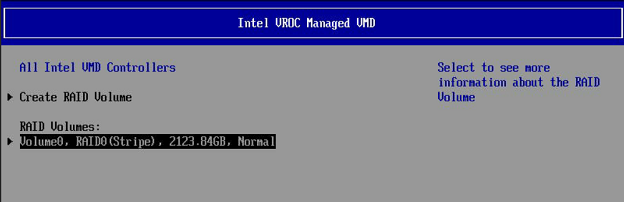
Users experience difficulties in creating RAID volumes using Intel® VROC on Intel® Server M50CYP Family. The steps below can help users to configure an Intel® VROC RAID volume

Resolution

Follow below steps to configure an Intel® VROC RAID volume:

  1. Enable the Intel® VMD Controller Domains by accessing BIOS > Advanced > Integrated IO configuration > Volume Management Device. Refer to the figure below
    Volume Management Device


    Select Enable
  2. Press the key F10 to save the settings. Once the system restarts, press the key F2 to access BIOS.
  3. Navigate to BIOS > Advanced > PCI configuration > UEFI option ROM control > Intel® Virtual RAID on CPU. See the below figure as reference.
    Intel Virtual RAID on CPU
  4. Select the option All Intel VMD Controllers. This will display the list of drives detected and the menu options to create RAID volumes. Refer to the figure below
    SSDs detected and menu options to create RAID
  5. Create the desired RAID volume by selecting the drives and the RAID level. Refer to the figures below
    Create RAID Volumes


    RAID volumes
Add-in card NVMe* devicesIntel® Server M50CYP Family based-systems do not support Intel® VROC for add-in card NVMe* devices due to the inability to enable Intel® VMD on PCIe slots. Drives are detected in BIOS under the storage controller section, but Intel® VROC RAID volumes cannot be configured on them.

Related Products

This article applies to 2 products.