VESA Mount Information for the Intel® NUC
Content Type: Install & Setup | Article ID: 000006857 | Last Reviewed: 01/26/2024
VESA developed a set of standards for manufacturing flat-screen televisions and PC monitors, such as mounting interfaces. Most manufacturers adhere to an industry-wide hole pattern on the back of displays for mounting.
Click or the topic to view the hole patterns on the VESA mount bracket:

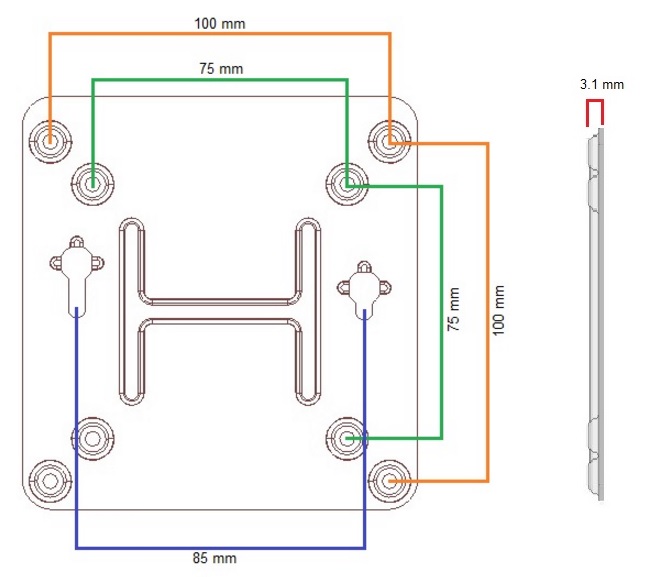
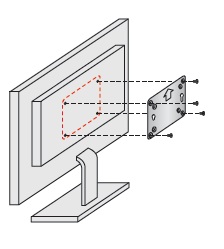
Attach the VESA mount bracket to the back of the display using the four small monitor screws (size M4) included in the box. The bracket has a 3 mm standoff from the monitor.
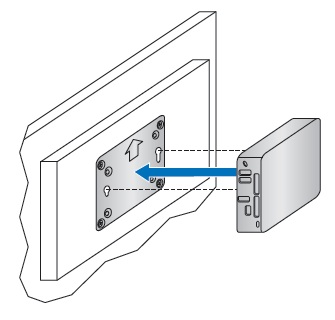
Attach the two large screws (size M3) to the bottom of the Intel® NUC chassis.

Insert the heads of the two screws on the Intel NUC chassis into the holes on the VESA bracket. Slide the chassis down to secure.
You can use a VESA mount adapter plate if your television or display has VESA holes in a larger pattern (example: 200 mm × 200 mm).
You can mount your Intel NUC behind your monitor, even if you already use the VESA holes for a swing arm or wall attachment. To do this, use an extension bracket that connects the Intel NUC to the swing arm. See the image below.
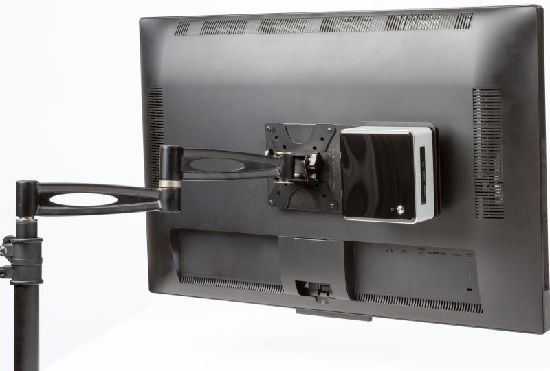
| Note | VESA extension brackets are available from third-party vendors, such as Simply NUC* and iiyama Corporation*. |
For more information, download the mechanical drawings in STEP format below. STEP is the file format for a 3D graphics file used by CAD software, such as AutoCAD* or SolidWorks*. Intel provides these materials as-is, with no express or implied warranties.
| Intel NUC Kits | STEP Format |
| NUC6i7KYK | NUC6i7KYK-VESA-Mount.STEP |
| All other Intel NUC Kit models | NUC-VESA-Mount.STEP |