1.3. Generating the Design
Figure 4. Procedure
Follow these steps to generate the Intel® Arria® 10 hardware example design and testbench:
- In the IP Catalog (Tools > IP Catalog), select the Intel® Arria® 10 target device family.
Note:
The Quick Start hardware example design is only supported in Intel® Arria® 10 devices. The testbench is available for variations that target Intel® Arria® 10 devices or Stratix® V devices.
- In the IP Catalog, locate and double-click 100G Interlaken . The New IP Variation window appears.
- Specify a top-level name for your custom IP variation. The parameter editor saves the IP variation settings in a file named <your_ip>.qsys.
- You must select a specific Intel® Arria® 10 device in the Device field, or keep the default Intel® Quartus® Prime software device selection.
- Click OK. The parameter editor appears.
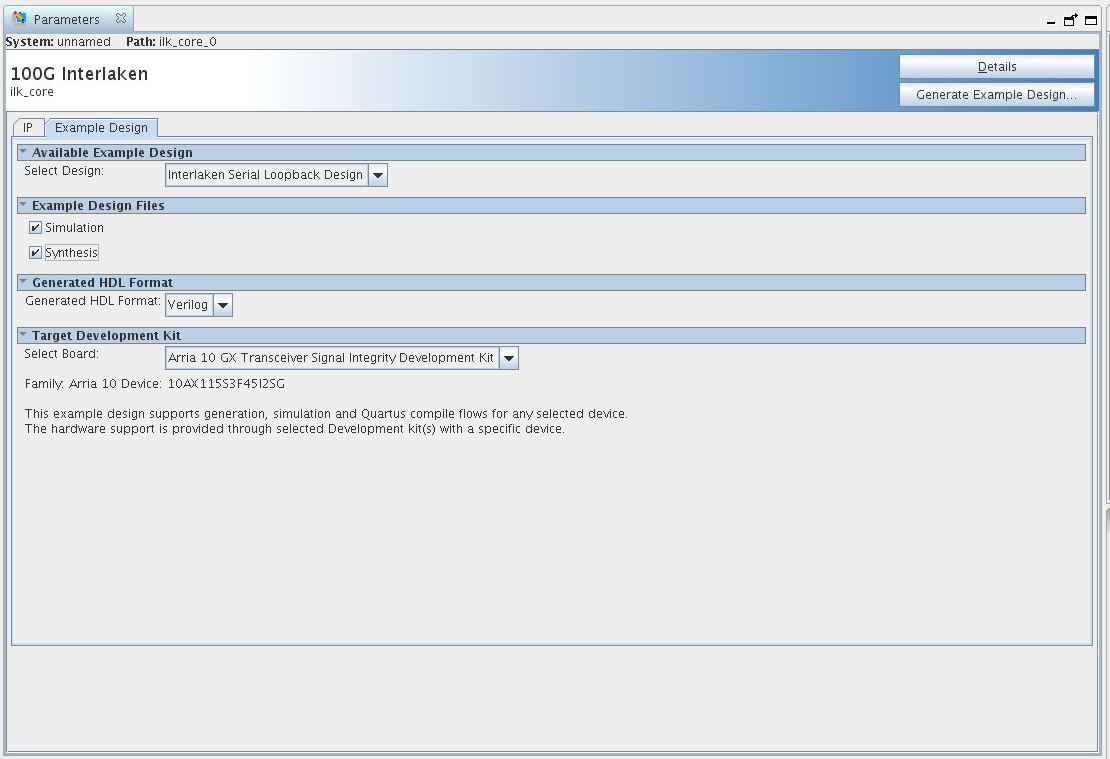
Figure 5. 100G Interlaken Parameter Editor
- On the IP tab, specify the parameters for your IP core variation.
- On the Example Design tab, select the Simulation option to generate the testbench, and select the Synthesis option to generate the hardware example design.
Note:
At least one of the Simulation and Synthesis check boxes from Example Design Files must be selected to allow generation of Example Design Files.
- For Generated HDL Format, only Verilog is available.
- For Target Development Kit select the Intel® Arria® 10 GX Transceiver Signal Integrity Development Kit. If you select a development kit, then the target device (selected in step 4) for Example Design is changed to match the device on target board.
- Click the Generate Example Design button.
Related Information