Run a Sample with Intel® OSPRay
This walkthrough demonstrates how to run an interactive sample application with Intel® OSPRay from the Intel® oneAPI Rendering Toolkit (Render Kit) for Linux* OS.
Prerequisite: Configure your system.
To run the application:
- Open a terminal.
- If you did not set up oneAPI toolkit environment permanently: Set up environment variables:
- For root or sudo users:
source /opt/intel/oneapi/setvars.sh - For non-root users:
source ~/intel/oneapi/setvars.sh
See Set up Environment Variables for other options.
NOTE:If you installed the Render Kit to a custom location, make sure to replace /opt/intel/oneapi/ (for root or sudo users) or ~/intel/oneapi/ (for non-root users) with the custom installation path before running the command. - For root or sudo users:
- Go to a writable directory and create a directory to store supporting files. For example, create the rk_gsg folder under the home directory:
cd ~mkdir rk_gsgcd rk_gsg - Run the ospExamples sample application:
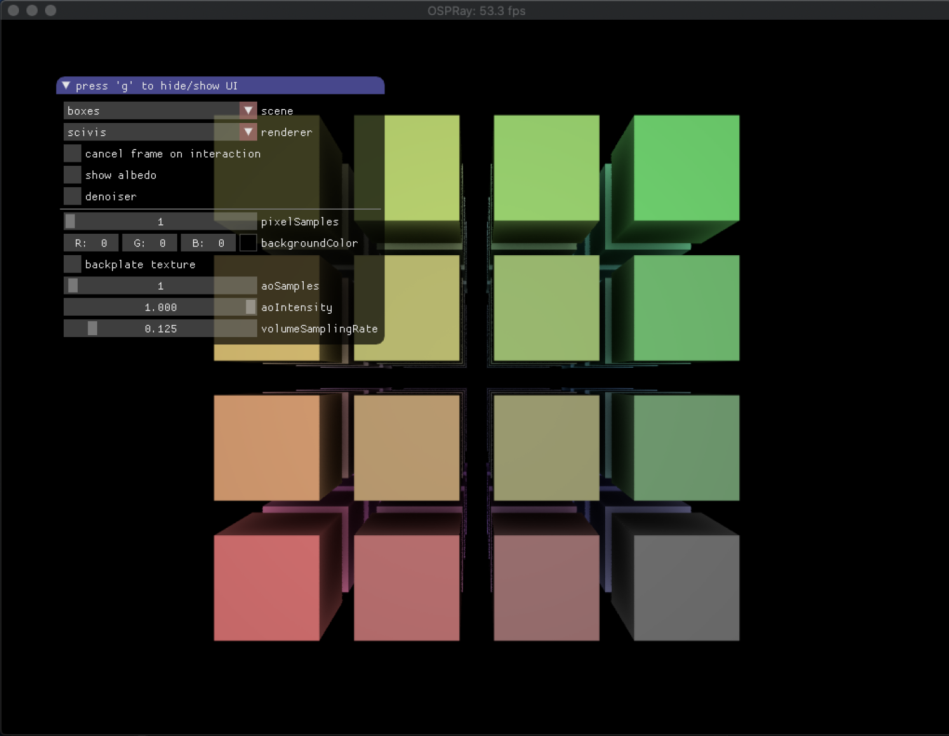
ospExamples
A new GUI window will open with multiple simple scenes composed of basic geometry types, lights, and volumes. You can edit the scene by clicking the drop-down buttons.
Controls and Tips
You can control the scene view with a mouse as follows:
- Right-click to move the camera in and out from the look-at point.
- Left-click to rotate.
- Use a mouse wheel to pan.
This also reports the geometry ID for intersected geometry under the cursor in a terminal.
- Drag and drop to move the camera.
You can also use the following keyboard controls:
- Press G to show/hide the user interface.
- Press Q to quit the application.
You can also control the scene from the control pane:
- Try different geometric and volumetric scenes. View them under different renderers.
- Cancel frame on interaction allows for more continuous animation during navigation.
- Enable showing depth to show relative depth at the ray intersection with the scene from each pixel location of the camera.
- Enable showing albedo to show the albedo of the material at the ray intersection with the scene from each pixel location of the camera.
- Enable denoiser to denoise each frame with Intel® Open Image Denoise.Note: The denoiser might work be better observed with some geometries than with others. For example, the Streamlines predefined scene set shows convergence with denoise more clearly.
NOTE:If ospray_module_denoiser is not available in your distribution, you can get it using the Superbuild as described in Next Steps.
- Change pixel filter to review the different anti-aliasing methods available in the API.
- Change pixel samples, which is the number of scene samples per pixel in one accumulation. Higher samples results in longer rendering times, but faster convergence per accumulation. Less samples per pixel results faster application performance.
- Change maximum path length parameter, which is the number of path reflections or refractions per sample. A higher number is more accurate, while a lower number is faster to compute.
- Change roulette path length, which is the threshold or reflections or refractions at which to randomly end the traversal of a ray. A higher number is more accurate, while a lower number is faster to compute.
- Change sample contributions. Sample contribution less than the minContribution will not affect the scene. A lower number is more accurate, while a higher number is faster to compute.
- Change camera motion blur to control the blur affect while moving the camera. A value of 0 turns the blur off.
- Enable Render Sun Sky to turn on a controllable scene horizon. The scene will reflect the horizon as configured from GUI pop-up parameters.
Next Steps
- Run pre-compiled sample applications for other Render Kit components.
- Explore additional resources in Next Steps.
Parent topic: Run Pre-Compiled Sample Applications