Get Started with the Intel® oneAPI Base Toolkit for Linux*
A newer version of this document is available. Customers should click here to go to the newest version.
Build and Run a Sample Project Using Eclipse*
Intel® oneAPI Base Toolkit
Intel® oneAPI integrates with third-party IDEs on Linux* to provide a seamless GUI experience for software development.
An internet connection is required to download the samples for oneAPI toolkits. For information on how to use this toolkit offline, see Developing with Offline Systems in the Troubleshooting section.
Create a New Project Using Eclipse*
You can access the entire suite using Eclipse* (see the release notes for minimum required version). Once oneAPI is installed, the tools are integrated into the menus.
To watch a video presentation of how to create a project, see Intel® oneAPI Eclipse Samples Plugin.
- Navigate to the Eclipse directory and source setvars.sh.
For root or sudo installations:
. /opt/intel/oneapi/setvars.shFor normal user installations:
See here for more information on setvars.sh.. ~/intel/oneapi/setvars.sh - Launch Eclipse from the folder where it was installed:
./eclipse - In Eclipse, select your workspace and create a project with Intel > Browse Intel oneAPI Samples. The wizard selection screen appears.
NOTE:If you do not see an Intel menu in Eclipse, install the oneAPI Eclipse plugins, then return to this page for instructions on how to Build and Run a sample.
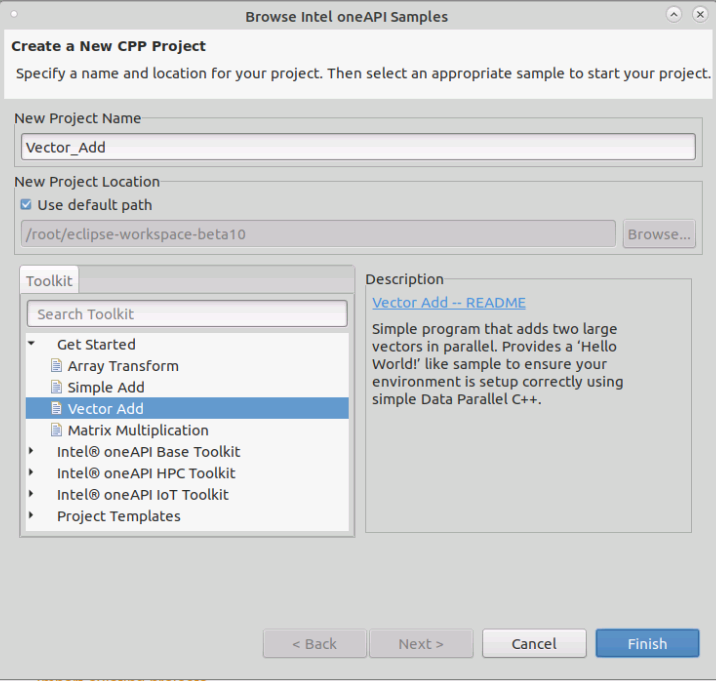
- Enter a name for your project in the New Project Name field. Use the > arrow to select the Intel® oneAPI Base Toolkit.
- Select the Intel® oneAPI DPC++/C++ Compiler > CPU, GPU and FPGA group, then select Vector Add. Vector Add is a simple test application that will help verify that the tools are setup correctly and can access your system's GPU.
- The Vector Add sample opens in the C++ perspective and the sample will run. Check the Problems view at the bottom. If there are any errors, they will display in the Problems tab.
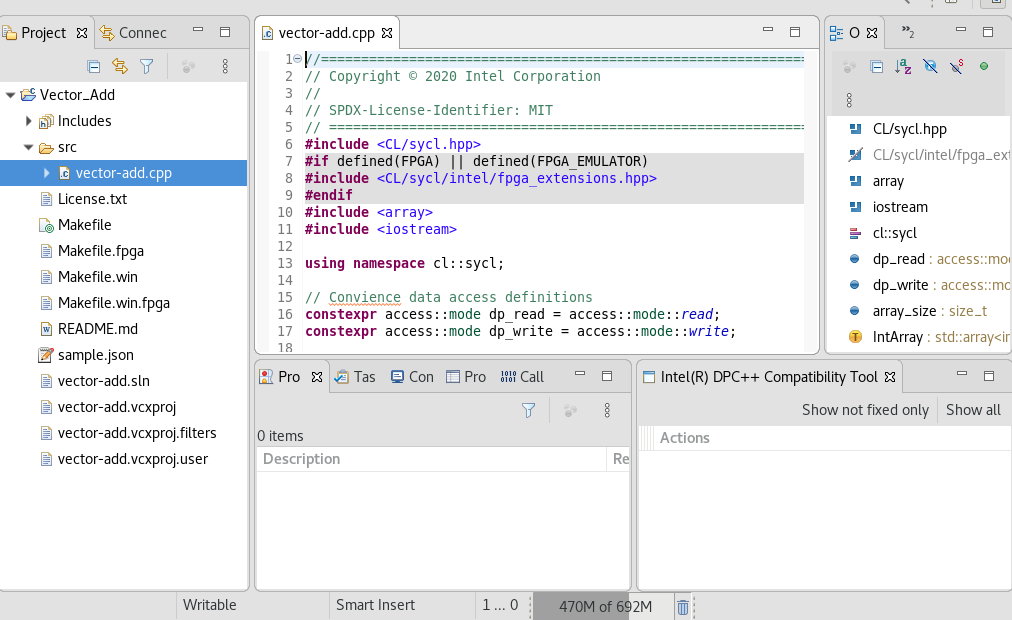
- To build a project, select Project > Build Project. When building, the Eclipse Console view (usually in the lower right) will show you a build log, along with any errors or warnings. In this example, no errors were found.
- To run the application, click Run > Run .