New Paths, New Possibilities
Just as parallelism and multithreaded programming paved the way for the performance strides of multicore CPUs, Vulkan* APIs are poised to forge a future of multithreaded, cross-platform GPU programming, and high-performance rendering, regardless of the target device.
The heir apparent to OpenGL*, Vulkan* gives developers greater control over threading and memory management, and more direct access to the GPU than predecessor APIs, which means more versatility for addressing an array of target platforms. The only costs are a relatively up-to-date processor, and bit more development work up front.
What You’ll Need
The minimum requirement for developing with Vulkan* APIs on Intel Graphics GPUs is a processor from the 6th Generation Intel® Processor Family (introduced in August, 2015) running 64-bit Windows* 7, 8.1 or 10. Intel also offers a 64-bit Windows® 10-only driver for 6th-, 7th- or 8th-generation processors. Vulkan* drivers are now included with Intel® HD Graphics drivers, which helps simplify the setup process a bit.
These instructions require:
- An account with Epic Games
- A Windows* PC with Unity* Engine 4 and Microsoft Visual Studio pre-installed. To install UE4, visit the Unreal Engine download page. For Visual Studio, navigate to the Visual Studio download page.
- An account on GitHub*
Using UE4 with Vulkan* APIs requires that the engine be rebuilt, and this must be done after the Vulkan* SDK has been downloaded, and installed. Rebuilding the Unreal Engine requires the engine source-code, which is freely available on GitHub* to registered users who have linked their git account with Epic Games. All required steps are covered here.
These instructions are for setting up a development host with Intel® HD Graphics.
Part One: Download Intel® Graphics Driver
1. Visit the Intel Download Center.
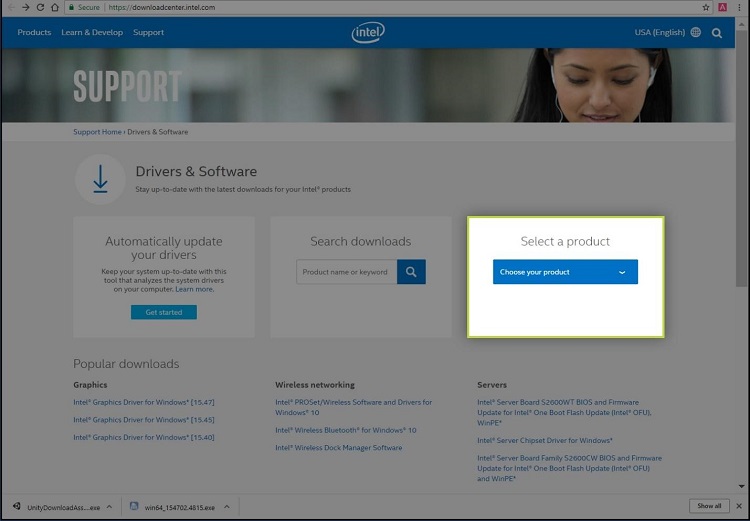
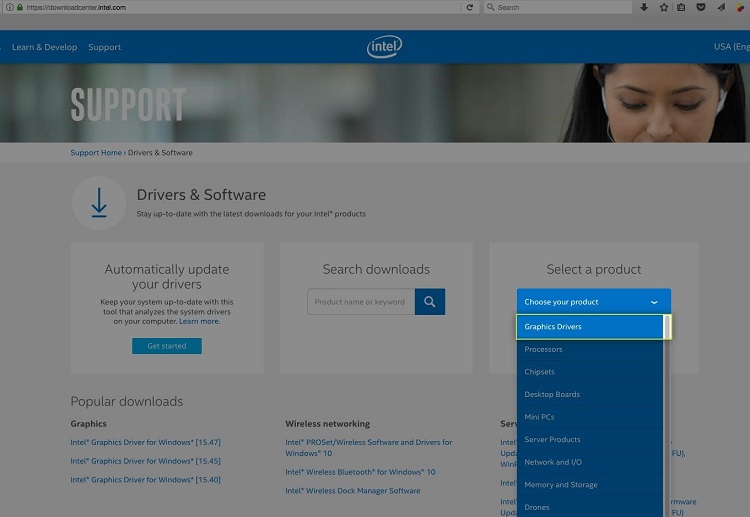
2. Select “Graphics Drivers” from the “Select a Product” drop-down menu.
3. Select the required driver based on the development host.
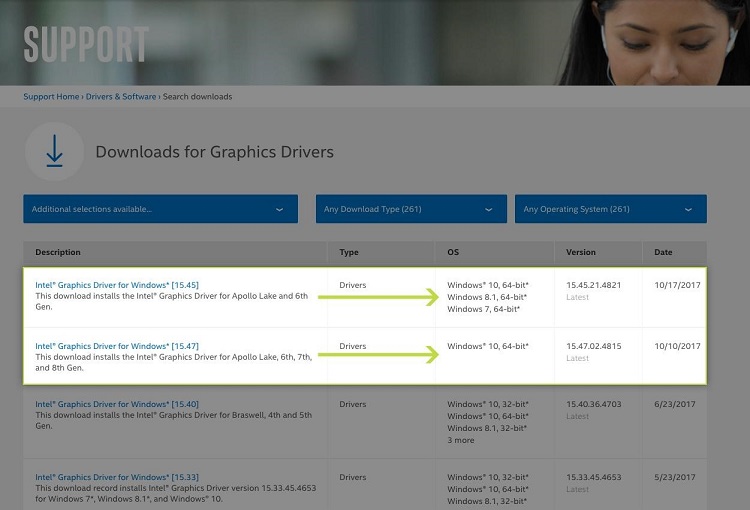
4. Download the .ZIP version of the driver.

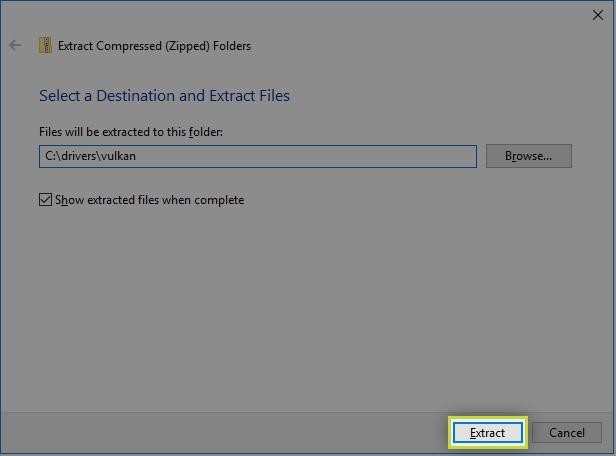
5. Extract all files from the: ZIP and create a memorable destination folder.
Part Two: Update Graphics in Windows*
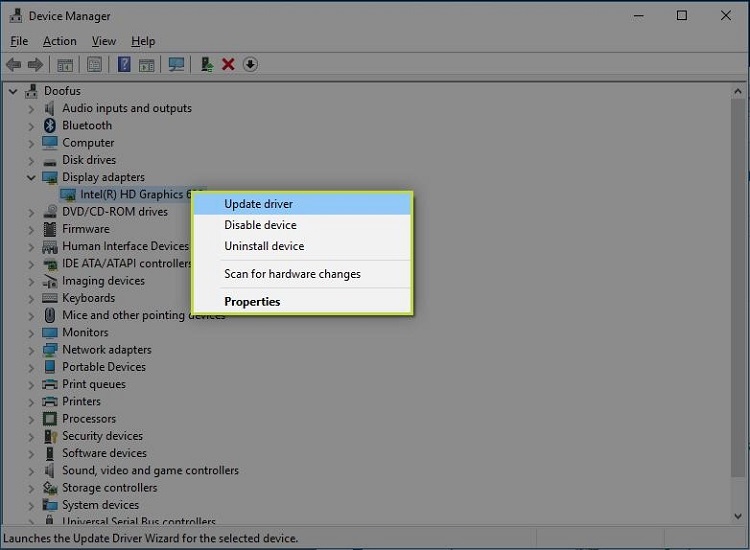
6. In Device Manager, expand “Display adapters,” right-click on the Intel® HD Graphics adapter, and select “Update driver.”
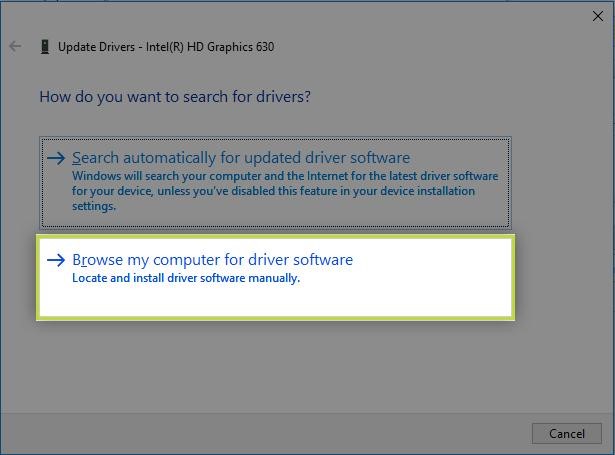
7. Select “Browse my computer…” in the “Update Drivers” screen.
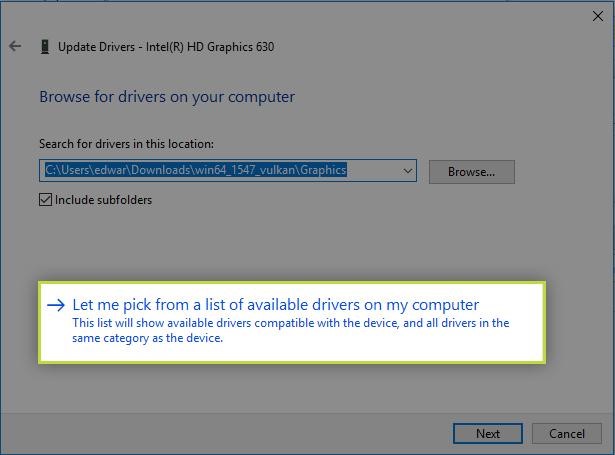
8. Select “Let me pick…”
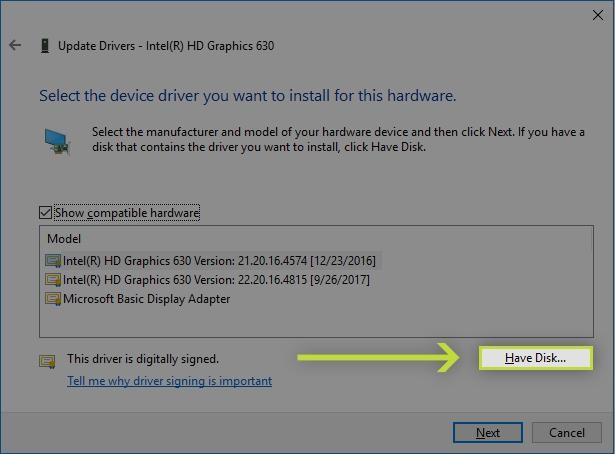
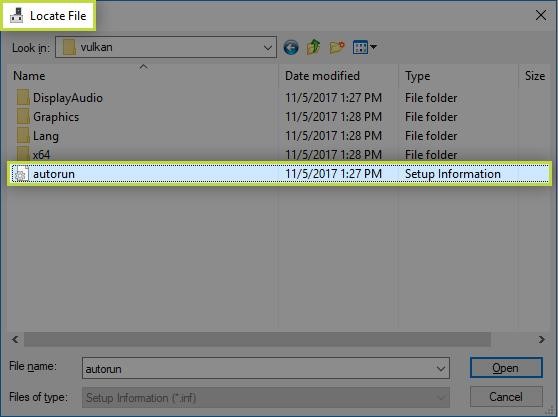
9. Select “Have Disk…”
10. Navigate to the folder containing the files unzipped in Step 5.
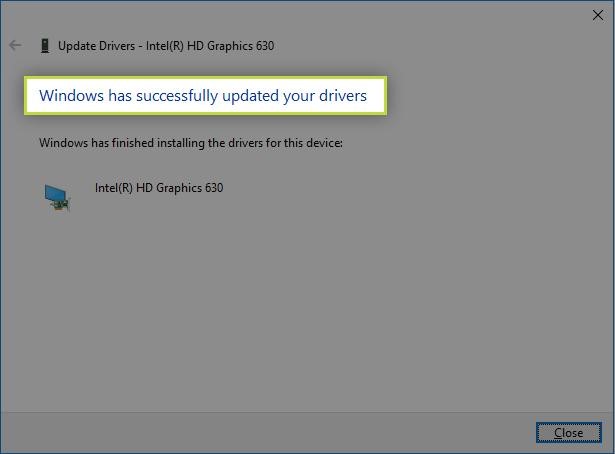
11. If successful, a message like the one below will appear:
Part Three: Configure UE4 for Vulkan*
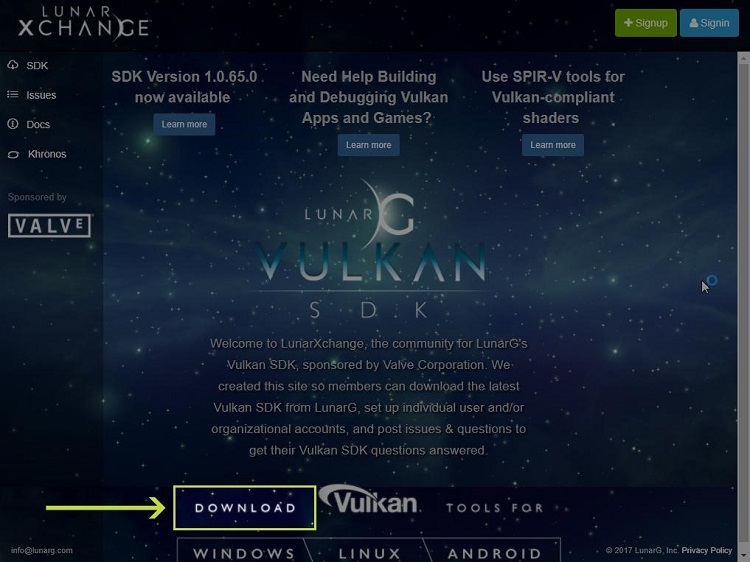
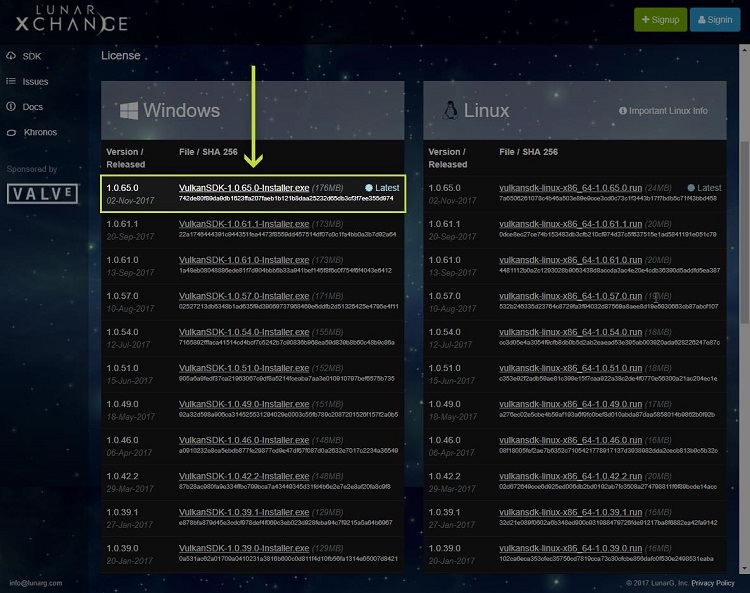
12. Download and install the Vulkan* SDK.
13. If you’re not already logged into GitHub*, log in now. Then open the Unreal Engine Launcher and click “Get the source code on GitHub*” (UE4 source is free to registered users who have linked their GitHub* account with Epic Games, which we'll cover next).
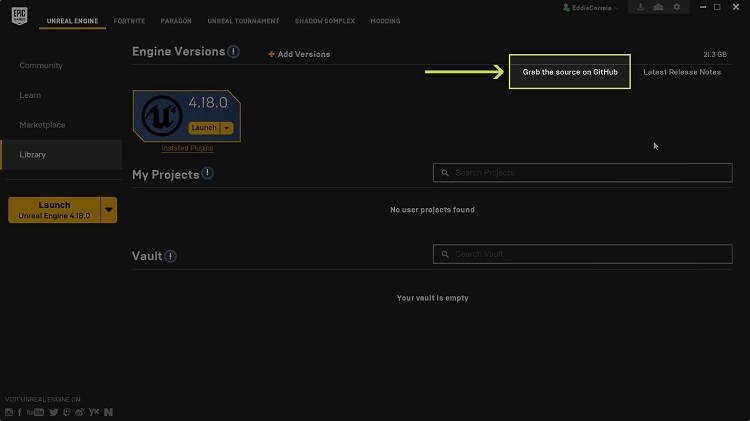
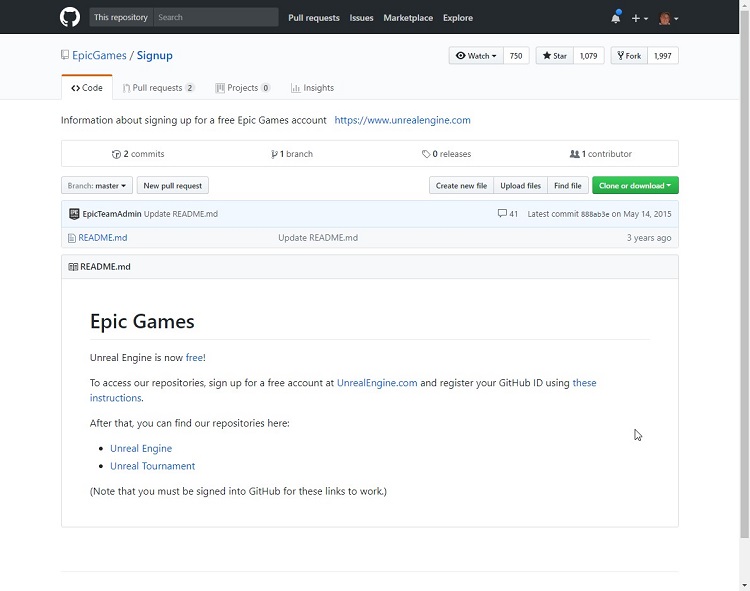
Clicking the “Grab the source” link brings you to the GitHub* page, as pictured below:
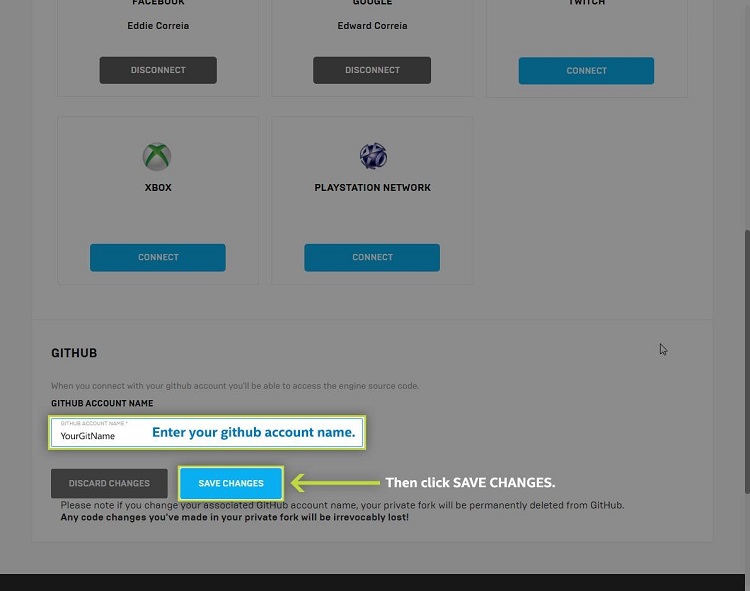
13a. Open your Epic Games Dashboard and link your Epic and GitHub* accounts:

14. Shortly after linking the accounts, a confirmation will arrive in your email inbox. Return to the Epic Games GitHub* page, and look for an invitation to join:
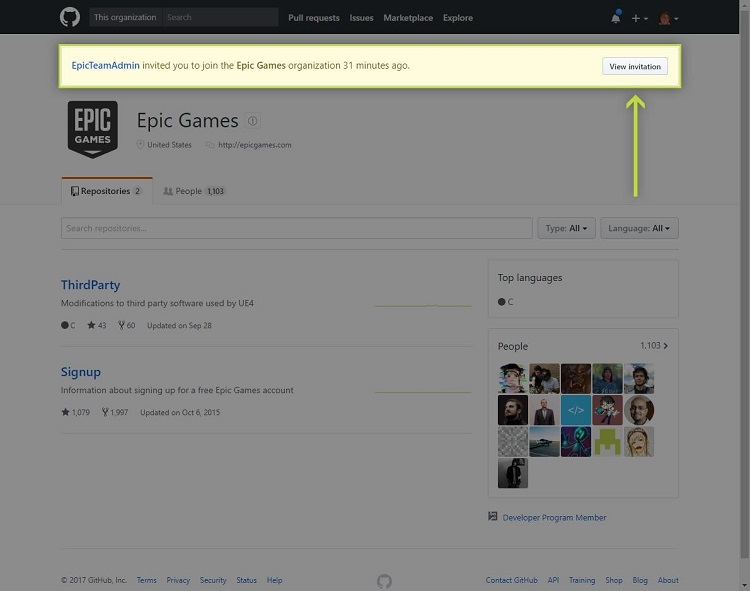
Clicking “View invitation” brings you to the page pictured below. Click “Join Epic Games.”

15. This returns you to the Epic Games GitHub* page, where UE4 repositories will now be available. Click “UnrealEngine” to continue.
16. Select the “master” branch from the “Branch:” button. Then hit the “Clone or download” button.
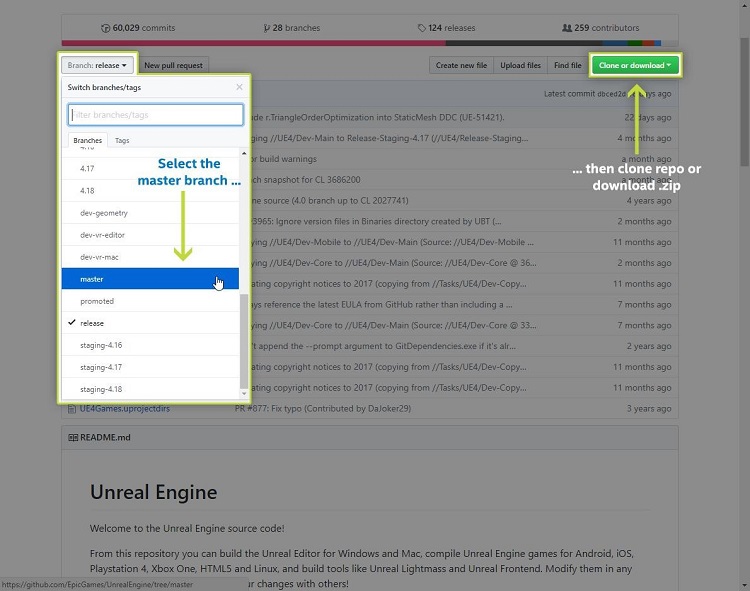
Important:
If you don’t intend to return engine changes to the community, download the .Zip file. If you do, then fork the master branch, clone it to your hard drive, and proceed from there.
Extract the .Zip (or clone the repo) to a suitable location on your hard drive.
17. When the file download has finished, open the new directory and run “Setup.bat,” and wait for it to finish (this takes a while).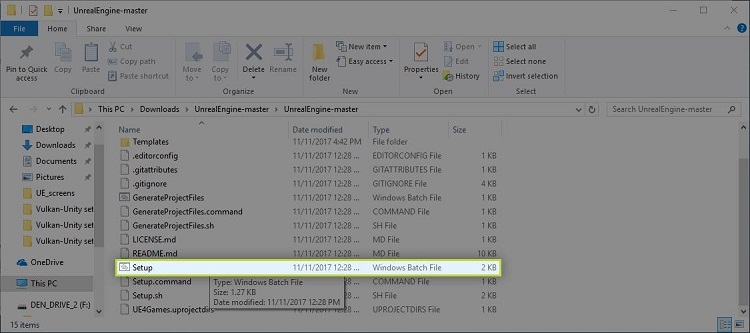
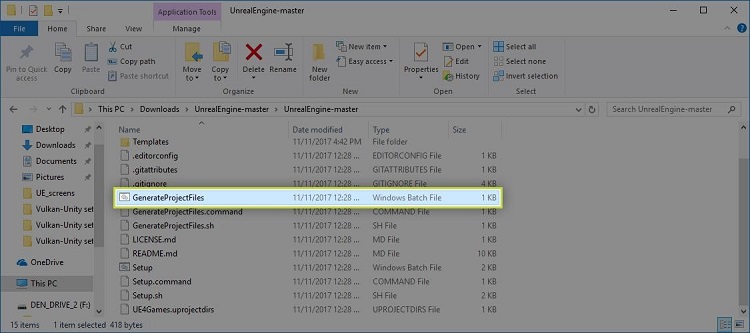
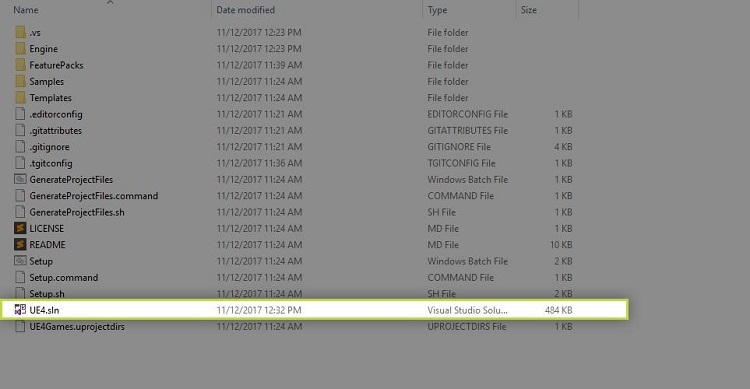
18. In the same directory, run “GenerateProjectFiles.bat” to create the “UE4.sln” project:
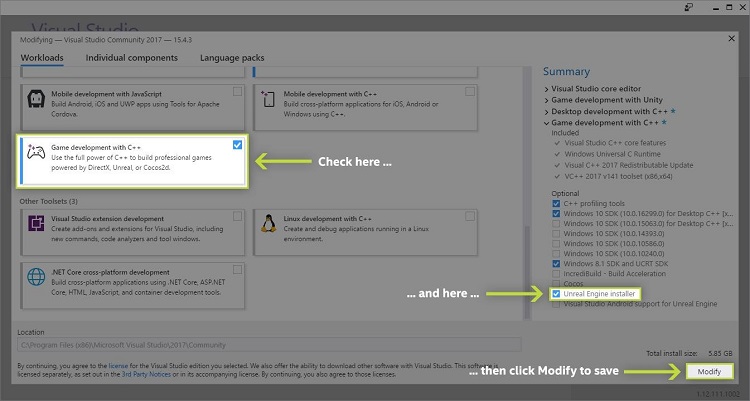
Note On some systems, it might be necessary to activate certain Visual Studio features to enable the “GenerateProjectFiles” script to do its job.
If it fails the first time, open Visual Studio and do the following:
a. Select Tools> “Tools and Features… ”
b. In the list of features, check “Game development with C++”
c. In the right-hand panel, check “Unreal Engine Installer”
d. Click “Modify” to save changes
e. Run “GenerateProjectFiles” again
Double-click the “UE4.sln” file to open the project in Visual Studio:
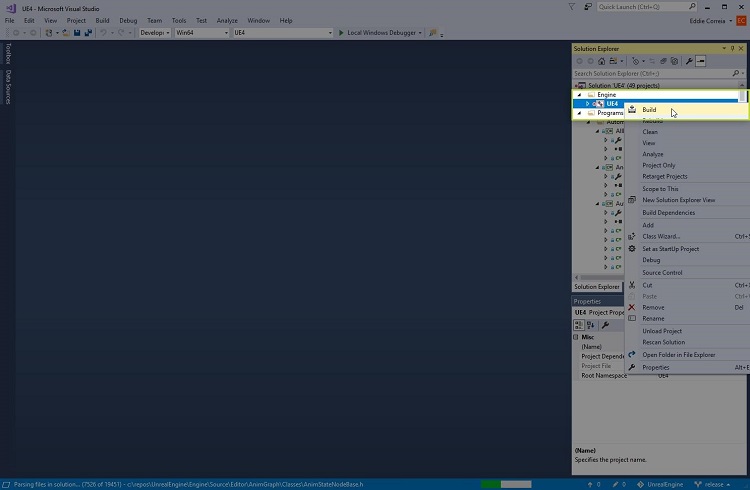
20. In VS Solution Explorer, right-click the UE4 project, and select Build.
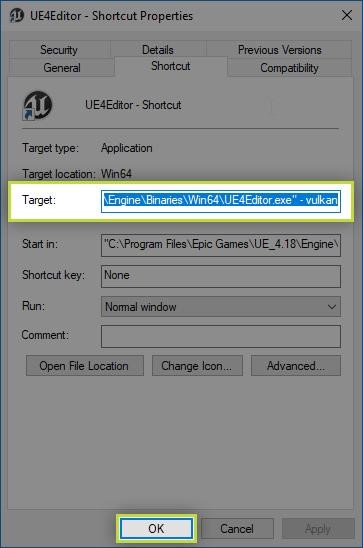
21. Once the build completes successfully, set up a shortcut for the UE4 Editor that puts it in “Vulkan* mode” using these steps:
a. Go to "C:\<installation_dir>\Engine\Binaries\Win64\
b. Create a shortcut for the file "UE4Editor.exe"
c. Set the shortcut Target to: "C:\<installation_dir>\Engine\Binaries\Win64\UE4Editor.exe" -vulkan
Your UE4 projects will now build using Vulkan* APIs whenever you start from that shortcut.