This article describes how to build Intel® oneAPI Rendering Toolkit (Render Kit) libraries from sources on macOS*. Use this guide if you want to:
- Review sample program source and edit them to understand API usage.
- Get critical performance optimizations of core library performance with the Intel® Implicit SPMD Program Compiled (Intel® ISPC).
- Quickly integrate Intel oneAPI Rendering Toolkit libraries into your own production projects.
- Integrate typical third-party imaging libraries and interactive windowing libraries.
NOTE: This walkthrough explains how to build components so that source and executables are staged for a non-administrator system user. Administrator prerequisites are minimal for this guide.
Important: Skipping sections of this document is not recommended for first-time users.
Prerequisites
| Software prerequisites |
|
| Optional |
|
| Estimated time | 45 - 60 minutes |
Library Source Locations
You can use one of the following ways to get the source code:
- Build the Intel® oneAPI Rendering Toolkit using automated superbuid scripts:
- Download the Intel® oneAPI Rendering Toolkit distribution from the Intel oneAPI Rendering Toolkit product page as a full-package local installer or online installer. For more information, see Installation Guide for Intel® oneAPI Toolkits.
- After you download and install the Intel oneAPI Rendering Toolkit, you can get the component sources using a CMake script located at <install-dir>/rkutil/latest/superbuild. By default, <install-dir> is /opt/intel/oneapi.
NOTE: These build scripts can also be acquired from GitHub.
- Build the Intel® oneAPI Rendering Toolkit manually:
- Check out sources for each component separately from corresponding GitHub* repositories.
- If you choose this option, make sure to check out components versioned for the same oneAPI release as they are validated together. See the Release Notes page for the toolkit component version manifests. Use the tags listed in the GitHub repositories to check out the corresponding component versions.
The component sections below provide instructions for both automatic and manual building options. Both instructions use Intel ISPC, which improves and optimizes core library performance.
Stage a Build Directory
After you install the Intel oneAPI Rendering Toolkit package on your system:
- Launch a new terminal session.
- Create a directory for library sources at a writable location. For example, create a rk folder in a /Users/$USER directory:
NOTE: If your system is behind a corporate proxy, set proxy environment variables as follows:
export http_proxy=http://<yourproxy>.com:<proxyport>
export https_proxy=http://<yourproxy>.com:<proxyport>
export HTTP_PROXY=http://<yourproxy>.com:<proxyport>
export HTTPS_PROXY=http://<yourproxy>.com:<proxyport>
Build the Libraries Automatically
To build all toolkit components automatically:
- Go to the build rk directory:
- Get rkUtil files from an installed distribution or from GitHub:
- From the installed distribution, copy the rkUtil, which contains provisions that are not core Intel oneAPI Rendering Toolkit libraries:
cp -r <rendering-toolkit-install-dir>/rkutil/latest/superbuild .
cd superbuild
- From the GitHub repository:
cd superbuild
- From the installed distribution, copy the rkUtil, which contains provisions that are not core Intel oneAPI Rendering Toolkit libraries:
-
Turn on sample building. Open a CMakeLists.txt for editing in a preferred text editor (for example, vim* or TextEdit*) and enable one or more of the toggles below for component samples you want to build:
-
Optional: Turn on OpenImageIO for extended texture support for Intel® OSPRay Studio. In the CMakeLists.txt file, set the following option to ON:
-DENABLE_OPENIMAGEIO=ON
-
Save the file.
-
Create a directory to stage the build:
-
Configure the component build:
cmake .. -DCMAKE_BUILD_TYPE=Release -DCMAKE_INSTALL_PREFIX=../install
-
Build the libraries:
cmake --build .
-
Ensure dynamic libraries are visible for sample programs by setting the DYLD_LIBRARY_PATH environment variable.
-
Run sample programs for each component to check the build is correct:
-
Intel OSPRay Studio sample:
-
Intel OSPRay sample:
-
Intel Open VKL sample:
-
Intel Embree sample:
-
Build the Libraries Manually
Building the libraries manually is recommended if you want to edit or add modules to one or more Intel oneAPI Rendering Toolkit libraries.
Set Up Dependencies
Configure the Intel® Implicit SPMD Program Compiler
Intel® Implicit SPMD Program Compiler (Intel® ISPC) is a compiler tuned for wide vector instructions available on Intel® architectures. Using the Intel ISPC with the Intel oneAPI Rendering Toolkit is recommended because it can greatly improve performance.
To configure the Intel ISPC for the Intel oneAPI Rendering Toolkit:
- Download the Intel ISPC binary package.
NOTE: This article uses Intel ISPC 1.15.0.
-
While in the rk directory, extract the binary in the current directory:
NOTE: Recent versions of macOS may need permissions unrestricted for applications. To disable, run the following:
- Run the following command to check the Intel ISPC:
You should see the version in the Intel ISPC installed.
-
If the application fails to run on a higher version of macOS, set the permissions for running unknown applications:
Build the GLFW3* Library
GLFW3* is used as an interfacing layer for OpenGL*-based drawing for reference applications. This article uses GLFW 3.3.2.
GLFW3 is not required for Intel oneAPI Rendering Toolkit libraries, but it is highly recommended because some Intel oneAPI Rendering Toolkit samples use it to draw outputs to GUI windows. If you target a headless environment, you may still want to explore the GUI samples as they demonstrate key library API features.
NOTE: You can install GLFW3 from your system package manager repositories instead of building it manually. This may be preferred for most cases.
To install the GLFW3 on macOS with Homebrew, run:
GLFW3 should be searchable in /usr/local/opt/glfw so that other programs can access it at runtime.
If you want to build the GLFW library manually:
- Go to the build rk directory:
-
Get GLFW3 sources from the GitHub repository:
-
Create a directory to stage the GLFW build:
-
Build and install the GLFW:
Get the Intel® oneAPI Threading Building Blocks
Intel® oneAPI Threading Building Blocks (oneTBB) is used for tasking within the infrastructure for Intel oneAPI Rendering Toolkit libraries. oneTBB is recommended to use for building Intel oneAPI Rendering Toolkit libraries, but there are other build-time configurable options, for example, OpenMP*.
NOTE: Use oneTBB version 2021.1 or higher. The latest Intel oneAPI Rendering Toolkit is validated with oneTBB 2021.2.0.
- Download the oneTBB.
- While in the rk directory, extract the oneTBB prebuilt library and headers for development. It will be extracted to /Users/${USER}/rk.
(Optional) Install OpenImageIO*
OpenImageIO provides an extended image type capability for Intel Embree and Intel Open Image Denoise sample applications. It has many dependencies, so you are recommended to use a package manager to download the OpenImageIO. For example, to download it using the Homebrew*:
Install Git* LFS for Intel® Open Image Denoise
Intel® Open Image Denoise maintains pretrained network topologies of large files sizes (megabytes). Git LFS facilitates transfer of large files.
For example, to install it with the Homebrew package manager:
Build rkcommon Library
rkcommon is a support library used by the Intel oneAPI Rendering Toolkit components. It abstracts common math and vectorization operations, tasking implemented with oneTBB, operating system input and output, networking, and memory capabilities to use in the Intel oneAPI Rendering Toolkit components. rkcommon is not component specific. Intel OSPRay and Intel Open VKL can automatically download and build the rkcommon. However, when building more than one Intel oneAPI Rendering Toolkit library, you should build the rkcommon manually so that all components reference the same version of rkcommon.
NOTE: The latest Intel oneAPI Rendering Toolkit requires rkcommon 1.8.0.
While in the rk build directory:
- Get rkcommon 1.6.1 sources from the GitHub repository:
- Create a directory to stage the rkcommon build:
-
Build and install the rkcommon:
cmake -DCMAKE_BUILD_TYPE=Release -DCMAKE_INSTALL_PREFIX=../install -DCMAKE_PREFIX_PATH=/Users/${USER}/rk/oneapi-tbb-2021.2.0 ..
cmake --build . -- -j4
cmake --build . --target install
Deployed bin, include, and lib directories contain a test executable, headers, libraries, and CMake references.
- Set an environment variable to point to the rkcommon build:
- Run the rkcommon_test_suite program to test the build:
Build the Libraries
Build Intel® Embree
-
Open a new terminal session. NOTE: For corporate network users: make sure proxy is set up as needed. See Stage Build Directory.
- Go to the build directory:
-
Get the Intel Embree sources from the GitHub repository:
-
Create a directory to stage the build:
-
Build and install the Intel Embree:
NOTE: The building can take up to 10 minutes. Increase the value for -j<num> to number of CPU cores to speed up the build.
To verify your Intel Embree installation, you can run a sample:
- Go to sample directory:
- Set the runtime search PATH environment variable:
- For a sample without GUI, run the bvh_access sample program:
- For a GUI-based sample, run the triangle geometry sample:
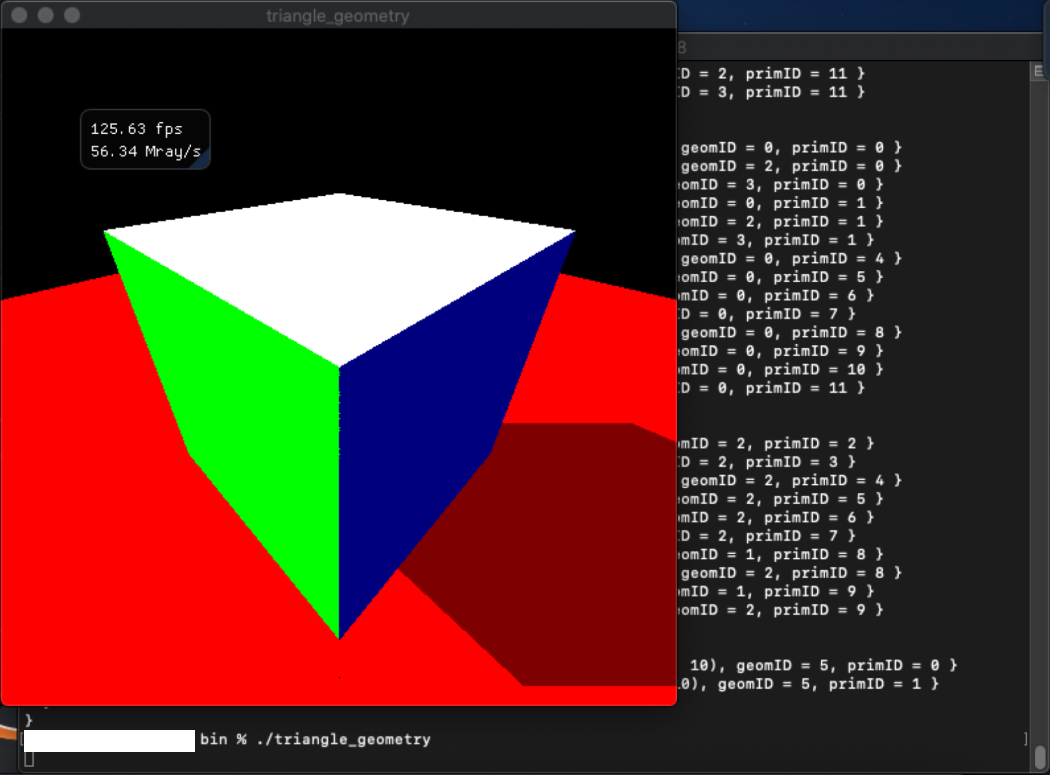
If the Intel Embree is installed successfully, you should see an interactive window rendering a cube. The interactive window has basic click-and-drag viewer functionality to move the virtual camera.
If the cube does not appear within a GUI window, check your GUI and runtime configuration.
Build Intel® Open Volume Kernel Library
- Open a new terminal session with a default shell environment: go to Shell >New Window >New Window With Profile. NOTE: For corporate network users: make sure proxy is set up as needed. See Stage Build Directory.
- Go to the build directory:
-
Get the Intel Open VKL sources from the GitHub repository:
-
Create a directory to stage the build:
-
Set up environment variables for the oneTBB, rkcommon, Intel Embree, and GLFW libraries:
-
Configure Intel the Open VKL to use the library versions that you have built:
-
Build and install the Intel Open VKL:
To verify your Intel Open VKL installation, run a sample:
- Go to the bin directory with samples:
- Set library path to enable dynamic search for component runtime libraries:
- Run Intel Open VKL samples:
-
Hello-world vklTutorial sample:
You should see the application output printed to the command prompt.
-
Hello-world vklTutorialISPC sample with Intel ISPC acceleration:
You should see the application output printed to the command prompt.
-
vklExample sample, which renders results to screen through a graphical interface:
You should see the application output in a new GUI window. Click and drag to move a virtual camera.
-
NOTE: Intel Open VKL uses a CMakeLists.txt file implementing a superbuild from its own superbuild directory. The Intel Open VKL superbuild can automatically download and install validated versions of Intel Open VKL dependencies, such as oneBB, rkcommon, GLFW3, Intel Embree, OpenVDB*. If your work is limited to Intel Open VKL only, consider using the superbuild for Intel Open VKL. Use the following configuration toggles:
cmake ../superbuild -DBUILD_BLOSC=OFF -DBUILD_DEPENDENCIES_ONLY=OFF -DBUILD_EMBREE=OFF -DBUILD_EMBREE_FROM_SOURCE=OFF -DBUILD_GLFW=OFF -DBUILD_ISPC=OFF -DBUILD_JOBS=4 -DBUILD_OPENVDB=OFF -DBUILD_OPENVKL_BENCHMARKS=OFF -DBUILD_OPENVKL_TESTING=OFF -DBUILD_RKCOMMON=OFF -DBUILD_TBB=OFF -DCMAKE_BUILD_TYPE=Release -DCMAKE_INSTALL_PREFIX=/Users/${USER}/rk/openvkl/install-super
To check the toggles with ccmake, run:
Build Intel® Open Image Denoise
- Open a new terminal session with a default shell environment: go to Shell >New Window >New Window With Profile. NOTE: For corporate network users: make sure proxy is set up as needed. See Stage Build Directory.
- Go to the build directory:
-
Get the Intel Open Image Denoise sources from a GitHub repository:
-
Clone the Intel Open Image Denoise sources:
-
Update the mkl-dnn and the weights submodules:
-
Make sure the size of each weight file is several megabytes. If the files are less than 1 KB, check the Git LFS configuration.
-
-
Create a build directory:
-
Add the Intel ISPC directory to the search PATH variable:
-
Configure the build:
-
If you have the libopenimageio, configure the build with the libopenimageio enabled for Intel Open Image Denoise sample applications:
-
If you do not have the libopenimageio:
NOTE: CMake may report OpenImageIO warnings, but the build should continue.
-
-
Build the Intel Open Image Denoise:
To verify your Intel Open Image Denoise build and installation, run a sample:
-
Download an example noisy input file.
-
Download the corresponding albedo file.
- Convert both images to a .pfm format with ImageMagick:
NOTE: -resize option is used to make sure for both noisy input and albedo inputs are of the same size.
- Go to bin directory with samples:
- Set library path to enable dynamic search for component runtime libraries:
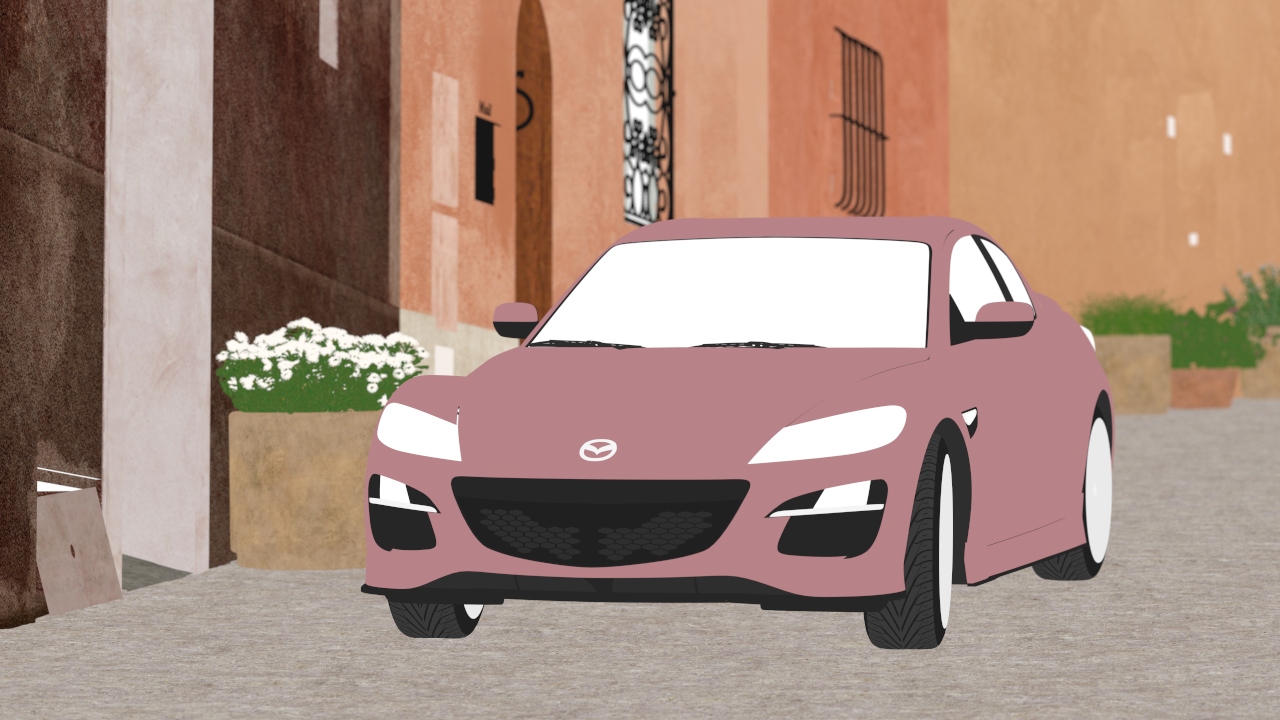
- Run the denoise sample application:
- Convert and view the output image:
NOTE: You can use the OpenImageIO library to load and unload images for Intel Open Image Denoise samples, but it is not required. OpenImageIO dependencies include many imaging and productivity libraries common to other applications. It is recommended to use the system package manager to install OpenImageIO instead of building it.
Build Intel® OSPRay
NOTE: Intel OSPRay requires other Intel oneAPI Rendering Toolkit libraries to be installed.
- Open a new terminal session with a default shell environment: go to Shell >New Window >New Window With Profile. NOTE: For corporate network users: make sure proxy is set up as needed. See Stage Build Directory.
- Go to the build directory:
-
Get the Intel Open VKL sources from a GitHub repository:
-
Create a directory to stage the build:
-
Set up environment variables for library build-time dependencies:
-
Enable Intel Open Image Denoise support for the ospExamples application:
-
Configure the build:
-
Build and install the Intel OSPRay:
To verify your Intel OSPRay installation, run the samples:
- Go to bin directory with samples:
- Set library path to enable dynamic search for component runtime:
- Run the ospTutorial Hello-World sample. This sample does not interface with the GUI environment:
- Review the generated .ppm files with your preferred image viewer. For example, to open the images in the ImageMagick:
Explore the ospExamples Viewer
Run the GUI-based ospExamples sample:
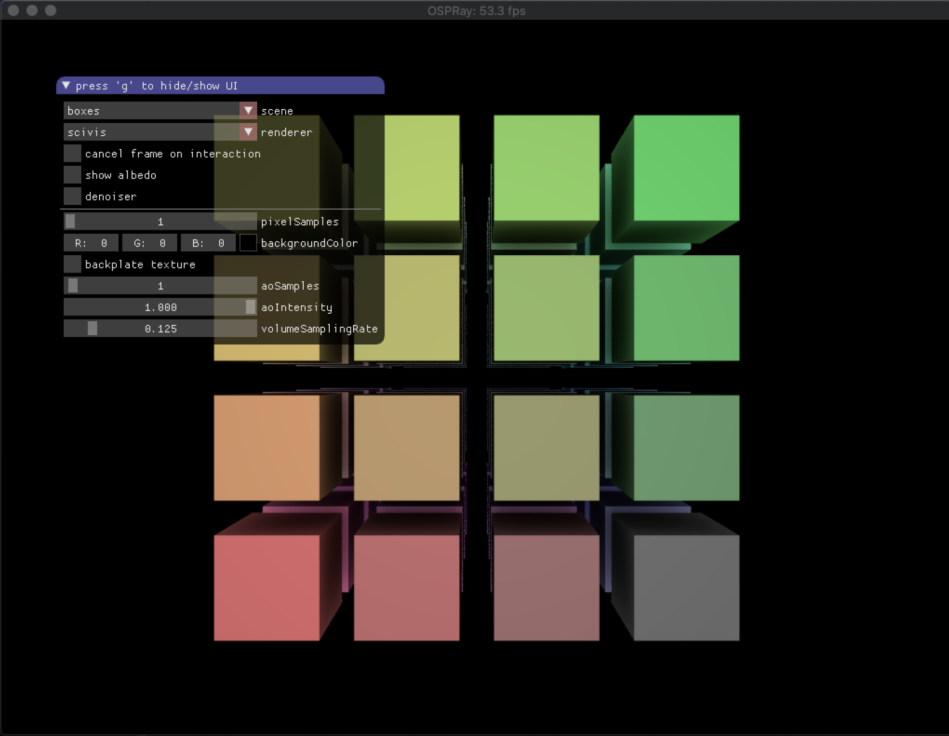
ospExamples combines much of the functionality of the Intel oneAPI Rendering Toolkit libraries into an interactive reference program.
-
Switch between typical geometries using the Scene drop-down.
-
Switch between pathtracer and scivis renderers using the Renderer drop down.
-
Control the virtual camera position by clicking and holding left, middle, or right mouse button and moving the mouse.
-
If the sample finds the Intel Open Image Denoise library, a denoiser pass checkbox is enabled.
The ospExamples reference program source is a great starting point for reviewing how scene geometry passes through Intel OSPRay and ultimately back to the screen.
Build Intel® OSPRay Studio
NOTE: Intel OSPRay Studio requires other Rendering Toolkit libraries to be installed.
- Open a new terminal session with a default shell environment: go to Shell >New Window >New Window With Profile. NOTE: For corporate network users: make sure proxy is set up as needed. See Stage Build Directory.
- Go to the build directory:
- Get the Intel Open VKL sources from a GitHub repository:
- Create a directory to stage the build:
- Set up environment variables for library build-time dependencies:
- Configure the build:
- Build and install the Intel OSPRay Studio:
To verify your Intel OSPRay installation, run the samples:
- Go to bin directory with samples:
- Set library path to enable dynamic search for component runtimes:
- Run the Intel OSPRay Studio in an interactive mode:
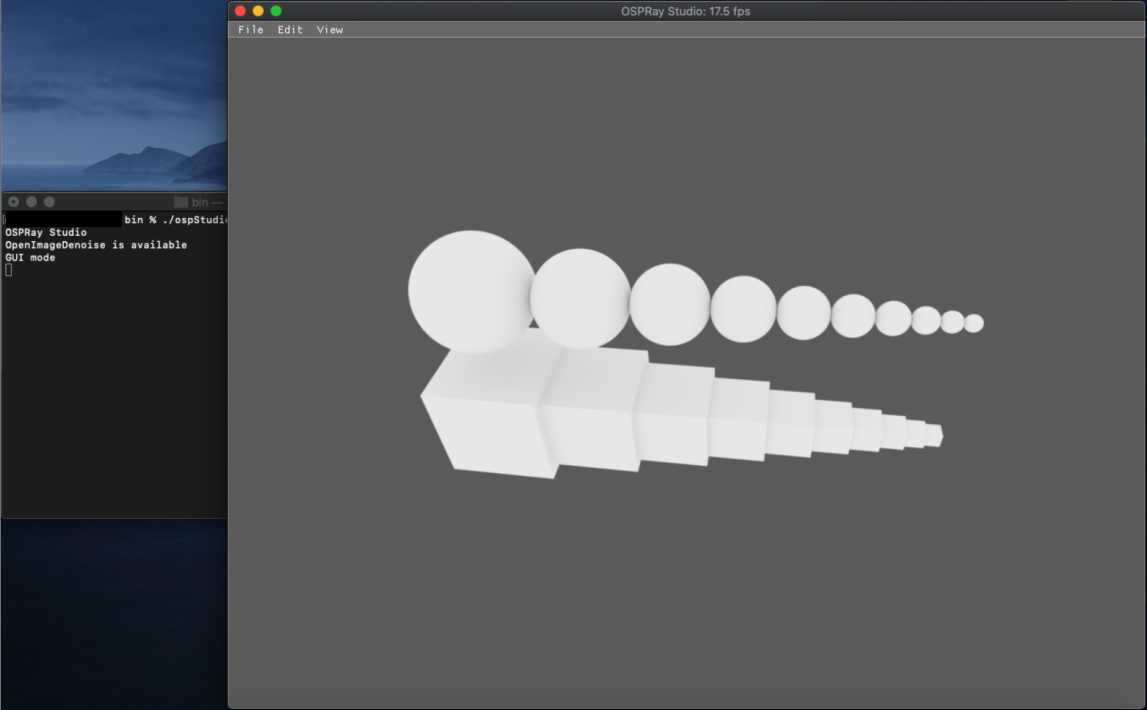
- From the file menu, go to Save >Screenshot to save the output in your preferred format. Review the saved screenshot in an image viewer.
Troubleshooting
If you have deployment concerns or suggestions, address the Intel Rendering Toolkit forum. If you work on a system where you want more non-administrator user flexibility. Please let us know of any experience gaps.
For an out-of-box build and run perspective, see the Intel oneAPI Rendering Toolkit Get Started Guide for instructions on running and building the included programs.
Intel OSPRay or Intel OSPRay Studio Initialization Errors
Such errors might happen if runtimes are not visible to an Intel OSPRay-based application.
Solution: Make sure the Dynamic Linker runtime search path includes all Intel oneAPI Rendering Toolkit components. From a terminal session, set the DYLD_LIBRARY_PATH variable to the paths of dynamic libraries:
When you build and deploy your own applications with Intel oneAPI Rendering Toolkit components, link the libraries to search for what makes the most sense in your environment.
In some cases, Intel OSPRay and Intel OSPRay Studio perform procedural linking, and the encapsulation within Intel oneAPI Rendering Toolkit libraries may hide reported runtime errors. This feature helps to adjust the programs to a system available.
Notices and Disclaimers
Intel technologies may require enabled hardware, software or service activation.
No product or component can be absolutely secure.
Your costs and results may vary.
© Intel Corporation. Intel, the Intel logo, and other Intel marks are trademarks of Intel Corporation or its subsidiaries. Other names and brands may be claimed as the property of others.
No license (express or implied, by estoppel or otherwise) to any intellectual property rights is granted by this document.
The products described may contain design defects or errors known as errata which may cause the product to deviate from published specifications. Current characterized errata are available on request.
Intel disclaims all express and implied warranties, including without limitation, the implied warranties of merchantability, fitness for a particular purpose, and non-infringement, as well as any warranty arising from course of performance, course of dealing, or usage in trade.