This article describes how to build Intel® oneAPI Rendering Toolkit (Render Kit) libraries from sources on Windows* OS. Use this guide to:
- Review sample program source and edit them to understand API usage.
- Get critical performance optimizations of core library performance by way of Intel® Implicit SPMD Program Compiled (Intel® ISPC).
- Quickly integrate Intel oneAPI Rendering Toolkit libraries into your own production projects.
- Integrate typical third-party imaging libraries and interactive windowfile implementing a superbuild from itsing libraries.
NOTE: This walkthrough explains how to build components for a non-administrator system user. Administrator prerequisites are minimal.
IMPORTANT: Skipping sections is not recommended for first-time users.
Prerequisites
| Software prerequisites |
|
| Optional |
|
| Estimated time | Automatic build: 15 - 20 minutes Manual build: 45 - 60 minutes |
Library Source Locations
You can use one of the following ways to get the source code:
- Build the Intel oneAPI Rendering Toolkit using automated scripts:
- Download the Intel® oneAPI Rendering Toolkit distribution from the Intel oneAPI Rendering Toolkit product page as a full-package local installer or online installer. For more information, see Installation Guide for Intel® oneAPI Toolkits.
- After you download and install the Intel oneAPI Rendering Toolkit, you can get the component sources using a CMake script located at <install-dir>/rkutil. By default, <install-dir> is C:\Program Files (x86)\Intel\oneAPI.
- Build the Intel oneAPI Rendering Toolkit manually:
- Check out sources for each component separately from corresponding GitHub* portals.
- If you choose this option, make sure to check out components versioned for the same oneAPI release as they are validated together. See the Release Notes pages for the toolkit component version manifests. Use the tags listed in the GitHub repositories to check out the corresponding component versions.
The component sections below provide instructions for both automatic and manual building options. Both instructions use Intel ISPC, which improves and optimizes core library performance.
Stage a Build Directory
NOTE: This walkthrough uses the Microsoft Visual Studio 2019 developer environment. You can use Microsoft Visual Studio 2017 and other standard C/C++ compilation toolchains instead with CMake* generators.
- From the Start menu, enter x64 Native Tools Command Prompt for VS 2019.
- Create a directory for library sources at a writable location. For example, create a rk folder in the %USERPROFILE% directory. By default, %USERPROFILE% is C:\Users\<username>.
Set Up Dependencies
Install CMake*
CMake 3.12 or higher is required to build the Intel oneAPI Rendering Toolkit libraries. Downoad and install a recent version of CMake.
NOTE: Microsoft Visual Studio 2019 includes CMake 3.17.x. However, using this included CMake for building the libraries may result in errors. You are recommended to use the CMake instead.
To verify that the CMake is installed correctly:
- Open a command prompt.
- Run the following commands to check the CMake version and location:
If the CMake version or location printed is incorrect or the location is not found, add it to the PATH environment variable:
set PATH=<cmake-install-dir>\bin;%PATH%
Install Git* LFS for Intel® Open Image Denoise
Intel® Open Image Denoise uses pre-trained networks in a .tza format at build time. These are large files posted on GitHub* that require Git* Large File Storage (Git* LFS) support to download.
To check if your installation of Git already has the LSF support, run the following commands:
where git
If your Git does not support LFS, install Git with LFS support from Git-lfs.
Optional: BuilGLFW3*
GLFW3* is used as an interfacing layer for OpenGL*-based drawing for reference applications. This article uses GLFW 3.3.2. GLFW3 is not required for the Intel oneAPI Rendering Toolkit libraries, but it is highly recommended because some library samples use it to draw outputs to GUI windows. If you target a headless environment, you can explore the GUI samples as they demonstrate key library API features.
From the rk directory:
- Get the GLFW3 3.3.2 sources from the Git repository:
- Create a directory to stage the build:
- Build the GLFW3 library:
cmake .. -G “Visual Studio 16 2019” -A x64 -DCMAKE_INSTALL_PREFIX=..\install -DBUILD_SHARED_LIBS=ON
cmake --build . --config Release --target INSTALL -- -m
- Add GLFW3 to the glfw3_DIR environment variable:
Optional: Install an Image Viewer
Some sample applications use images in .pfm and .ppm formats. You need an image viewer supporting these formats to open them. This article uses ImageMagick* to stage, convert, and review input and output images.
After downloading and installing the viewer:
- Add it to the PATH environment variable to make the development easier:
- Check that the viewer is configured correctly:
Optional: Build Third-Party Libraries with vcpkg*
This step takes most of time (about 55 minutes). The following libraries are optional, but they can be helpful for understanding and exploring Intel oneAPI Rendering Toolkit libraries. The vcpkg* package with all libraries takes up around 7 GB after installation is complete. OpenImageIO*, OpenVDB*, libjpeg-turbo*, and libpng* are recommended because they extend input and output capabilities of sample programs.
To install the vcpkg libraries:
- Go to the rk directory:
- Set up vcpkg:
- Get the vcpkg sources from Git:
- Install the vcpkg:
- Get the vcpkg sources from Git:
- Install the recommended imaging libraries:
.\vcpkg install openimageio:x64-windows openvdb:x64-windows libjpeg-turbo:x64-windows libpng:x64-windows
Install Python*
Intel® Open Image Denoise requires Python* 2 or 3 x86-64. You can download it from Python.org.
After installing, add Python to the PATH environment variable:
Check that Python is installed and set up correctly:
Build the Libraries Automatically
- Go to the build rk directory:
- Set proxy if it is required for your network connection:
- Get the superbuild files:
- From the installed distribution, copy the rkUtil, which contains provisions that are not core Intel oneAPI Rendering Toolkit libraries:
mkdir superbuild
xcopy /e "<install-dir>\rkutil\latest\superbuild*" superbuild\.
cd superbuild
- From GitHub*repository:
- From the installed distribution, copy the rkUtil, which contains provisions that are not core Intel oneAPI Rendering Toolkit libraries:
-
Turn on sample building. Open a CMakeLists.txt for editing in a preferred text editor and enable one or more of the toggles below for component samples you want to build:
-
Optional: Turn on the OpenImageIO to enable extended texture support for Intel® OSPRay Studio:
-
Save the file.
-
Create a directory to stage the build:
-
Configure the component build:
cmake .. -G ”Visual Studio 16 2019” -A x64
-
Build the libraries:
NOTE: At this step, proxy settings may cause download timeouts.
-
Stage Intel® oneAPI Threading Building Blocks headers in the same folder as built executables:
-
Navigate to the default install directory with the CMake script:
-
Check the interactive GUI sample programs:
-
Intel® OSPRay sample:
-
Intel® Open Volume Kernel Library (Intel® Open VKL) sample:
-
Intel® Embree sample:
- Intel® Open Image Denoise sample:
-
Download test images for Intel Open Image Denoise:
-
Convert the images to the Intel Open Image Denoise-friendly format with ImageMagick:
-
Denoise the test images with the Intel Open Image Denoise sample:
oidnDenoise.exe -ldr mazda_64spp_input.pfm -alb mazda_firsthit_512spp_albedo.pfm -o denoise.pfm
-
Open the result images with ImageMagick:
-
-
At this point, you can edit sources and recompile the sample applications as needed. If you used the Microsoft Visual Studio generator, you can review the sources with the Microsoft Visual Studio GUI from the generated component solution files (.sln).
Build the Libraries Manually
Building the libraries manually is recommended if you want to edit or add modules to one or more Intel oneAPI Rendering Toolkit libraries.
Set Up Dependencies
Configure the Intel® Implicit SPMD Program Compiler
Intel® Implicit SPMD Program Compiler (Intel® ISPC) is a compiler tuned for wide vector instructions available on Intel® architectures. Using the Intel ISPC with the Intel oneAPI Rendering Toolkit is recommended because it can greatly improve performance.
To configure the Intel ISPC for the Intel oneAPI Rendering Toolkit:
- Download the Intel ISPC 1.15.0 binary package from the GitHub repository. You can use the following PowerShell* command:
NOTE: This article uses Intel ISPC 1.15.0.
-
Extract the binary to the rk directory. You can do this from the PowerShell with the following command:
-
Add the Intel ISPC to the PATH environment variable so that component libraries can access it:
-
Check that the Intel ISPC is installed and configured correctly:
Get the Intel® oneAPI Threading Building Blocks
Intel® oneAPI Threading Building Blocks (oneTBB) is used for tasking within the infrastructure for Intel oneAPI Rendering Toolkit libraries. oneTBB is recommended to use for building Intel oneAPI Rendering Toolkit libraries, but there are other build-time configurable options, for example, OpenMP*.
IMPORTANT: Use the same oneTBB library version for all Intel oneAPI Rendering Toolkit components. Recommended version is oneTBB 2021.1 or higher. This guide uses Intel oneAPI Rendering Toolkit with oneTBB 2021.2.0.
- Download and install the package using one of the following:
- Download the package from the GitHub and unpack it.
- Download and unpack the package using PowerShell:
Build rkcommon
rkcommon is a support library used by the Intel oneAPI Rendering Toolkit components. It abstracts common math and vectorization operations, tasking implemented with the oneTBB, operating system input and output, networking, and memory capabilities to use in Intel oneAPI Rendering Toolkit components. rkcommon is not component specific. Intel OSPray and Intel Open VKL can automatically download and build rkcommon. However, when building more than one Intel oneAPI Rendering Toolkit library, you should build the rkcommon manually so that all components reference the same version of rkcommon.
NOTE: The latest Render Kit requires rkcommon 1.8.0.
- Go to the rk build directory:
- Get rkcommon 1.8.0 sources from the Git* repository:
- Create a directory to stage the rkcommon build:
- Stage oneTBB headers:
cmake .. -G"Visual Studio 16 2019" -A x64 -DCMAKE_INSTALL_PREFIX=../install -DRKCOMMON_TBB_ROOT="%USERPROFILE%\rk\oneapi-tbb-2021.2.0"
- Configure, build, and install rkcommon:
cmake --build . --config Release --target INSTALL -- -m
cd ..\install\bin
rkcommon_test_suite.exe
You should see the following output:
===============================================================================
All tests passed (2000399 assertions in 36 test cases)
Deployed bin, include, and lib directories contain a test executable, headers, libraries, and CMake references.
Build the Libraries
Build Intel® Embree
NOTE: Before building Intel Embree, make sure to install the rkcommon and other prerequisites.
- Launch a new shell session. From the Start menu, enter x64 Native Tools Command Prompt for VS 2019.
- Go to the build directory:
- Get the Intel Embree sources from a Git* repository:
- Create a directory to stage the build:
- Build Intel Embree with imaging input and output libraries:
cmake .. -G"Visual Studio 16 2019" -A x64 -DCMAKE_INSTALL_PREFIX=../install -DEMBREE_TBB_ROOT="%USERPROFILE%\rk\oneapi-tbb-2021.2.0" -DCMAKE_PREFIX_PATH=%USERPROFILE%\rk\vcpkg\installed\x64-windows -DPNG_LIBRARIES=%USERPROFILE%\rk\vcpkg\installed\x64-windows\lib\libpng16.lib
cmake --build . --config Release --target INSTALL -- -m
NOTE: The building can take up to 35 minutes. Use the -m option to parallelize the build.
To verify your Intel Embree build and installation, you can run a sample:
- Go to sample directory:
- Make sure the sample applications can access the oneTBB and imaging DLLs. Append the oneTBB .dll directory and imaging .dll directory to your PATH environment variable.
- Run the interactive triangle geometry sample:
Successful launch displays an interactive window rendering a cube. If the cube does not appear within a GUI window, please check your GUI and runtime path configuration.
Build Intel® Open Volume Kernel Library
NOTE: Before building Intel Open VKL, make sure to install the rkcommon and other prerequisites.
- Launch a new shell session. From the Start menu, enter x64 Native Tools Command Prompt for VS 2019.
- Go to the build directory:
-
Get the Intel Open VKL sources from a Git repository:
-
Create a directory to stage the build:
-
Set environment variables for other components that Intel Open VKL required for building:
-
Configure Intel Open VKL build:
cmake .. -G"Visual Studio 16 2019" -A x64 -DCMAKE_INSTALL_PREFIX=..\install
-
Build Intel Open VKL:
cmake --build . --config Release --target INSTALL -- -m
To verify your Intel Open VKL build and installation, you can run a sample:
- Go to bin directory with samples:
- Make sure the Intel Open VKL samples can access component runtime libraries. Add .dll directories for oneTBB, rkcommon, Intel Embree, imaging libraries, and GLFW3 to your PATH environment variable:
- Run Intel Open VKL samples. If you see any runtime errors, make sure the samples can access tbb.dll, rkcommon.dll, and embree3.dll as described in the step above:
-
Hello-world vklTutorial sample:
You should see the application output printed to the command prompt.
-
Hello-world vklTutorialISPC sample with Intel ISPC acceleration:
You should see the application output printed to the command prompt.
-
vklExample sample, which renders results to screen through a graphical interface:
You should see the application output in a new GUI window.
-
NOTE: Intel Open VKL has a CMakeLists.txt file implementing a superbuild from its superbuild directory. The superbuild can automatically download and install validated versions of Intel Open VKL dependencies, such as oneTBB, rkcommon, GLFW3, Intel Embree, OpenVDB*. If you work with Intel Open VKL only, consider using the superbuild.
Build Intel® Open Image Denoise
- Launch a new shell session. From the Start menu, enter x64 Native Tools Command Prompt for VS 2019.
- Ensure Python, Intel ISPC, and Git with LFS are available from the shell:
where python
where ispc
where git
git lfs env
You should see a path to each tool. Otherwise, add the appropriate directories to your PATH environment variable.
- Go to the build directory:
-
Get the Intel Open Image Denoise sources from a Git repository:
-
Clone the Intel Open Image Denoise sources:
-
Update the mkl-dnn and the weights submodules:
-
-
Important: Check that %USERPROFILE%\rk\oidn\weights contains files that are larger than 200 bytes:
These files are pre-trained network required for building the Intel Open Image Denoise, and the size of each file should be at least 5 MM. If the size is smaller that 200 bytes, it means that they are downloaded incorrectly without using git-lfs. You can download the pretrained network files manually:
-
Clone the oidn-weights directory from the repository:
-
Copy the files to the weights directory:
-
-
Create a build directory:
-
Configure the build:
-
If you have libopenimageio, configure the build with libopenimageio enabled for Intel Open Image Denoise sample applications:
set OPENIMAGEIO_ROOT=%USERPROFILE%\rk\vcpkg\installed\x64-windows
NOTE: You can use the OpenImageIO* library to load and unload images for Intel Open Image Denoise samples, but it is not required. OpenImageIO dependencies include many imaging and productivity libraries common to other applications. vcpkg manager is recommended to install OpenImageIO instead of building it.
-
If you do not have libopenimageio:
cmake .. -G”Visual Studio 16 2019” -A x64 -DCMAKE_PREFIX_PATH=%USERPROFILE%\rk\oneapi-tbb-2021.2.0 -DCMAKE_INSTALL_PREFIX=../install -DOIDN_APPS=ON -DOIDN_APPS_OPENIMAGEIO=ON
NOTE: CMake may report OpenImageIO warnings, but the build should continue.
-
-
Build the Intel Open Image Denoise:
cmake --build . --config Release --target INSTALL -- -m
To verify your Intel Open Image Denoise build and installation, run a sample:
- Go to the bin directory with samples:
- Download an example noisy input file. You can use PowerShell:
- Download the corresponding albedo file. You can use PowerShell:
- Convert both images to a .pfm format with ImageMagick:
NOTE: Use the -resize option to make sure that the noisy input and albedo input images are of the same size.
- Set path for runtime DLL libraries:
- Run the oidnDenoise sample application:
- Open the resulting images:
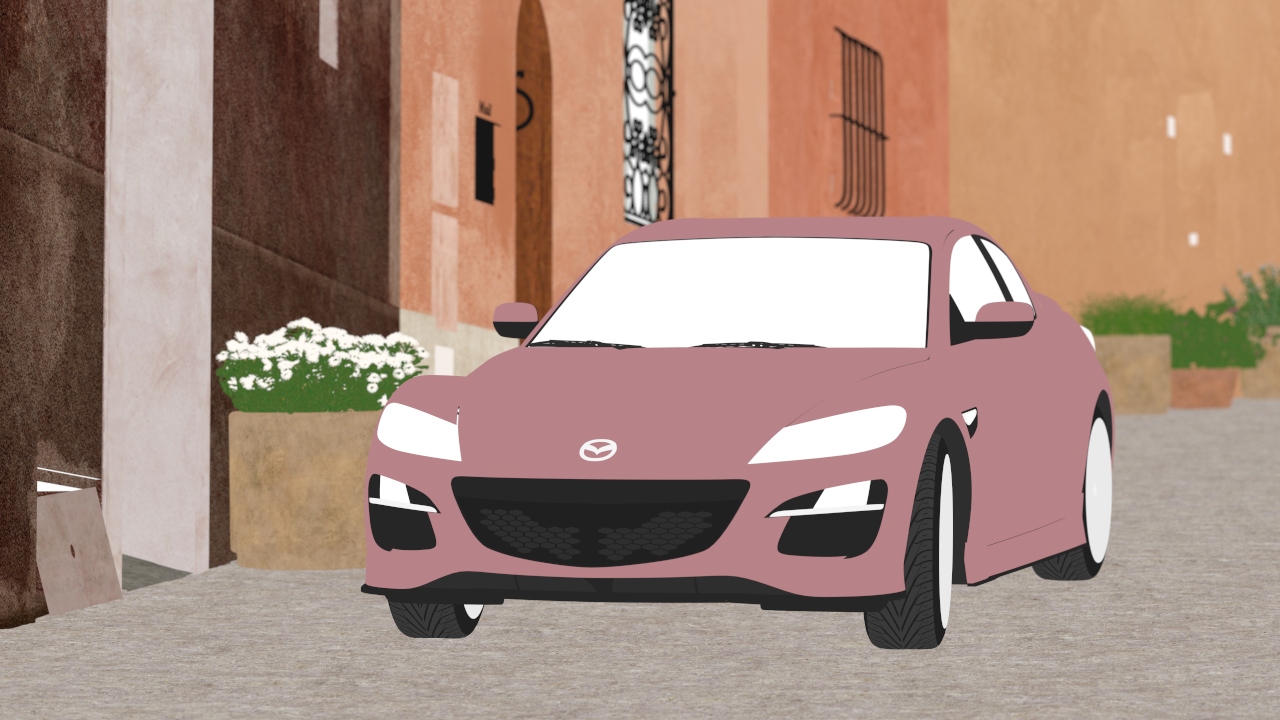
The sample outputs a denoised ray-traced image. Notice the reduced noise underneath the vehicle when using the sample vehicle image as an input.
Build Intel® OSPRay
NOTE: Intel OSPRay requires other Intel oneAPI Rendering Toolkit libraries to be built first.
- Launch a new shell session. From the Start menu, enter x64 Native Tools Command Prompt for VS 2019.
- Go to the build directory:
-
Get the Intel OSPRay sources from a Git repository:
-
Create a new directory to stage the build:
-
Set up environment variables for library build-time dependencies:
- Optional: To enable Intel Open Image Denoise support in Intel OSPRay samples:
-
Configure the build:
cmake .. -G"Visual Studio 16 2019" -A x64 -DCMAKE_PREFIX_PATH=%USERPROFILE%\rk\oneapi-tbb-2021.2.0 -DCMAKE_INSTALL_PREFIX=../install -DOSPRAY_MODULE_DENOISER=ON
NOTE: DOSPRAY_MODULE_DENOISER=ON enables denoiser control in the ospExamples application. You can omit this build-time control if you do not use the denoiser.
-
Optional: If you want to extend Intel OSPRay with additional modules or other custom module features, run cmake-gui.exe and reconfigure:
cmake-gui.exe .
-
Build and install the Intel OSPRay:
cmake --build . --config Release --target INSTALL -- -m
To verify your Intel OSPRay build and installation, run the samples:
- Go to bin directory with samples:
- Set the PATH variable to enable dynamic search for component runtimes:
- Run the ospTutorial Hello-World sample. This sample does not interface with the GUI environment:
- Review the generated .ppm files with your preferred image viewer. For example, to open the images in the ImageMagick:
Run the ospExamples viewer:
ospExamples combines much of the functionality of Intel oneAPI Rendering Toolkit libraries into an interactive reference program.
- Switch between typical geometries using the Scene drop-down.
- Switch between pathtracer and scivis renderers using the Renderer drop down.
- Control the virtual camera position by clicking and holding left, middle, or right mouse button and moving the mouse.
The ospExamples reference program source is a great starting point for reviewing how scene geometry passes through Intel OSPRay and ultimately back to the interactive window.
Build Intel® OSPRay Studio
NOTE: Intel® OSPRay Studio requires Intel OSPRay.
- Launch a new shell session. From the Start menu, enter x64 Native Tools Command Prompt for VS 2019.
- Go to the build directory:
- Get the Intel OSPRay sources from a Git repository:
- Create a directory to stage the build:
- Set up environment variables for library build-time dependencies:
- Optional: Enable Intel Open Image Denoise support in Intel OSPRay samples:
- Configure the build:
- Optional: If you want to extend the Intel OSPRay with additional modules or other custom module features, run cmake-gui.exe and reconfigure:
To verify your Intel OSPRay build and installation, run the samples:
- Go to the bin directory with samples:
- Run the ospStudio:
Notices and Disclaimers
Intel technologies may require enabled hardware, software or service activation.
No product or component can be absolutely secure.
Your costs and results may vary.
© Intel Corporation. Intel, the Intel logo, and other Intel marks are trademarks of Intel Corporation or its subsidiaries. Other names and brands may be claimed as the property of others.
No license (express or implied, by estoppel or otherwise) to any intellectual property rights is granted by this document.
The products described may contain design defects or errors known as errata which may cause the product to deviate from published specifications. Current characterized errata are available on request.
Intel disclaims all express and implied warranties, including without limitation, the implied warranties of merchantability, fitness for a particular purpose, and non-infringement, as well as any warranty arising from course of performance, course of dealing, or usage in trade.