Introduction
The Intel® Quark™ Microcontroller Developer Kit D2000 consists of a small form-factor board which contains among other things flash storage, a 6-axis compass/accelerometer with temperature sensor, an Arduino-Uno compatible shield's interface and a booster-pack compatible shield's interface. A USB connection enables programming and debugging (JTAG) of the development platform.
The software tool chain for the development platform is provided by Intel® System Studio for Microcontrollers, which is an Eclipse*-based IDE for developing, optimizing and debugging applications. Features include the Intel compiler for Intel® Quark™ microcontroller D2000, GNU compiler collection (GCC), Intel® Integrated Performance Primitives for microcontrollers, the board support package for the Intel® Quark™ Microcontroller Software Interface (Intel® QMSI) and sample applications. Energy Analysis is used to measure system or software behaviors that influence the power consumption of the microcontroller.
Unpack the box with the Intel Quark Microcontroller Developer Kit D2000, and finish the following three steps to get ready to launch your development environment and work with your Intel Quark D2000 Developer Board.
- Step 1: Select Your Operating System
- Step 2: Prepare Your Hardware
- Step 3: Download, Install, and Launch the Development Environment
- Quick Start with Intel System Studio for Microcontrollers
- Next Steps
Step 1: Select Your Operating System
Select the Operating System, on which you plan to develop:
- Linux* (64bit: Ubuntu* 14.04 LTS)
- Windows* (64bit: Versions 7, 8.1)
Step 2: Prepare Your Hardware
Collect your necessary components and connect your board to your PC.

- Make sure you have everything you need
- D2000 microcontroller board
- Micro USB to USB cable
- Connect your D2000 board to your PC via USB
- Connect USB end to your PC
- Connect Micro USB to D2000 board
- The green LED confirms connection
Step 3: Download, Install, and Launch the Development Environment
- Download Intel System Studio for Microcontrollers development environment for D2000 from the Intel Registration Center page for Windows or Linux.
Click the Register and Download button

to open up the registration page where you will be required to enter a valid email address and select the country where you reside.Note Why do I need to register? There are international regulations that require Intel to register users who download an application of this nature. Registering will also allow Intel to keep you up to date on the latest Intel System Studio for Microcontroller version releases.
Click the Submit button to download the Intel System Studio for Microcontrollers development environment for D2000.
- Install Intel System Studio for Microcontrollers:
Make sure that your D2000 board is still connected to your PC and then double-click the installer to run it.
On Windows*:
w_cembd_mv_p_1.0.y.xxx.exeOn Linux*:
- Decompress the package
tar -xvf ./l_cembd_mv_p_1.0.y.xxx.tgz
- Choose to install via GUI (option "1") or command line (option "2"):
- Start the installer in GUI mode:
./l_cembd_mv_p_1.0.y.xxx/install_GUI.sh
- Alternatively force the installer to install in text mode:
./l_cembd_mv_p_1.0.y.xxx/install.sh -cli-mode.
- Start the installer in GUI mode:
The default installation paths, defined as ISSM_ROOT are:
Windows:
- C:\IntelSWTools\ISSM_2016.1.0XX
Linux:
- For sudo/root install:
/opt/intel/issm_2016.1.0XX
- For user install:
~/intel/issm_2016.1.0XX
- Decompress the package
- Launch Intel System Studio for Microcontrollers and follow the quick start instructions. The quick start guide is in the Intel System Studio for Microcontrollers application:
Within Intel System Studio for Microcontrollers you can find the blinking light sample code (led_blink), other sample applications and create your own programs.
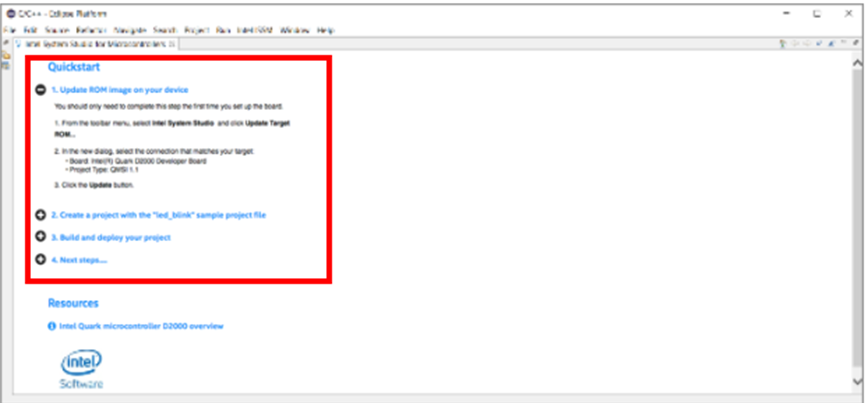
Quick Start with Intel® System Studio for Microcontrollers
Once you have launched the Intel System Studio for Microcontrollers, you can start to explore your kit quickly by following steps.
- Update ROM Image On Your Device
- Create a Project with the "led_blink" Sample Project File
- Build and Deploy Your Project
Update ROM Image On Your Device
You should only need to complete this step the first time you set up the board.
- From the Eclipse* toolbar menu, select Intel ISSM > Update target ROM…
- In the new dialog, select the connection that matches your target:
- Board: Select your connected board Project
- Type: QMSI 1.1 Click the Update button.
- Click the Update button:

Create a Project with the led_blink Sample Project File
From the Eclipse* File menu, select New and then select Intel(R) Project.
- From the drop-down File menu, select New > Intel(R) Project or from the Intel ISSM drop-down menu, select New Intel(R) Project
- Follow the setup wizard to create your project:
- Developer board: Select your connected board
- Project type: Intel® QMSI (1.1)
- Tool chain: USB-Onboard
- Project example: led_blink

- Click Finish
Build and Deploy Your Project
- To build the project, select your Build configuration from the drop-down list of the "hammer" icon (Ctrl+B)
Debug: create symbols for enhanced debugging (default)
Release: optimize your code for deployment
- Optionally, you may review your build process, locate your binaries, and check the statistics of your application in target memory

- To debug and flash (if selected) your target, just click the "bug" icon
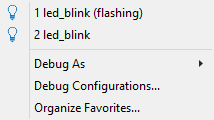
Project_Name (flashing): rebuilds your project, flashes the binary to the target, and runs to main function of your application to start debugging (slow startup time)Project_Name: resets target, reuses flashed image target, and runs to main function of your application to restart debugging (fast startup time but the binary of your target and your host PC have to be the same)
- To run the project, just click the "play" icon
- To view Serial Output:
- Open the launch Terminal with the "monitor" icon (Ctl+Atl+T)
- Configure the serial connection (defaults): Select port: Active port should display.
Note The port will vary depending on the serial hardware used and there may be more than one listed.
To to view your port status on Linux*, use the 'dmesg' command
To view the Ports on Windows*, open Device Manager (COM & LPT)

Next Steps
You are now ready to start prototyping with the Developer Board.
Refer to the following documentation and resources for more information:
Documentation and Resources
- Refer to Intel® Quark™ Microcontroller D2000 product web page for basic information on Intel® Quark™ 2000 Microcontrollers.
- Refer to Intel® Quark™ SE Microcontroller product web page for basic information on Atlas platforms.
- Read Intel® System Studio for Microcontrollers User and Reference Guide for information how to use the tool set components in Eclipse and from the command line.
- Read Intel® System Studio for Microcontrollers Release Notes for information on what's new and last minute changes. You will find this document in the Intel Registration Center page for Windows and Linux.
- Intel® Quark™ Microcontroller Software Interface.
- Reference Manual for Intel Integrated Performance Primitives for microcontrollers 1.0 documents the first release of the Intel® Integrated Performance Primitives (Intel® IPP) for microcontrollers library.