Introduction
As fans of escape-room games, we understand the real-world limitations they pose. Venues typically have a limited amount of physical room and can accommodate only a few scenarios at a time. These scenarios also have an inherent limitation: Once experienced, players have little incentive to replay them. To stay relevant to their audience, Escape Room must be constantly updated; a process that takes time to design and even longer to build.
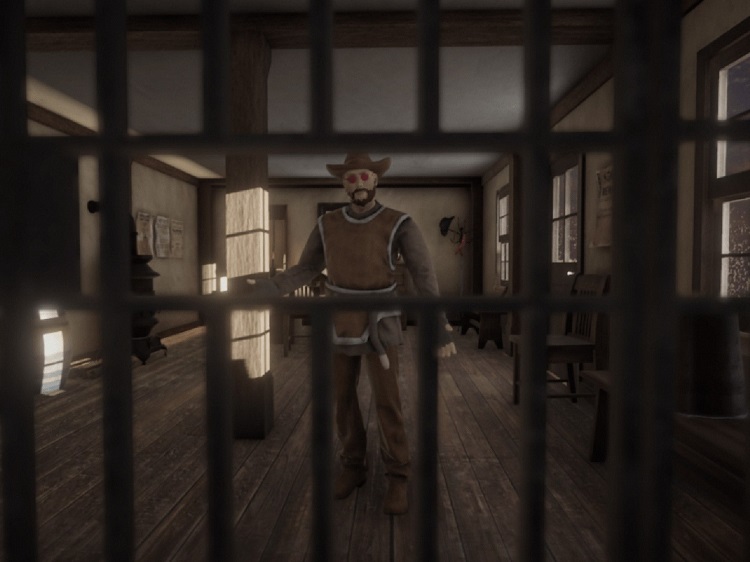
Figure 1. Imprisoned game scene, including the corrupt sheriff.
We believe virtual reality (VR) can mitigate at least some of these limitations. By building Escape Room scenarios in VR, physical space is less of an issue. Branching story paths can be created to improve replayability, and downtime during updates is reduced.
But, as we discovered, while VR can solve some problems, it comes with a few quirks.
Building the Game World
When we set out to develop our VR Escape Room, we decided to not spend too much time on creating assets; instead we focused our efforts on delivering the best possible user experience. We began by searching the Unity* software Asset Store for suitable building blocks, focusing on theme consistency and realistic graphics. We found a Wild West-style sheriff’s office asset1 that provided a sturdy foundation for our VR game.
However, while it was a valuable asset for our purposes, the office asset came with its share of bugs. To modify it for our uses, we had to remap textures for parts of the building and stitch the vertices of almost all meshes to ensure good quality when baking lights2.
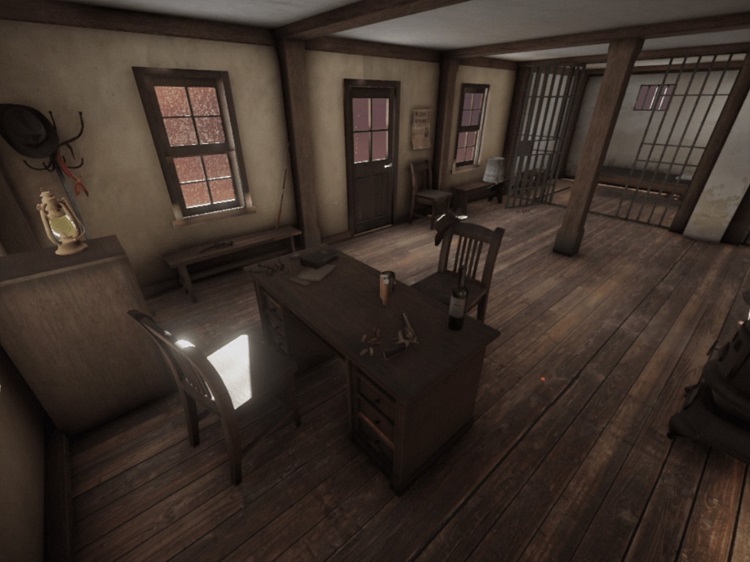
Figure 2. Sheriff’s office overview.
Setting up VR in Unity* software
Next on our agenda was VR headset integration. We opted for the Steam* VR Unity software 3D plugin3, which provides a comprehensive framework for VR development, supports OpenVR, and works seamlessly with Oculus Rift* and HTC Vive*.
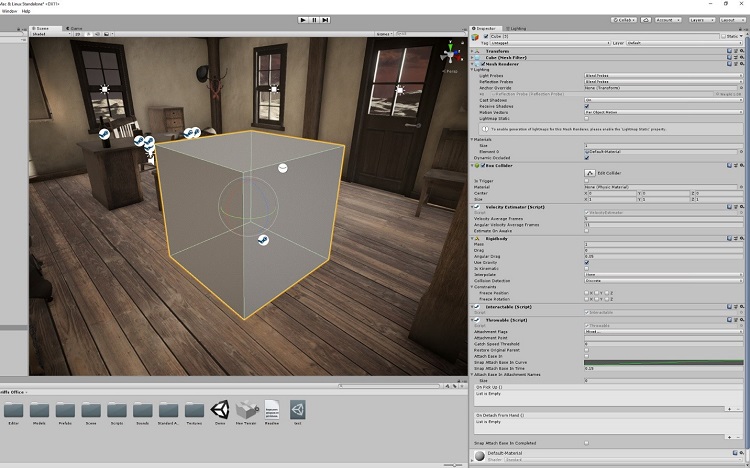
Figure 3. Setting up a box collider in Unity* software.
Moving from A to B in VR: Walk, Float, or Teleport?
While walking in VR is the most natural way of getting around, our development setup had limited physical space; an issue that most VR titles face. We therefore had to choose between using a joystick or using teleportation as the primary interface between the player and the Escape Room.
The joystick movement—a staple of first-person shooter (FPS) games—is easy to learn. However, one disadvantage is motion sickness4, which is an issue for many VR titles. Player nausea was pronounced in our case because the confined virtual space seemed to exaggerate the symptoms; this led us to choose teleportation. While teleporting can affect immersion, it remains a reliable means of exploring the game world, with greatly reduced nausea.
Interacting with Objects: Kinematic versus Non-Kinematic
The two established methods for interacting with objects in VR are:
- Kinematic, in which an object held by the player has no physical constraints in the virtual world. The kinematic object can pass through static obstacles such as walls, and knocks back dynamic objects regardless of their size or mass.
- Non-kinematic, in which the player’s grip becomes a pivot joint that extends to the held object. The non-kinematic object follows the hand’s movement but it cannot pass through static obstacles, and knocks back other objects only when its mass and velocity allow.
SteamVR uses kinematic constraints when interacting with objects. This compromises immersion, but allows the player to more accurately manipulate objects and reduces the occurrence of physics bugs. It is, therefore, the approach for which we opted.
Next, we set up an interactable object in SteamVR.
To pick up, drop, or throw an object in SteamVR, you need to add scripts to it. We used the Throwable script, which includes the rigidbody, interactable, and velocity estimator variables. We ensured we had at least one kind of convex collider, and that the mass was set within the rigidbody script to be consistent with the object type.
However, our gas lamp object (see Figure 4) is a hybrid. The handle is kinematic, while the lamp itself is non-kinematic. The handle has the normal SteamVR components attached. It also has a hinge joint connected to the body of the lamp, with the rotation axis between the two ears of the handle. The lamp itself is a rigidbody with a Capsule Collider and cannot be picked up directly by the player. However, when the handle is picked up it becomes kinematic, and the hinge joint allows the lamp to swing freely as the player moves with it in hand.
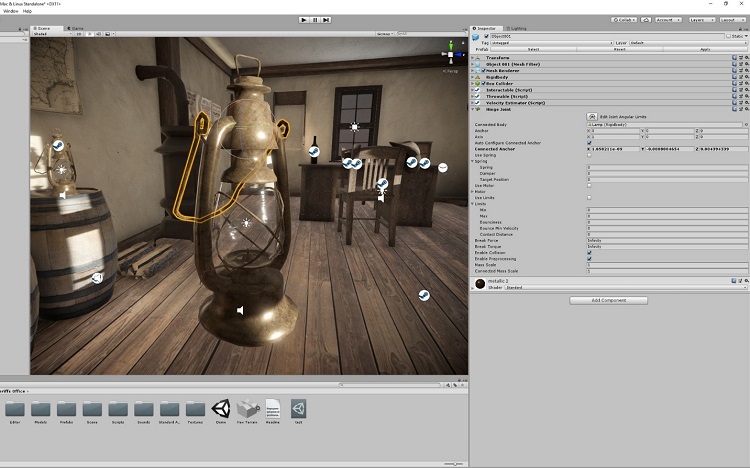
Figure 4. Gas lamp object in Unity* software.
For developers who wish to experiment with a non-kinematic approach, we highly recommend the NewtonVR Unity software asset by Tomorrow Today Labs5. This solid framework, built on Steam and Oculus VR platforms, allows picking up, throwing, and other object manipulations, while taking advantage of PhysX. This means that held objects cannot pass through each other or through walls. A basic collision sound package is included in the asset.
Creating Puzzles
Puzzles are the heart of all escape-room experiences. In ours, the backstory positions the player as a victim of wrongful imprisonment by a Crooked Sheriff. This leads to the player’s first challenge: escaping a locked cell.
First, the player must discover a file beneath a food ration inside the cell. The file can be used on a weakened and deformed bar, until the bar breaks and falls. The key to the cell hangs on a nail on an adjacent wall, so the player must reach out, grab the key, and use it to escape.
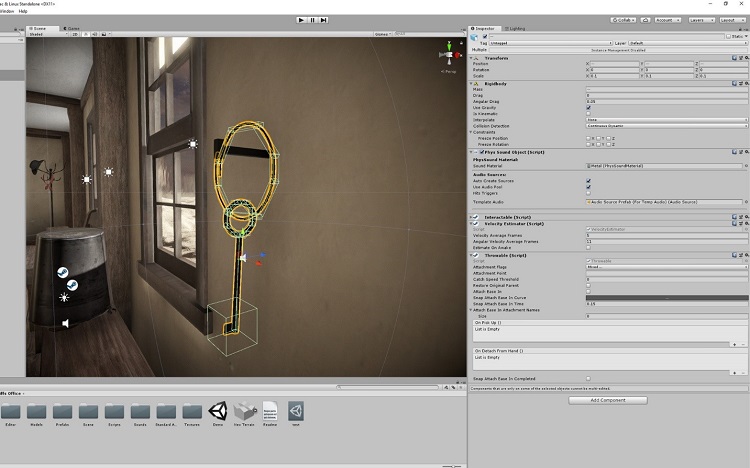
Figure 5. Key ring and key object in Unity* software.
Performance limitations mean Unity software does not allow non-convex colliders for physics computations. This presented a problem for our key ring and key. To maintain a physical interaction between the two, we could not rely on the default non-convex mesh collider. Instead, we created box colliders that would approximate the shape of the rings and make the interaction function seamlessly.
No Wild West adventure is complete without a safe, so we put one inside a second cell. The safe is the game’s end goal, as it contains evidence of the sheriff’s ill-gotten gains. The player must get his hands on these documents to put an end to the villain’s dastardly deeds.
This creates an intriguing twist: To win, the player who first escaped from a cell must then break into one.
An interesting element is the spinner lock on the safe. A circular drive component—part of SteamVR—allowed us to mark objects as rotatable by the player. For an object simply to rotate when touched by the player, however, was insufficient; we needed a script that would make the rotation correspond to the markings on the lock’s dial. For our purposes, the following code worked fine:
float _zero = 180f;
float _mid = 0f;
float _gap = 360f / 100f;
float _midPointNumber = 50;

if (transform.rotation.eulerAngles.z > _zero || transform.rotation.eulerAngles.z<_mid)
rotationValue = Mathf.RoundToInt(-((_zero - transform.rotation.eulerAngles.z) / _gap));
else
rotationValue = Mathf.RoundToInt(_midPointNumber + Mathf.Abs(_midPointNumber - (_zero - transform.rotation.eulerAngles.z) / _gap));
The lock’s dial has 100 positions. Zero is at six o’clock and the midpoint number at 12 o’clock reads 50. To map this, we specified zero as a rotation of 180 degrees. The dial is a full circle, so the midpoint is at zero degrees and the gap between each number is 3.6 degrees. This code maps the rotation to a number on the dial, based on the quadrant into which the dial is turned.
Adding Challenges
To access the cell containing the safe, we wanted a greater challenge than simply keys and dials. So, we created a contraption with five levers of different colors, with each lever corresponding to a pedestal above it. We also scattered five gas lamps inside the level. The player must locate all five lamps, place them on the correct pedestals, and turn them on (see Figure 6). To do so, a lamp’s controlling lever must be moved from its initial position—whether up or down—to the opposite position. The catch is that, when moved, a lever toggles its neighbors to switch their positions. When the player succeeds in lighting all five lamps, the door to the cell containing the safe opens.
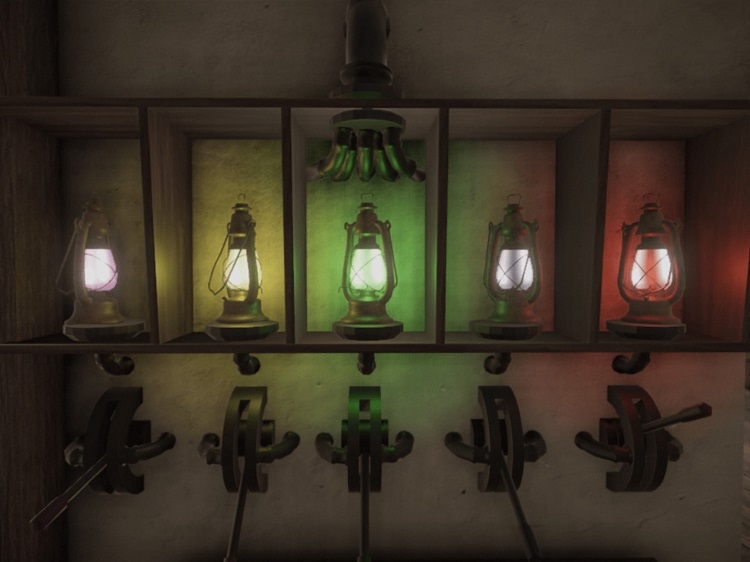
Figure 6. Lamps puzzle.
Each lever has a circular drive attached and we wanted haptic feedback when they were moved. Fortunately, SteamVR offers this as a component: haptic rack. You can add it to your objects, configure its values to achieve the desired feel, and assign the same linear mapping component used for your circular or linear drive.
With the haptic effect in place we sought a grinding noise to match it, and found an excellent, long-running sound of scraping metal on freesound.org. In the VR game, the sound is triggered by movement of the levers. (Experience the effect.)
Addressing Issues
In SteamVR, by default, your head acts as a kinematic object; that is, it passes through walls and objects. We realized that, despite limiting teleportation to unlocked areas, nothing prevented the player from simply walking out of a cell. The solution was to fade the view to black when the player’s head is inside an object. We added a trigger spherecollider on the camera and a script that adds and removes triggers on player entrances and exits.
To prevent the player from poking his head beyond the wall or object collider, we created trigger colliders to fill the volumes of the areas not unlocked by the player. These are moved or removed as the checkpoints are unlocked. We already had a system that unlocked teleportation areas based on progression, so adding the colliders was straightforward.
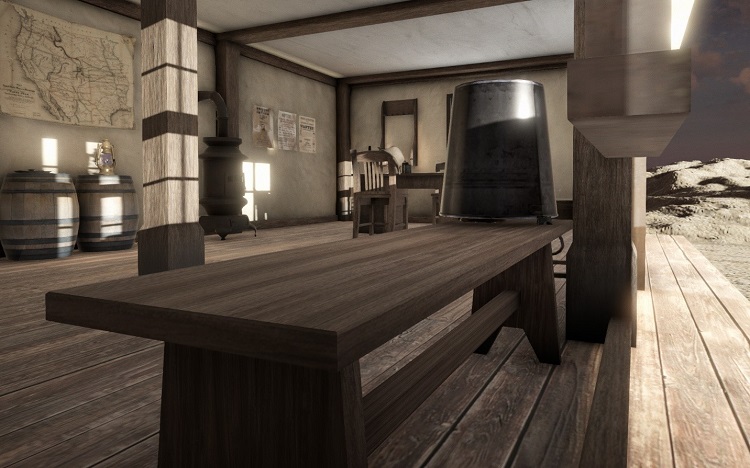
Figure 7. Passing through walls.
To enhance immersion, we added sounds to all objects that collide with one another. We used PhysSound6, which is a simple asset to set up, and includes scraping sounds. (Experience the effect.)
Conclusion
We see VR escape-room experiences less as a replacement for the physical equivalent and more as a complement. A hybrid of both creates a fascinating experience.
Building a VR experience from the ground up in Unity software 3D provided an opportunity to learn a great deal. We hope the knowledge and tips we’ve shared from the development of Crooked Sheriff help you create awesome VR projects.
Please enjoy our commentated playthrough of Crooked Sheriff. Thank you!
References
- https://assetstore.unity.com/packages/3d/props/interior/sheriff-s-office-67625
- https://docs.unity3d.com/Manual/LightMode-Baked.html
- https://assetstore.unity.com/packages/templates/systems/steamvr-plugin-32647
- https://en.wikipedia.org/wiki/Virtual_reality_sickness
- https://assetstore.unity.com/packages/tools/newtonvr-75712
- https://assetstore.unity.com/packages/tools/audio/physsound-37650
- https://www.youtube.com/watch?v=GfCvFm-1IZw
About the Developers
Andrei and Silviu are members of the Intel® Software Innovator Program. Their areas of expertise are Software Development, Artificial Intelligence, Game Development and Virtual Reality. Their work includes forward-thinking projects such as Drill Sergeant Simulator, HELIOS or ASTRO.