Summary
This article describes two different methods to locate and zip the Intel® DSA folders.
Description
The files and logs in these Intel® DSA folders provide information on all the changes that happen during updates, scans and initialization of the Intel® DSA. If experiencing issues with scanning of Intel® DSA, our developers will need these folders to help root cause and resolve the issue. Either of these methods will help you locate the folders and explains how best to zip them for sending to Intel for helping to root cause issues. The zip file can then be provided to an Intel agent or uploaded to an Intel Community post.
Resolution
Method #1:
- Open Intel® DSA on the browser of your preference.
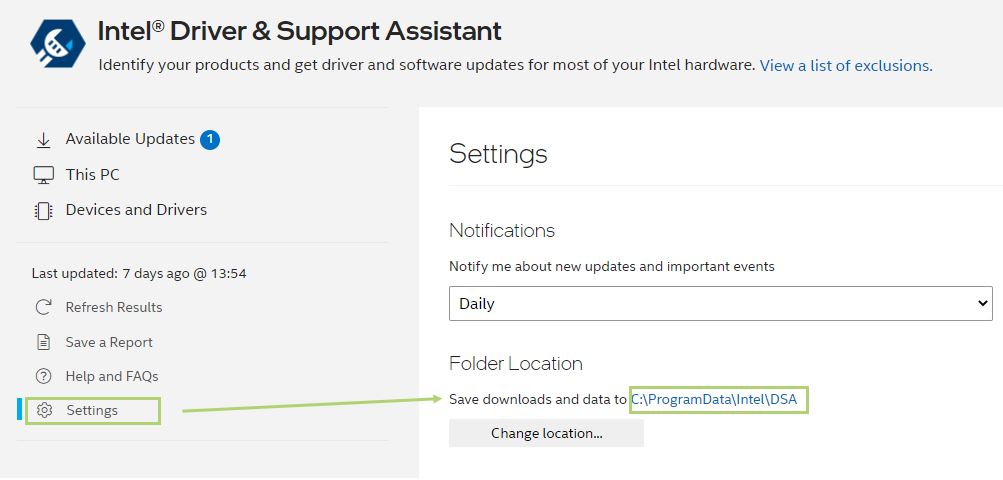
- Go to Settings.
- Find the Folder Location field.
- Click on the hyperlink of the location.
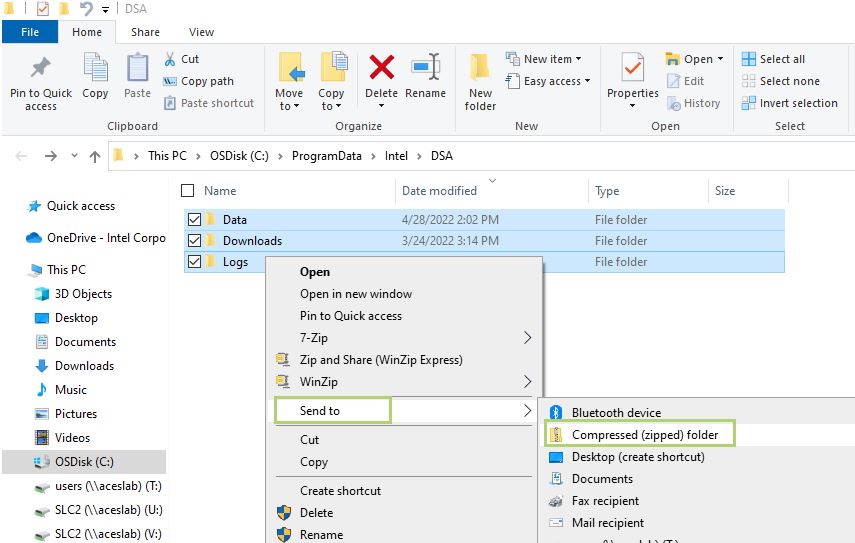
- Select the three folders shown and then, right click.
- Click on Send to.
- Click on Compressed (zipped) folder.
- Save it in the desired location.
Method #2:
- Go to C:/ProgramData/Intel/DSA
- Sometimes the ProgramData folder is a hidden folder, so if you cannot see the folder, change the settings to show all hidden files.
- For Win7: In File Manager, choose Organize, folder & search options, click View tab, under Advanced Settings and make sure the radial button is marked for Show hidden files, folders and drivers.
- For Win8, 10 & 11: In File Explorer, choose the View tab at the top of the page and check the box for hidden items to be shown.
- Sometimes the ProgramData folder is a hidden folder, so if you cannot see the folder, change the settings to show all hidden files.
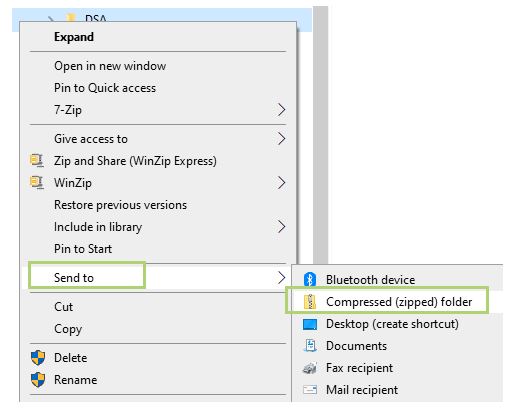
- Right click on the DSA folder.
- Click on Send to.
- Click on Compressed (zipped) folder.
- Save it in the desire location.