Intel® Virtual RAID on CPU (Intel® VROC) Graphical User Interface (GUI) Components
Content Type: Product Information & Documentation | Article ID: 000100535 | Last Reviewed: 04/30/2025
Environment
Intel® VROC for Windows*
The Intel® VROC GUI application allows a full integrated management of the drives installed in a Windows* system. The Intel® VROC GUI includes the following components.
Intel® VROC GUI
With the release of Intel® VROC 8.0, the GUI application was also updated. The information mentioned here refers to this new Intel® VROC GUI available in Intel® VROC 8.0 or higher. If you are using the new Intel® VROC GUI (Intel® VROC 8.0 or higher), you can find more information in the Intel® Virtual RAID on CPU (Intel® VROC) Graphical User Interface (GUI) Getting Started Guide. If you are still using the legacy Intel® VROC GUI (Intel® VROC 7.x or lower), refer to your system vendor documentation for additional information.
Home Page
The Home page is divided into several sections:
Navigation: Clicking on the navigation arrows in the top left corner of the app window allows navigation between visited pages at all times regardless of current opened page. Also, after opening any of the Controller, Array or Volume pages, a breadcrumb path is displayed allowing the user to navigate directly between those pages.
Status Bar: The application displays the overall health and status of the system. This bar showcases one of three possible states:
System is functioning normally.
Warnings of potential problems detected.
Failures in a RAID volume.
Summary Pane: This area contains a list of RAID controllers detected by the driver. Clicking on any of the controller fields moves the user to a page containing detailed information about the selected controller.
Side Menu: This area contains links that navigate to other pages and menus. Clicking the hamburger button expands the panel.
Home Page
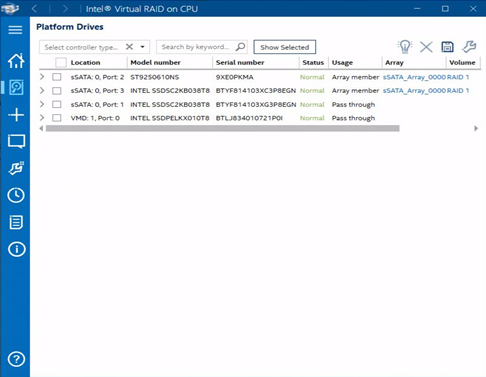
Drives Page
This page contains a detailed list of all drives detected on the platform. The user can find here three areas of interest:
Filters Section: In here, the user can search and filter the extensive list of drives that are present in the system. This pane contains three elements:
Controller Type Selector: This is a drop-down list which allows for filtering the drives table by the controller type, by selecting one of the available options from the list.
Keyword Search Bar: A standard text search bar that allows filtering by typed keyword. The field is updated after entering at least three characters.
Show Selected/Show All Button: A button that toggles the drives table to show only the drives selected with the checkbox.
Action Buttons: There are four buttons that allow the user to perform specific tasks on drives selected from the drives list, except for the Export to CSV option,which is always available.
Activate LED Option: After clicking this button, the selected drives will start to flash their built-in LEDs, which enables to physically locate them easier within the system. The LED will blink for about 12 seconds.
Eject Drive Option: This button performs the action Eject Drive, which removes a selected drive permanently from the operating system. This action requires that only one drive under the Intel® VMD controller is selected. After clicking the button, a prompt will appear requesting for additional confirmation that this action was deliberate. Ejecting the drive will also activate the LED, to allow prompt removal of hardware. The Eject Drive option is only available for NVMe* drives and may not be operational with SATA drives.
Export to CSV Option: This button allows the user to export all the detailed information of all the drives to a .csv file. After clicking the button, a new file browse window opens, which allows selecting where to save the file.
More Actions Option: This button opens a side panel which contains six more buttons that trigger additional actions on a selected drive. If prerequisites for an action on any of the drives selected with the checkbox are not met, the button for that action will be unavailable.
Drives Table: It is a standard table which allows sorting and filtering.
Clicking on any header of a column sorts the table ascending or descending based on the content of the column.
Every record has an arrow on the left side which allows to expand a pane with additional information about the drive.
Each record has a checkbox which allows for selecting drives from the table. Right-clicking anywhere inside the table enables editing what data and in what order it should be displayed in the table. Those settings will be preserved between runs of the app.
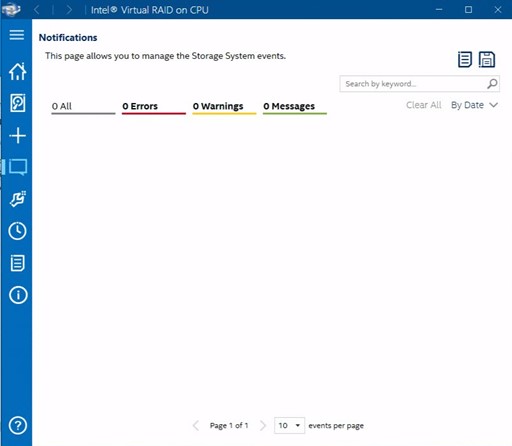
If any issues such as errors or warnings with the RAID volumes occur, all notifications will be present on this page, indicating what is wrong and which RAID volumes are affected.
Notifications Page
Preferences Page
This page allows the user to have the ability to turn notifications on or off in regard to the affected RAID volumes managed by Intel® VROC.
Preferences Page
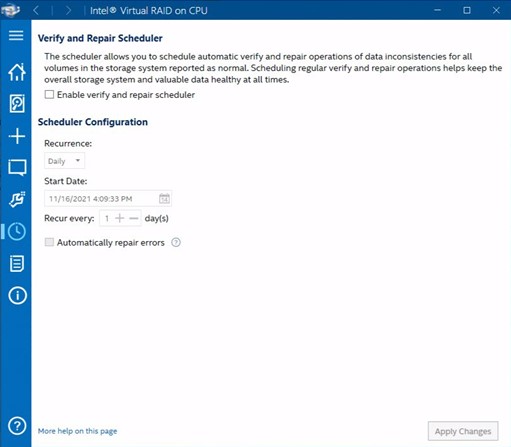
Scheduler Page
From this page, the user can set up the scheduler feature which allows to schedule automatic verify and repair operations.
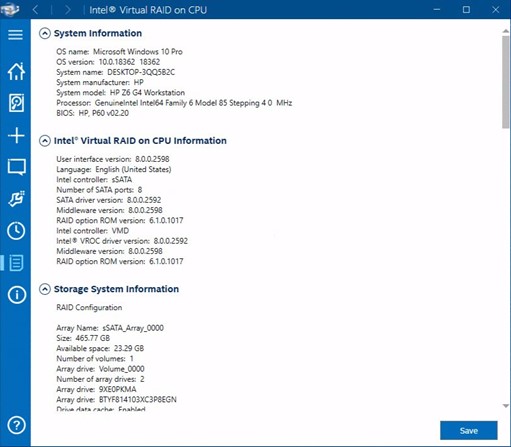
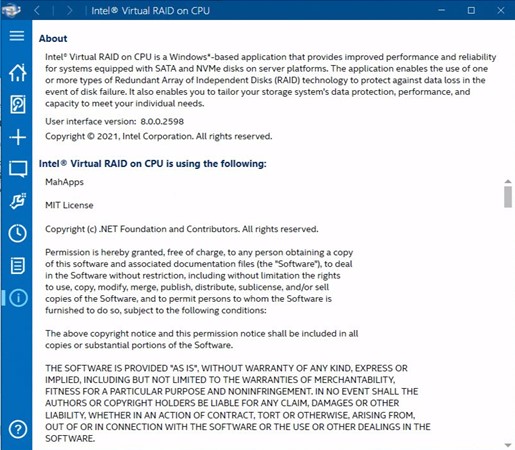
This page provides additional information about the purpose and functionality Intel® VROC performs, along with licensing information.
About Page
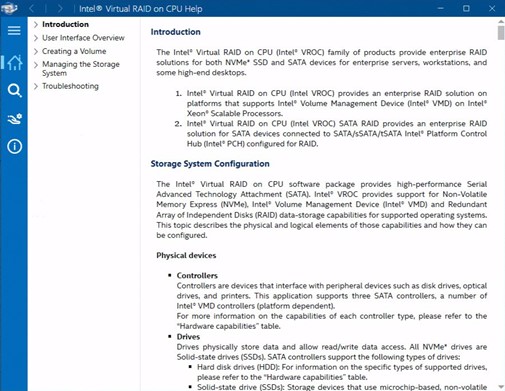
Help Content Page
The Help Content page opens in a separate app window after clicking on the Help option. The Help Content page provides brief descriptions of the overall functionality of Intel® VROC capabilities and associated devices as well as troubleshooting tips for common issues. See more information in Troubleshooting Tips for Intel® Virtual RAID on CPU (Intel® VROC) in Windows* Environments.