Article ID: 000096144 Content Type: Product Information & Documentation Last Reviewed: 12/04/2023

How to Enable Collage Display in the Intel® Graphics Control Panel

BUILT IN - ARTICLE INTRO SECOND COMPONENT
Summary

Steps to enable Collage mode in the Intel® Graphics Control Panel.

Description

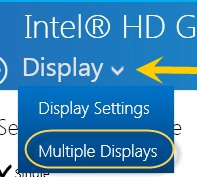
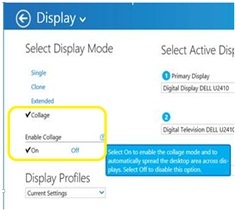
How do I enable Collage Display?

Resolution
NoteIn Windows 10 and Windows 11, a Local Flat Panel (LFP) such as laptop built-in display will not count towards the number of displays when using collage mode. Only an External Flat Panel (EFP) will count towards the number of displays in collage mode.
  1. Make sure your computer is connected to a minimum of two displays.
  2. Press Ctrl + Alt + F12 to open the Intel® Graphics Control Panel.
  3. Click Display drop-down menu at the top of the screen, and select Multiple Displays.
    Display drop-down menu
  4. Click the drop-down menu and select Multiple Displays.
    1. Select Collage. Under Enable Collage, select On. Click Apply.
      Enable Collage
  5. Select the Active Displays using the drop-down menus.
  6. Under Arrange Displays, choose the desired display mode.

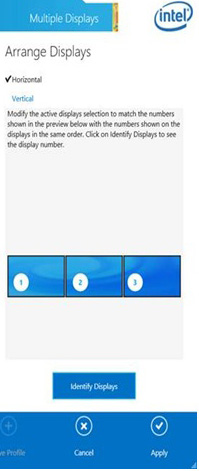
    If Horizontal is selected, one image is stretched from left to right across two or three displays.
    Horizontal is selected

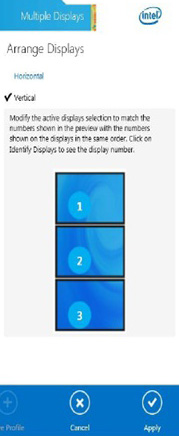
    If Vertical is selected, one image is stretched from top to bottom across two or three displays.
    Vertical is selected

  7. Click Apply.
  8. Select the Display drop down menu, and click the Resolution drop down arrow. Select the desired resolution.
  9. Click Apply.

Related Products

This article applies to 121 products

Intel® Data Center GPU Max Series
Intel® Data Center GPU Max 1100
Intel® Data Center GPU Max 1550