Quick Start Guide for Intel® Xeon® Accelerator Engine: Intel® QuickAssist Technology (Intel® QAT)
Content Type: Install & Setup | Article ID: 000096012 | Last Reviewed: 02/23/2026
As the complexity of applications continues to grow, systems need more and more computational resources for workloads, including cryptography and data compression. The drivers and patches offered in this guide assist application developers to take advantage of Intel® QuickAssist Integrated Accelerator, which is offered with platforms based on 4th Gen Intel® Xeon® Scalable Processors and Intel® Xeon®6 Processors.
This guide will enable the initial setup of Intel® QuickAssist Technology (Intel® QAT) on compatible systems. Check if your Intel® Xeon® Processor has the Intel® QAT accelerator active. This information is available on the Product Specifications for Intel® Xeon® Processors under the Advanced Technologies Section.
Note: The Advanced Technologies section lists the "out-of-the-box" Accelerators present on a specific SKU. If the Accelerators are available on your CPU SKU, they will be listed as the number of devices available. For more details, visit: Intel® Accelerator Engines
| Before continuing to read, consider that... |
|
export ICP_ROOT=/QAT
mkdir -p $ICP_R
cd $ICP_ROOT
tar -zxof QAT20.L.*.tar.gz
./configure
make -j install
| Where to download the Intel® QAT Drivers? |
| The driver files can be downloaded from the following links: |
service qat_service status
Depending on the Linux distribution, the output may be different:
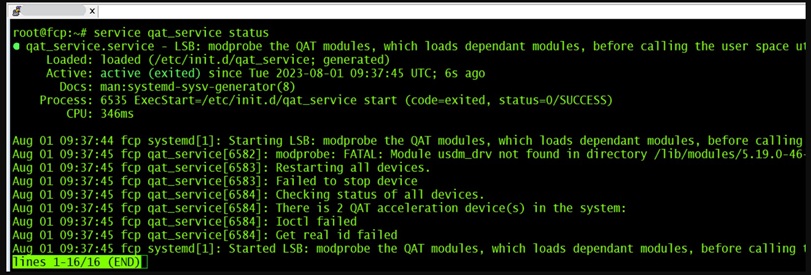
# service qat_service status
Checking status of all devices.
There is 2 QAT acceleration device(s) in the system:
qat_dev0 - type: 4xxx, inst_id: 0, node_id: 0, bsf: 0000:76:00.0, #accel: 1 #engines: 9 state: up
qat_dev1 - type: 4xxx, inst_id: 1, node_id: 0, bsf: 0000:7a:00.0, #accel: 1 #engines: 9 state: up
service qat_service restart
service qat_service status
cd $ICP_ROOT
make samples-install
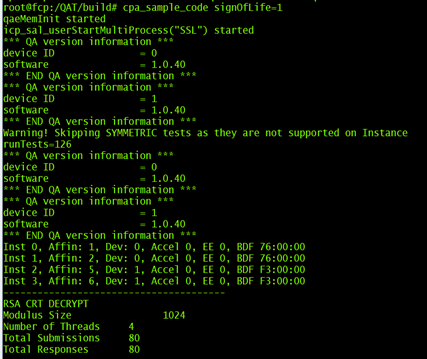
$ICP_ROOT/build/cpa_sample_code signOfLife=1
The output should look similar to the following:
| Where to go from here? |
|