Wake-on-LAN (WoL) is a hardware/software solution that wakes up your computer remotely from a low power mode or off mode. The computer must have an Internet connection and be plugged in to power for WoL to work.
Wake-on-LAN can be configured to use Ethernet or Wireless.
| Note | - Not all devices support Wireless Wake-on-LAN.
- Devices that do support Wireless Wake-on-LAN only support wake from system sleep states S3 or S4.
|
For WoL to function, your computer's BIOS and operating system need to be setup correctly.
Click or the topic for details:
Enable Wired Wake-on-LAN in the BIOS
| For NUCs with Visual BIOS | - Press F2 during boot to enter BIOS Setup.
- Select Advanced, then select the Power menu.
- Within Secondary Power Settings check to make sure Wake-on-LAN from S4/S5 is set to: Power On - Normal Boot (this is the default setting).
- Press F10 to save and exit the BIOS Setup.
|
| For NUCs with Aptio V BIOS | - Press F2 during boot to enter BIOS Setup.
- Select the Power menu.
- Within Secondary Power Settings check to make sure Wake-on-LAN from S4/S5 is set to: Power On - Normal Boot (this is the default setting).
- Press F10 to save and exit the BIOS Setup.
|
Configure Wired Wake-on-LAN in Windows® 10
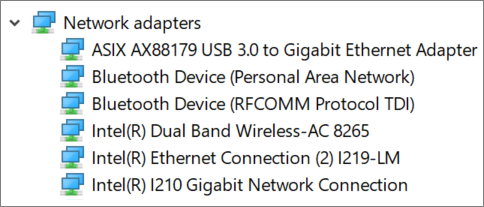
- Open Device Manager by selecting the Windows button and typing, Device Manager.
- Expand the Network Adapters section and double-click the desired Ethernet adapter.
- Select the Power Management tab.
- Select Wake on Magic Packet and any other desired options within the Wake on LAN section.
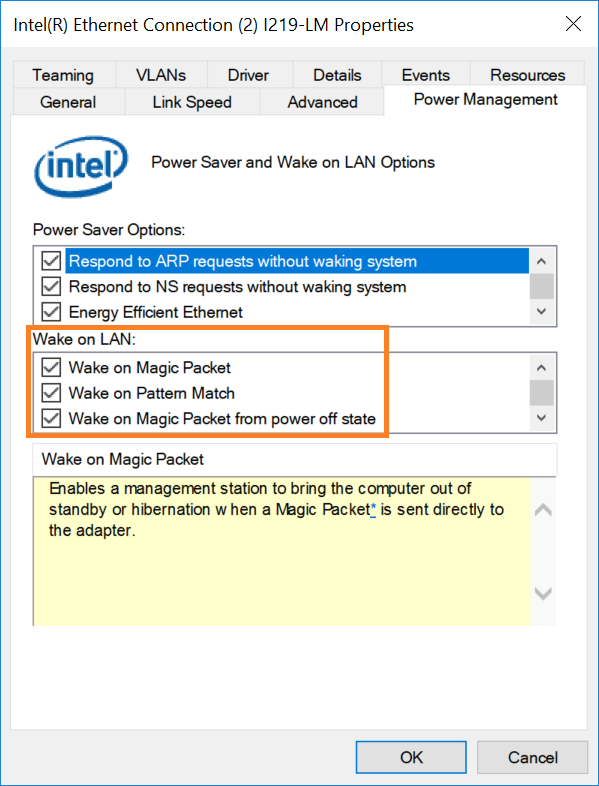
- Click OK.
Configure Wireless Wake-on-LAN in Windows® 10
- Open Device Manager by selecting the Windows button and typing, Device Manager.
- Expand the Network Adapters section and double-click the Wireless device.

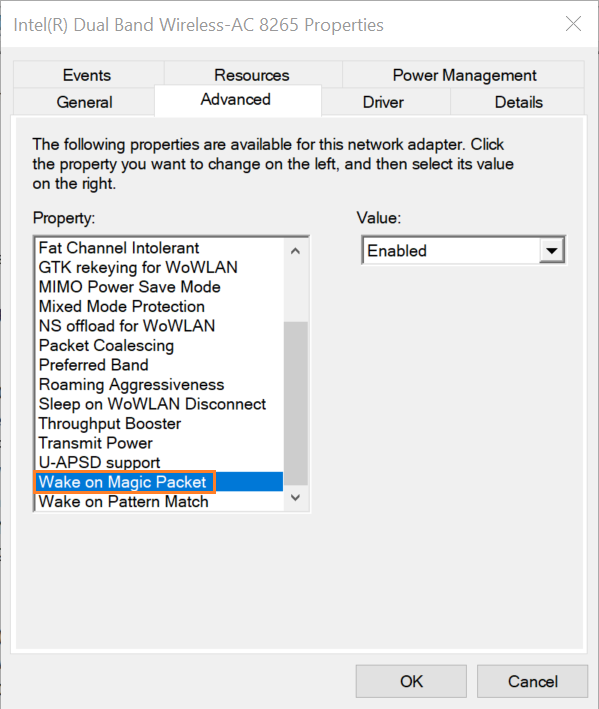
- Select the Advanced tab.
- Make sure Wake on Magic Packet is enabled (this is the default setting).
- Select the Power Management tab.
- Select Allow this device to wake the computer and any other desired options.
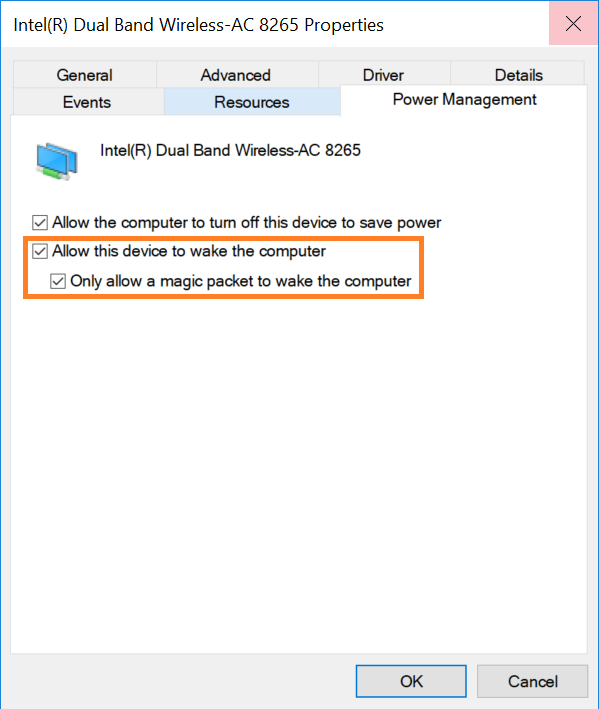
- Click OK.
If the Intel NUC won't Wake on LAN after completing the steps detailed above, try disabling Fast Startup in Windows:
- Type Power Options in the Search bar.
- Select Choose what the power buttons do.
- Select Change settings that are currently unavailable.
- Uncheck Turn on fast startup in the Shutdown settings section.
- Click Save changes.