Configure or Reset Intel® Remote Management Module 3 (Intel® RMM3)

Documentation

Install & Setup

000006864

09/21/2019

The below are excerpts from the Intel® Remote Management Module 3 (Intel® RMM3) user guide.

Click or the topic for details:

Configure the Intel® Remote Management Module 3 (Intel® RMM3)
Using the BIOS
  1. Install the Intel® RMM3 Kit.
  2. Make sure the Intel® Server Board has the latest firmware.
  3. Power on the server and press <F2> to enter the BIOS utility.
  4. Select the BIOS Server Management menu, scroll down, and select Baseboard LAN configuration.
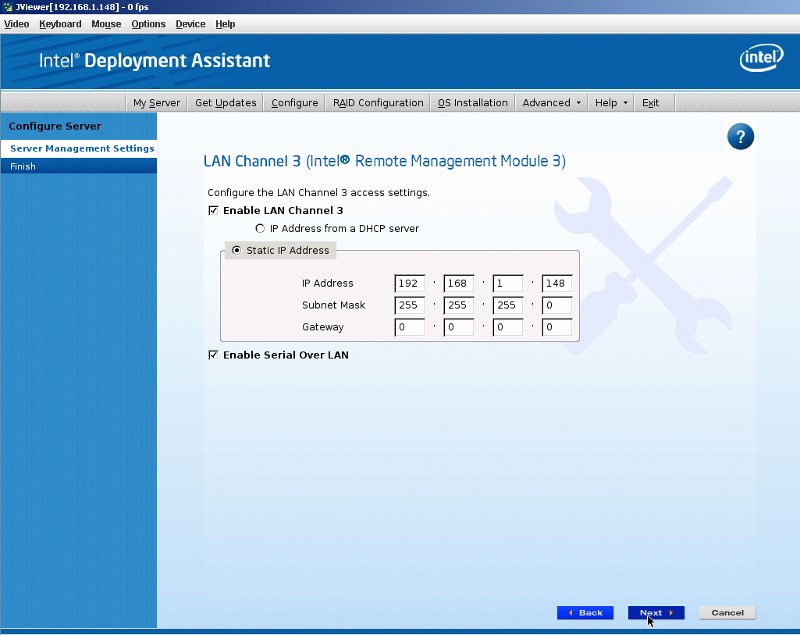
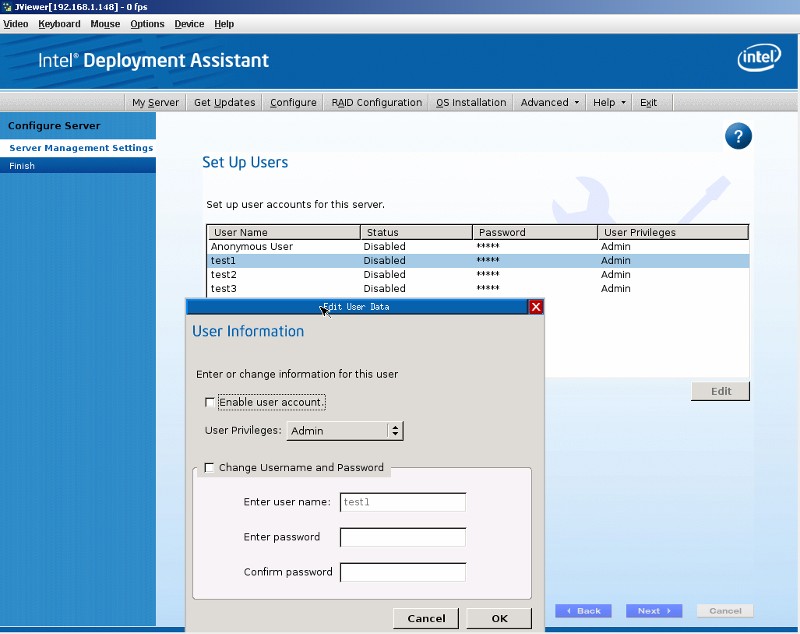
  5. Configure the LAN and User settings.

    LAN and User settings

With Intel® Deployment Assistant

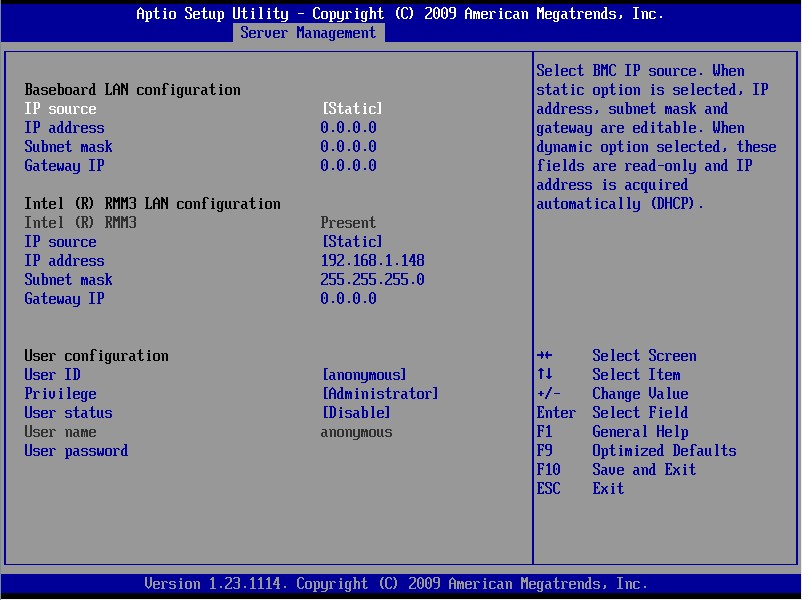
Either view the Demo: Configuring Intel® RMM3 using Intel® Deployment Assistant CD, or follow the steps below:

  1. Install the Intel® RMM3 Kit.
  2. Make sure the Intel® Server Board has the latest firmware.
  3. Power on the server and press <F6> during the POST to boot from the CD/DVD-ROM and start the Intel® Deployment Assistant CD.
  4. Click the Configure tab.
  5. Go to Server Management Settings.
  6. Select LAN Channel 3 (Intel® Remote Management Module 3).

    LAN Channel 3

  7. Configure the IP settings and click Next.
  8. The Set Up Users screens display the inactive, pre-configured user accounts.

    User information

  9. Double-click a user name to open a pop-up window (See screenshot above). Enable the user account, select the appropriate User Privileges, and change Username and password.
  10. Click OK.
  11. Click Next to continue.
  12. Click Apply to save settings and exit.
If the user name or password is lost, reset to factory defaults using the syscfg utility
  1. Download syscfg from Intel's Download Center.
  2. Unzip the file and copy the folder, UEFI_SYSCFG_V501_B23\, to a USB device.
  3. Boot the server and enter the BIOS.
  4. Go to the Boot Manager menu and select boot to EFI shell.
  5. Press Enter.
  6. In the EFI shell prompt, type fs0: (0 is the device containing the sysconfig utility, for example, USB device).
  7. Browse to the directory with the sysconfig utility.
  8. Enter set SYSCFG_PATH fs0:\<syscfg_efi> (where syscfg_efi is the folder with the sysconfig utility files) to define the path.
  9. Enter syscfg –rfs to reset the settings.
  10. Type the command, syscfg -rbmc, to reboot the BMC.