After any BIOS update, Intel recommends the following steps:
- Press F2 during start to enter BIOS Setup.
- Press F9 to set BIOS default values.
- Customize any BIOS settings, if desired (optional).
- Press F10 to save and exit BIOS Setup.
Click or the method for details:
F7 Update
The F7 BIOS Update allows you to update the Intel Compute Stick’s BIOS during the start process and before the operating system loads.
- Download and save the BIOS update (.bio) file to a portable USB device (or to a microSD card). Example:
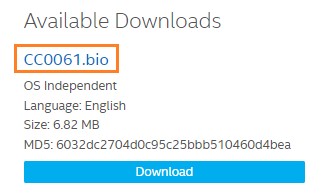
| Note | The USB device must be formatted as FAT32 in order to update an Intel® Compute Stick STCK1A32WFC or STCK1A8LFC. Other Compute Stick models can use USB devices formatted as either FAT32 or NTFC. |
- When the Intel Compute Stick is turned off, plug the USB device into the USB port (or insert the microSD card into the SD card slot). Note: If you're using a USB keyboard/mouse, you'll need a multiport USB hub.
- Turn on the Intel Compute Stick.
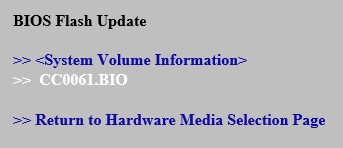
- During start, when the F7 prompt is displayed, press F7 to enter the BIOS Flash Update tool.
- Select the USB device (or microSD card) from the media list and press Enter.

- Select the .bio file and press Enter.
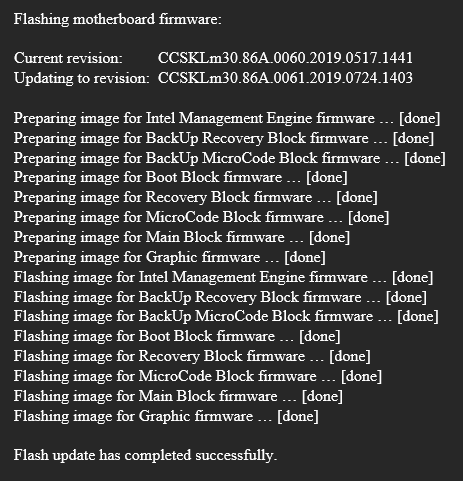
- Confirm you want to update the BIOS by pressing Enter.
- Wait 2-5 minutes for the update to complete.
- Remove the USB device.
- Restart the computer.
Power Button Menu Update
The Power Button Menu Update allows you to update the Intel Compute Stick’s BIOS during the start process and before the operating system loads.
- Download and save the BIOS update (.bio) file to a portable USB device (or to a microSD card). Example:
- When the Intel Compute Stick is turned off (not in Hibernate or Sleep mode), plug the USB device into the USB port (or insert the microSD card into the SD card slot). Note: If you're using a USB keyboard/mouse, you'll need a multiport USB hub.
- Press the power button and hold it down for three seconds, then release it before the four-second shutdown override. The Power Button Menu appears.
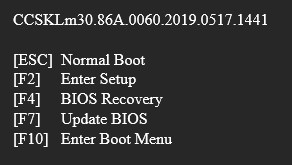
- Press F7 to perform a BIOS update.
- Select the USB device (or microSD card) from the media list and press Enter.
- Select the .bio file and press Enter.
- Confirm you want to update the BIOS by pressing Enter.
- Wait 2-5 minutes for the update to complete.
- Restart the computer.
UEFI Shell Update
The UEFI Flash BIOS update utility allows you to update the BIOS from the EFI Shell.
- Download the UEFI Flash BIOS Update file. Example:
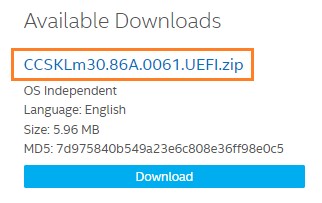
- Double-click the *.ZIP to extract its files.

- Copy UefiFlash.efi and the .BIO file to the bootable USB device.
- Connect the USB drive to a port on the Intel Compute Stick.
- Configure the BIOS of the target computer to boot to the EFI Shell:
- Press F2 during start to enter BIOS setup.
- Go to Advanced > Boot > Secure Boot.
- Disable Secure Boot, if enabled.
- Go to Advanced > Boot > Boot Configuration.
- In the Boot Devices pane, enable Internal UEFI Shell.
- Press F10 to save changes and exit BIOS Setup.
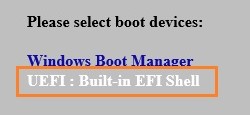
- Press F10 during start to open the Boot Menu.
- Select UEFI: Built-in EFI Shell.
- Change the current directory to the USB flash drive by entering the command fsX: where X is the drive number of the USB flash drive from the device mapping list. Example: if your USB drive is fs3, then type fs3: and press enter.
- At the command prompt, type UefiFlash.efi XXX.bio, where XXX.bio is the file name of the .bio file and press Enter.
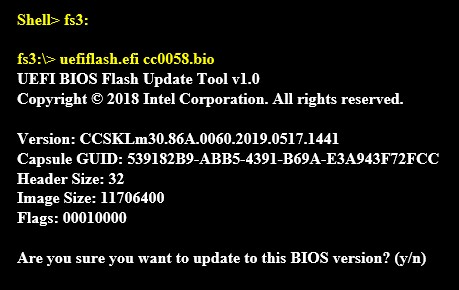
- Press Y to begin the update.
- Wait for the BIOS update to complete.
- The computer restarts when finished.
- Set the BIOS back to original settings:
- Restart the computer.
- Press F2 during start to enter BIOS setup.
- Go to Advanced > Boot > Boot Configuration.
- In the Boot Devices pane, disable Internal UEFI Shell.
- Go to Advanced > Boot > Secure Boot.
- Enable Secure Boot, if it was originally enabled.
- Press F10 to save changes and exit BIOS Setup.
BIOS Recovery
In the unlikely event that a BIOS update is interrupted, it's possible the BIOS may be left in an unusable state. Try the BIOS Recovery method to fix the issue.
- Download and save the BIOS update (.bio) file to a portable USB device. Example:
- Plug the USB device into a USB port of the Intel Compute Stick when it's turned off (not in Hibernate or Sleep mode). Note: If you're using a USB keyboard/mouse, you'll need a multiport USB hub.
- Press the power button and hold it down for three seconds, then release it before the four-second shutdown override. The Power Button Menu appears.
- Press F4 to perform a BIOS Recovery.
- Wait 2-5 minutes for the update to complete.
- The computer either turns off when the recovery process is complete or prompts you to turn it off.
- Restart the computer.