Developer Reference
Installing Eclipse* Plugins from the IDE
Install Eclipse* Plugins
If you are going to use Eclipse IDE, there are some additional setup steps:
- Locate the Eclipse plugins that were included with your oneAPI tools (see the note below).
- Ensure that CMake has been installed.
- Install plugins from the command line or Eclipse IDE.
You can find the Eclipse plugins to install into your copy of the Eclipse IDE for C/C++ Developers in the various tool folders located within the oneAPI installation folder, which is normally found in /opt/intel/oneapi or ~/intel/oneapi, depending on whether you installed the package as the superuser. Those plugins should be located in a folder named ide_support within each tool that includes an Eclipse plugin.
To locate all the Eclipse plugins that are part of your installation:
- Open a terminal session (bash shell) and change directory to the root of your installation. For example, if you installed as the superuser using the default folder:
cd /opt/intel/oneapi Use the find command to locate the available Eclipse plugin packages:
find . -type f -regextype awk -regex ".*(com.intel|org.eclipse).*[.]zip"- The find results look like this (the exact results depend on which tools you installed):

Install from Command Line or IDE
You can install the Intel plug ins using the command line or using Eclipse IDE.
To Install Plugins with the Command Line
For the Command Line, use the install-eclipse-plugins.sh script. Go to:
<install_dir>/dev-utilities/latest/bin/The script does not require arguments to run. You can get a help message using any of the following:
./install-eclipse-plugins.sh -h
 ./install-eclipse-plugins.sh --help
Running the setvars.sh script will add install-eclipse-plugins.sh to your path (for the current terminal session):
<install_dir>/setvars.shThe script supports a verbose mode which can be helpful if you are having issues running the script, especially if the script is failing to do its work. Use verbose mode as follows:
./install-eclipse-plugins.sh -v
 ./install-eclipse-plugins.sh -V
The script will ask for the location of the Eclipse binary into which you want to install or update the Intel plug-ins for Eclipse.
The script performs the following operations:
- Looks for Eclipse plug-ins included in the installed toolkit(s) and checks which are already installed in the selected copy of Eclipse.
- Uninstalls any plug-in conflicts and runs the Eclipse garbage collector to clean up the uninstall.
- Installs the included toolkit plug-ins into the selected copy of Eclipse.
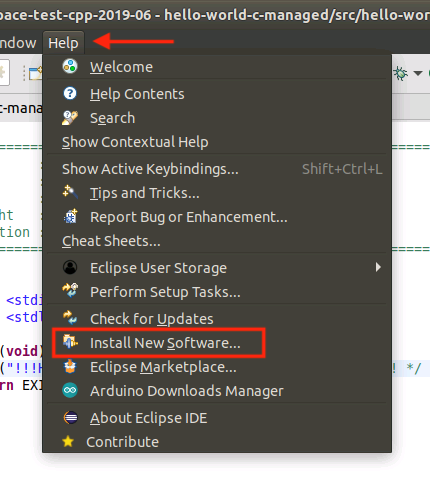
To install the Eclipse plugins from the IDE:
Open a command terminal and launch your installation of Eclipse for C/C++ Developers (Eclipse CDT).
Once Eclipse launches, choose Help > Install New Software.
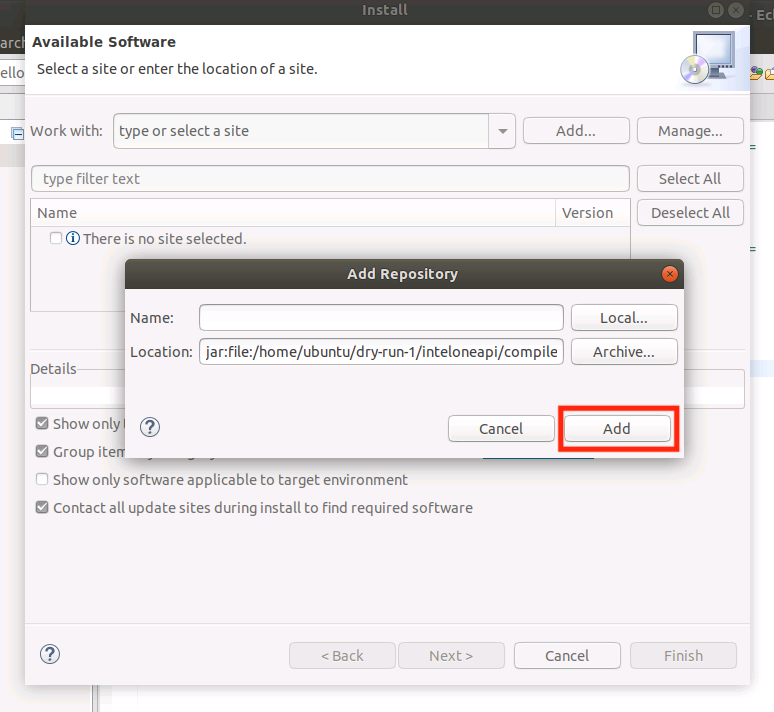
- Click the Add button and then click Archive in the dialog box that appears.

Navigate to the location of the Eclipse plugin you wish to install.
NOTE:If you cannot remember the location of the plugin, run the find command in a shell to show the locations of available plugins.Repeat this process for each Eclipse plugin that you want to install. In this image, the compiler plugin (last in the previous find command list example) is being selected for installation into the copy of Eclipse for C/C++ Developers.
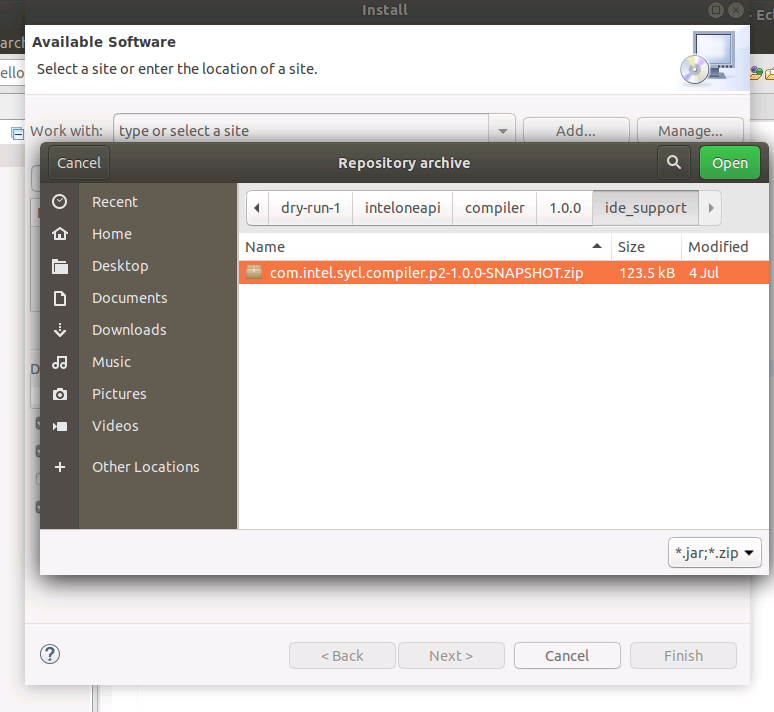
Select the plugin file (using the green Open button shown in the previous image), and then click the Add button in the Add Repository dialog box. The Location field should match the Eclipse plugin path and name that you identified using the file picker.
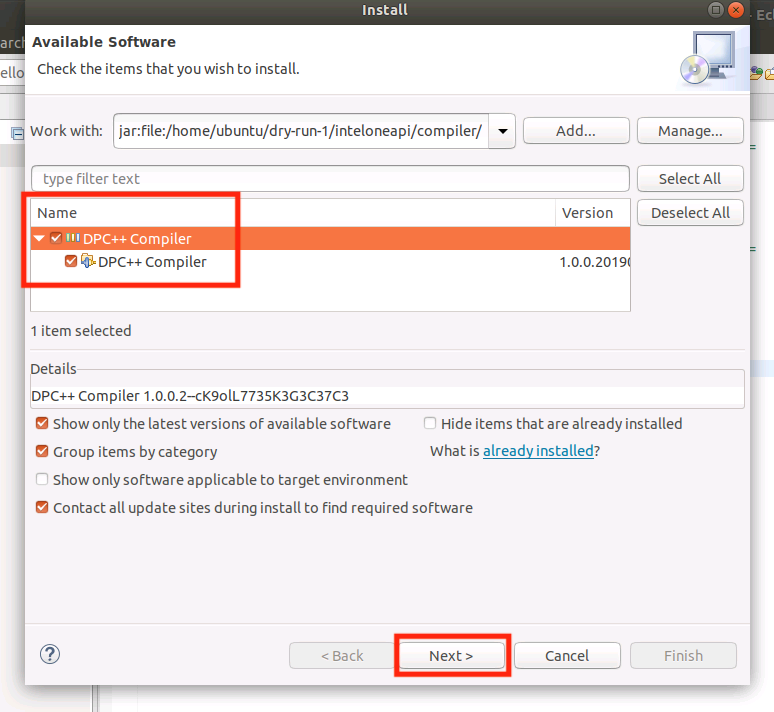
Check the boxes next to the name of the selected plugin or plugins, and then click Next.
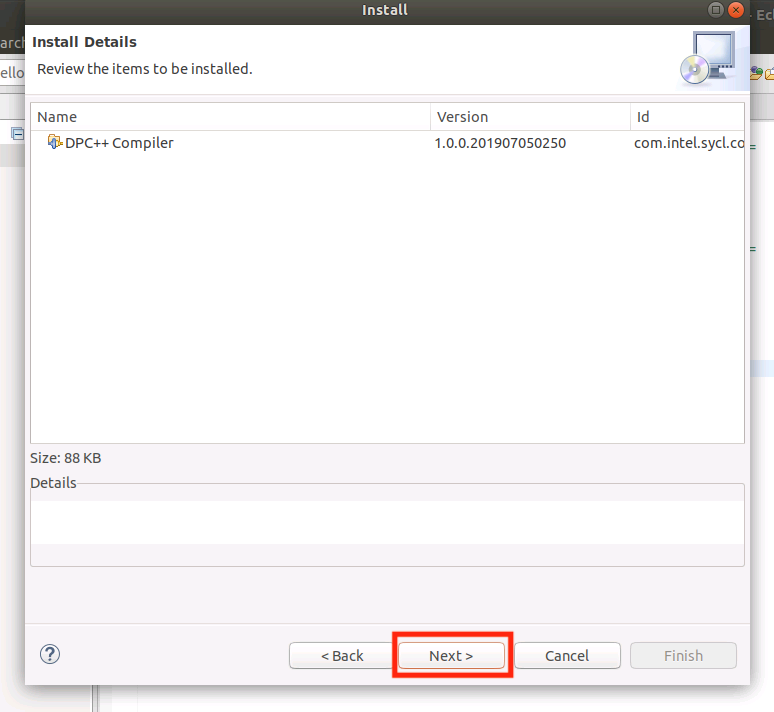
Confirm that the plugin to be installed is listed in the Install Details dialog box, and then click Next.
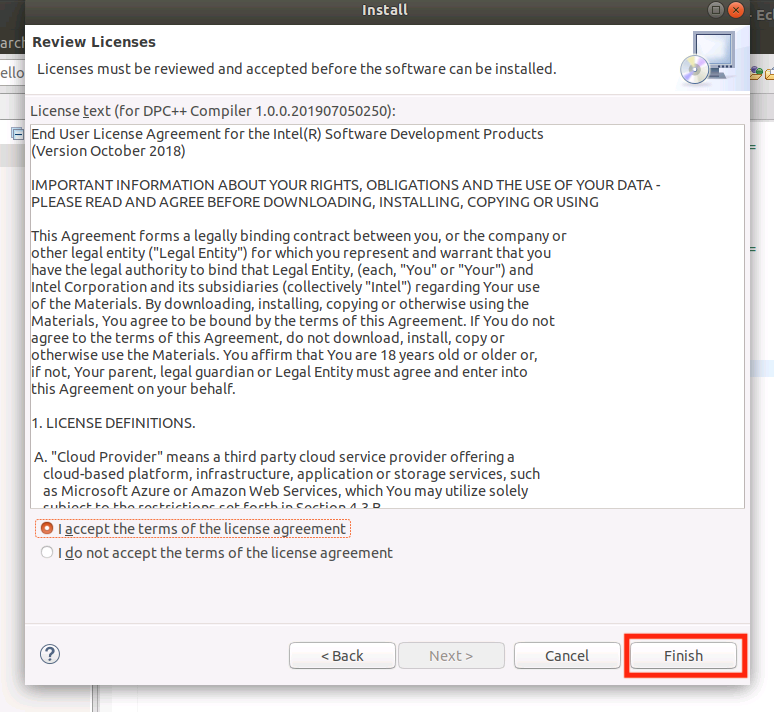
Review the license agreement (you must select the I accept option to proceed), and then select Finish to start installation of the plugin.
After you click Finish, Eclipse installs the plugin.
The installation process may take several minutes if the plugin has required dependencies that are not part of your copy of Eclipse. That is most likely to happen if you are installing into a different build of Eclipse. For example, if you install the plugin into a copy of Eclipse IDE for Java Developers (aka Eclipse JDT) the missing Eclipse for C/C++ components will be automatically added, along with the plugin. A working Internet connection is required if this is the case and missing dependent plugins are required.
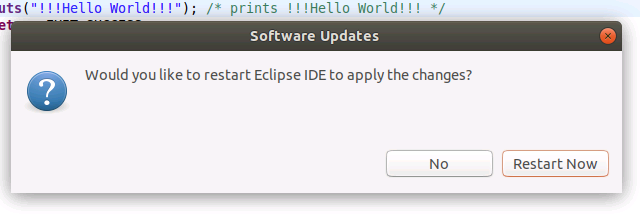
When the plugin installation is complete, Eclipse prompts you to restart. Click Restart Now. Do this for each plugin you add to your copy of Eclipse for C/C++ Developers.