Get Started
To follow this guide, you need a machine with:
- An Intel® Xeon® processor
- Minimum 64 GB RAM
- Minimum 256 GB hard drive
- An internet connection
- CentOS* 7.8.2003
Objectives
- Install the Converged Edge Insights software package, version 20.12. For instructions, see the Converged Edge Insights Documentation.
- Deploy a container-based workload:
a. Understand the structure of a Helm* chart
b. Deploy an application
c. Validate the deployment - Deploy a virtual-machine-based workload:
a. Create the KubeVirt namespace, operator, and custom resources
b. Deploy the Containerized Data Importer (CDI)
c. Understand the structure of a Helm chart
d. Deploy an application
e. Validate the deployment
Container Deployment
Get a Sample
Go to GitHub* to download the sample Helm chart.
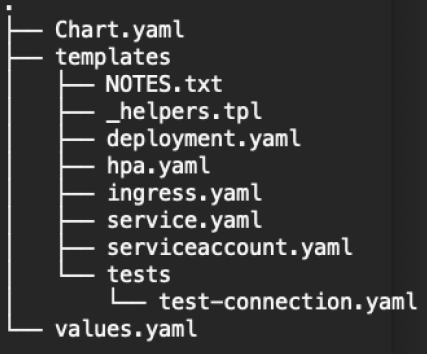
Figure 1. Directory structure
Understand the Structure of a Helm Chart
Chart.yaml
This file contains information about the Helm chart and is required for application deployments.
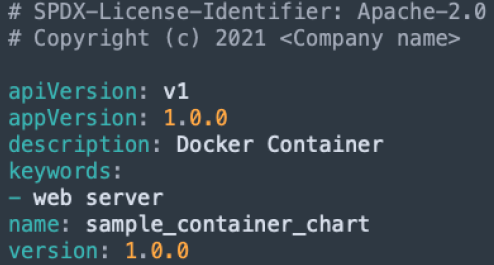
Figure 2. Example of Chart.yaml
This file contains the following fields:
- apiVersion (required): Version of the chart API.
- appVersion (optional): The application version.
- Description (optional): A one-sentence explanation of this project.
- Keywords (optional): A list of significant words for the project.
- Name (required): The chart name.
- Version (required): A standard version of Semantic Versioning (SemVer) 2.
For more information about additional fields, see Documentation.
Values.yaml
This file contains the default configuration values for the Helm chart.
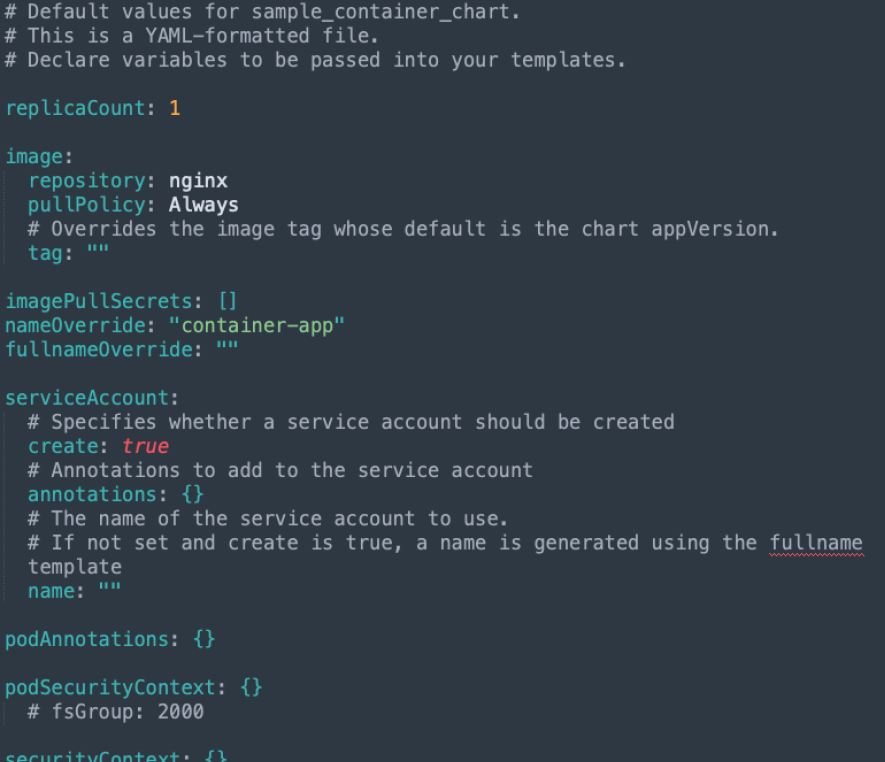
Figure 3. Example of values.yaml
Templates Directory
The Templates directory contains the YAML definitions for the services, deployments, and other Kubernetes* objects that are previously listed. These definitions are used to render the chart resources.
Deploy an Application
- Switch to the root user:
- Delete the default network policy:
-
Install and deploy the chart archive:
Validate the Deployment
Verify the following information for the release:
- The values used to generate the release
- The generated manifest file
- The information provided by the chart for the release
- The hooks associated with the release
Virtual Machine Deployment
Create the KubeVirt Namespace, Operator, and Custom Resources
KubeVirt is a virtual machine management add-in for Kubernetes.
- Switch to the root user:
- Delete the default network policy:
- Create the KubeVirt namespace:
- Create the configuration map to use software emulation and live migration features:
- Create the KubeVirt operator:
-
Create the KubeVirt custom resource (CR) definition:
Deploy the CDI
This utility to imports, uploads, and clones virtual machine images for use with KubeVirt.
- Create the CDI operator:
- Create the CDI CR:
Understand the Structure of a Helm* Chart
Get a Sample
Go to GitHub to download the sample Helm chart.
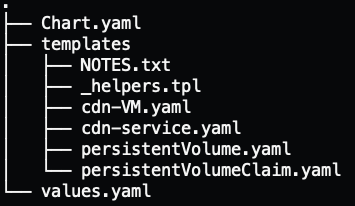
Figure 4. Directory Structure
Understand the Structure of a Helm Chart
Chart.yaml
This file contains information about the Helm chart and is required for application deployments.
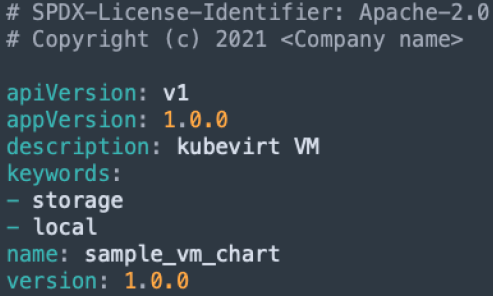
Figure 5. Example of Chart.yaml
This file contains the following fields:
- apiVersion (required): Version of the chart API.
- appVersion (optional): The application version.
- Description (optional): A one-sentence explanation of this project.
- Keywords (optional): A list of significant words for the project.
- Name (required): The chart name.
- Version (required): A standard version of Semantic Versioning (SemVer) 2.
For more information about additional fields, see Documentation.
Values.yaml
This file contains the default configuration values for the Helm chart.
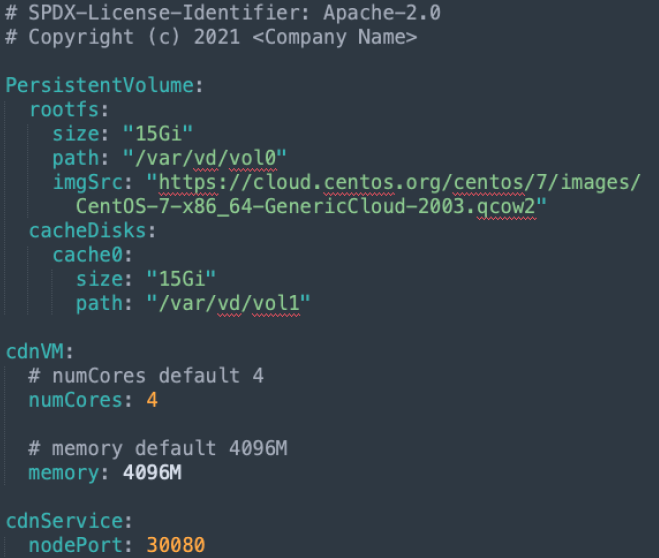
Figure 6. Example of values.yaml
Templates Directory
This directory contains files specific to one or more resource types, which are passed to the template engine for rendering the chart resources.
![]()
Figure 7. Template directory files
This directory contains configurations for the following resources:
- Virtual machine
- Service
- Persistent volume claim
- Persistent volume
Deploy an Application on Intel Distribution of Open Network Edge Services Software
- Switch to the root user:
- Delete the default network policy:
-
Install and deploy the chart archive:
Validate the Deployment
- Verify the following information for the release:
- The values used to generate the release
- The generated manifest file
- The information provided by the chart for the release
- The hooks associated with the release
- Review the status of the virtual machine objects in the default namespace: