This tutorial explains how to create, compile and run the ‘Hello World’ example application on Linux* for the Terasic DE10-Nano Development Board. You’ll learn how to import and compile a sample application, set up a remote system explorer, and create a debugger configuration to run and debug the application.
Prerequisites: Download and install the SoC Embedded Design Suite (SoC EDS)
Note: This section uses a host computer running Linux, as can be seen from the screenshots and the issued commands. However, the scenario can also be run on a Windows* machine, although it is not usual for Linux development to be done on Windows.
Configuring Linux*
For this getting started scenario we need Linux to be running on the target board.
Eclipse* needs an account with a password to be able to connect to the target board. The root account does not have a password by default, so one needs to be set up. This can be achieved by running ‘passwd’ command from the serial console (on host system). Linux will then ask for the new password, then for password confirmation, then it will update it.
Note: Eclipse is part of the SoC EDS.
Import Sample Application
- Start Eclipse from Embedded Command Shell
- In Eclipse, select File > New Project > C Project. The C Project dialog box displays.
- In the C Project dialog box, select Project Name to be “HelloWorldLinux”. Also select the Executable to be “Hello World Ansi C Project” and the Toolchain to be “GCC 4.x[arm-linux-gnueabihf]”.
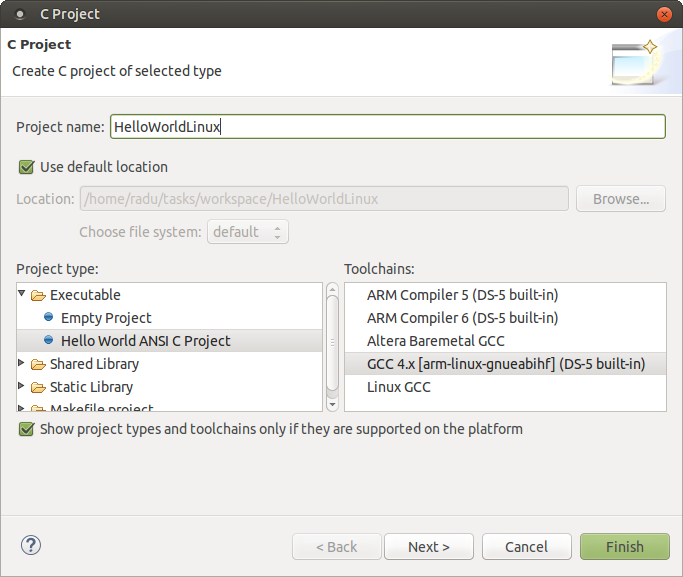
- Click Finish. The project is imported. The project files are displayed in the Project Explorer panel.
Compile Sample Application
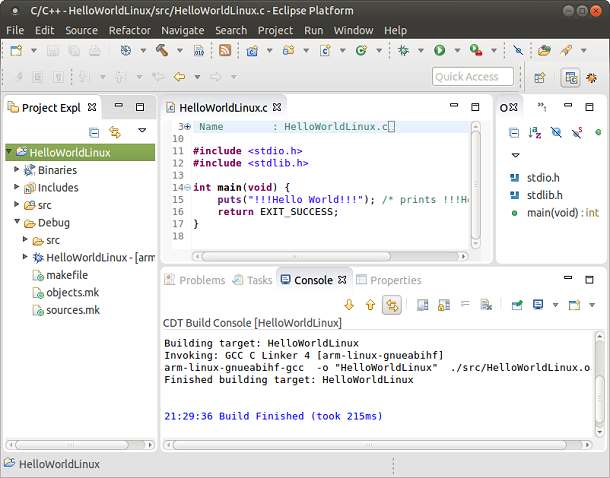
- To compile the application, select the project in Project Explorer.
- Select Project > Build Project.
- The project compiles and the Project Explorer shows the newly created hello executable file as shown in the figure below. The Console dialog box shows the commands and responses that were executed.
Set up Remote System Explorer
The ARM DS-5 Altera Edition can run and debug programs directly on the target with the help of the Remote System Explorer (RSE). It has all the regular features of a debugger that include: load application, run application, step-by-step execution, view variables and registers, and evaluate expressions. Before this feature can be used, the RSE needs to be configured to connect to the target board running Linux.
- In your Eclipse workspace, select Window > Open Perspective > Other. This will open the Open Perspective dialog box.
- In the Open Perspective dialog box, click the Remote System Explorer and click OK.
- In the Remote System Explorer view, right click Local and select New > Connection …. This will open the New Connection wizard. Note that Clicking the + icon achieves the same result

- In the first page of the New Connection wizard, named Remote System Type view, select SSH only and click Next.

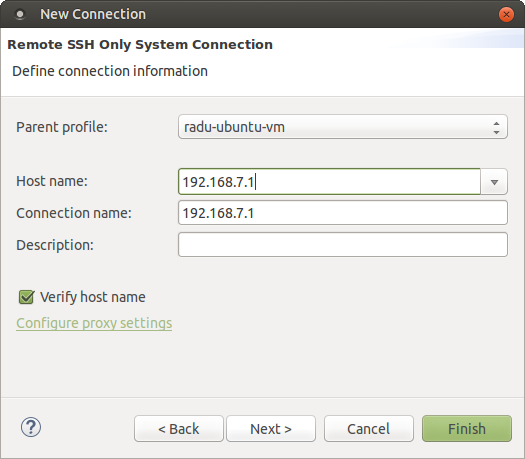
- Enter the IP address of the board in the Host Name field. Click Finish to create the connection.
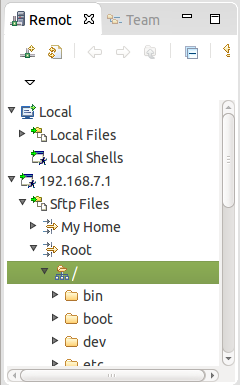
- In the Remote Systems panel, click the Target IP > Sftp Files > Root. This opens a dialog box to enter the username and password
- Assign root to User ID and assign the password you selected in the “Configuring Linux” Section to Password. Check the Save User ID and Save password check boxes. Click OK.

-
Eclipse asks for confirmation of authenticity of the board. Click Yes.
-
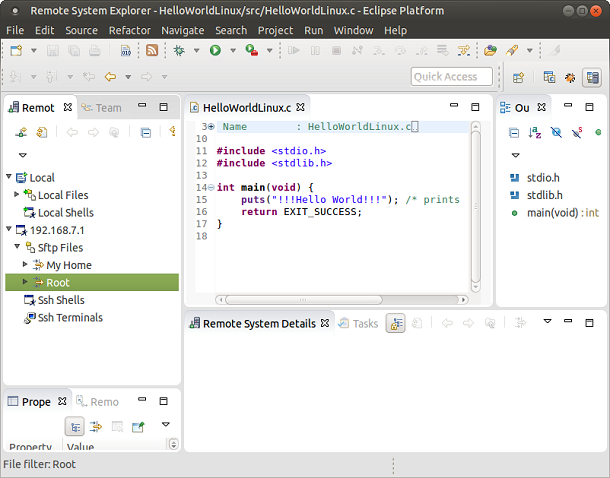
Remote System Explorer shows the files on the board on the left panel.
Debug Sample Application
At this stage, we have a compiled Linux application and a properly configured Remote Systems Connection. This section shows how to create a Debugger Configuration and use it to run and debug the application.
Learn more at:
Terasic DE10-Nano
- Select Run > Debug Configurations… to open the Debug Configurations dialog box.
- In the Debug Configurations dialog box, right click the DS-5 Debugger and click New to create a new debug configuration.
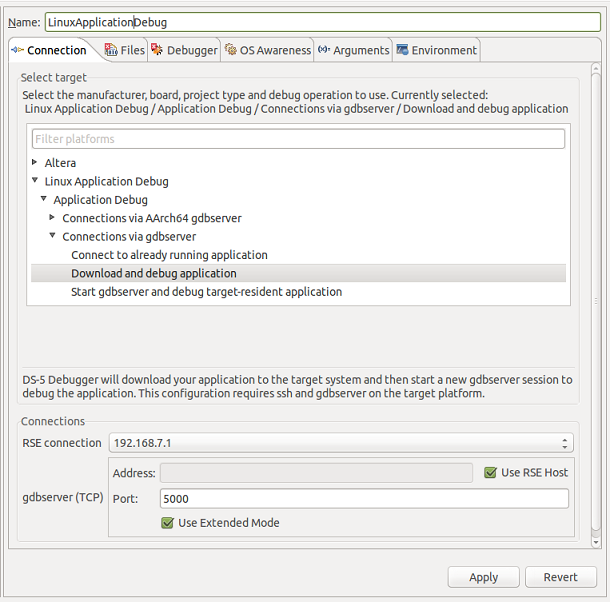
- Name the newly created debugger configuration, “LinuxApplicationDebug”, by editing its name in the Connection tab.
- In the Connection tab:
- For the Free Web Edition license, select Generic > gdb server > Linux Application Debug > Download and Debug Application.
- For the Subscription Edition or 30-day Evaluation Edition, select Linux Application Debug > Connections via gdbserver > Download and Debug Application.
- In the Connection tab, select the newly created RSE connection and keep the default values. Note: On some systems, you may need to uncheck the Use Extended Mode checkbox to prevent an ‘Unable to connect’ error.
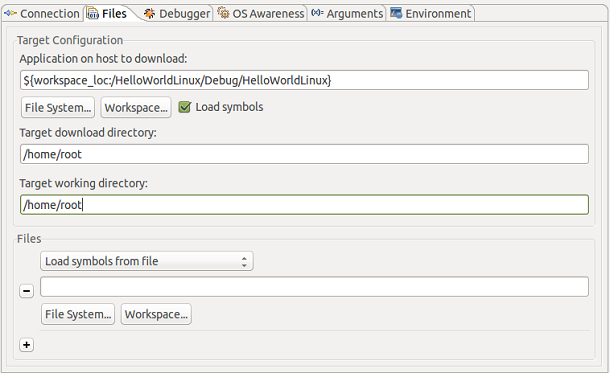
- Go to Files tab, and set the Target Configuration parameters:
- Select the Application on host to download to be the hello executable file. Use the Workspace… browse button.
- Edit the Target download directory to be "/home/root" (the root folder).
- Edit the Target working directory to be "/home/root" (the root folder).
-
Click the Debug button. A dialog window appears asking to switch to Debug perspective. Click Yes.
-
Eclipse downloads the application to the board and stops at main function entry.
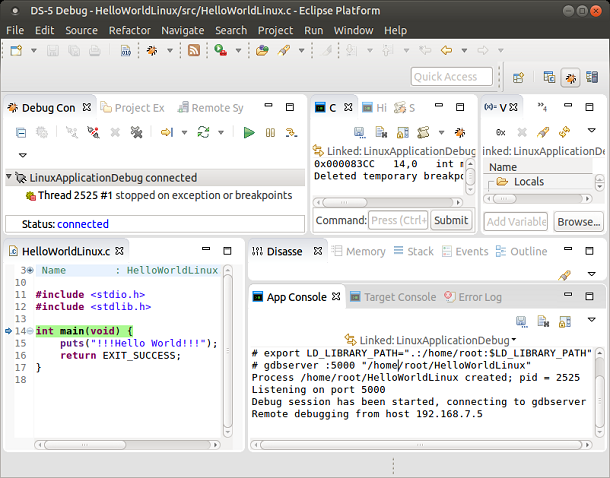
At this stage, all the usual debugging features of DS-5 can be used, such as breakpoints, view variables, registers, tracing, and threads.
-
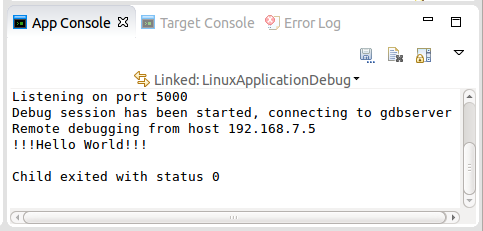
Click the Continue green button or press F8 to run the application. The hello message is printed on the Application Console.
Learn more at: Terasic DE10-Nano Home