Introduction
The Intel® oneAPI DPC++/C++ Compiler provides optimizations that help your applications run faster on Intel® 64 architectures on Windows* and Linux*, with support for the latest C, C++, and SYCL* language standards.
This article demonstrates how to change the versions of Intel® C++ Compiler for two projects using different versions of Intel C++ Compiler in the Microsoft Build* (MSBuild) command prompt.
Prerequisites
- The Intel oneAPI DPC++/C++ Compiler can be downloaded through Intel® oneAPI Base Toolkit, Intel® HPC Toolkit, or as a stand-alone product. For more information, see the Windows* Get Started Guide.
- Supported versions of Microsoft Visual Studio* 2019 or 2022. For more information on supported versions, see Visual Studio Version Compatibility with Intel Compilers.
- It is necessary to have the multiple versions of Intel oneAPI in your machine to change the versions of the Intel C++ Compiler.
- Appropriate configuration of your system as per the system requirements for the Intel oneAPI DPC++/C++ Compiler.
Steps to Change the Version
Assume you have two projects, say firstProject and SecondProject, and you want to use two different versions of the Intel C++ Compiler for each project. For example, firstProject must use the 2023.1 version of the compiler and SecondProject must use the 2023.2 version of the compiler on MSBuild command prompt without opening the Visual Studio GUI.
- Open Visual Studio, and then create a C++ console application.
a. Create the C++ project and name the first project as firstProject.
b. Go to Project Properties (Alt + Enter) and in Configuration Properties, navigate to General, change the Platform Toolset to Intel C++ Compiler 2023(icpx compiler). In this image, firstProject is using Intel C++ Compiler v2023.2.
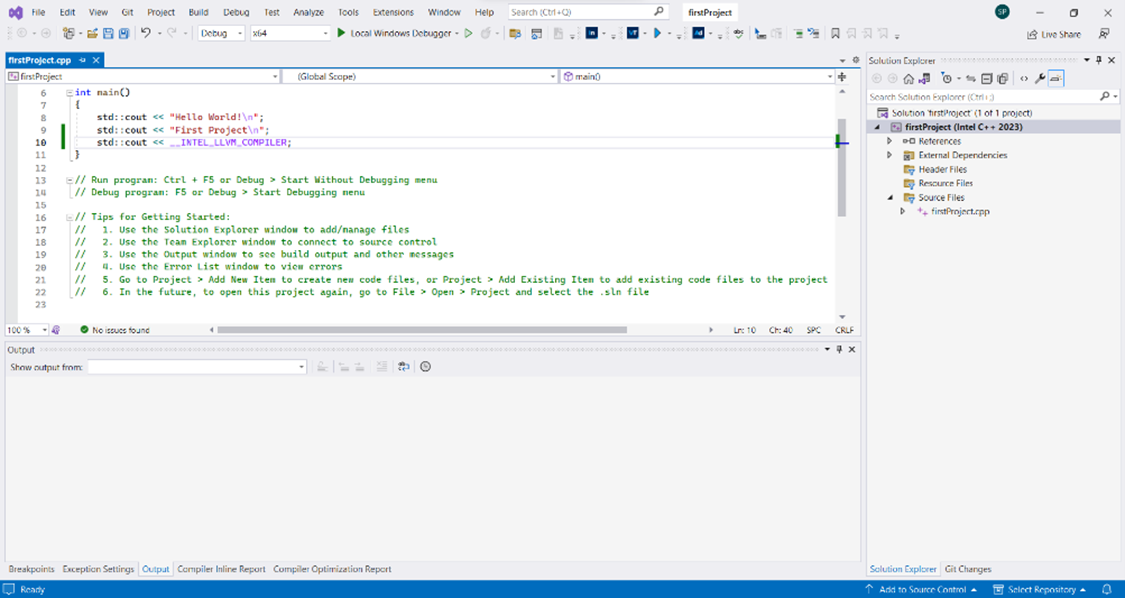
c. Follow the same process mentioned above for creating another project named SecondProject. In this image, SecondProject is using Intel C++ Compiler v2023.1.
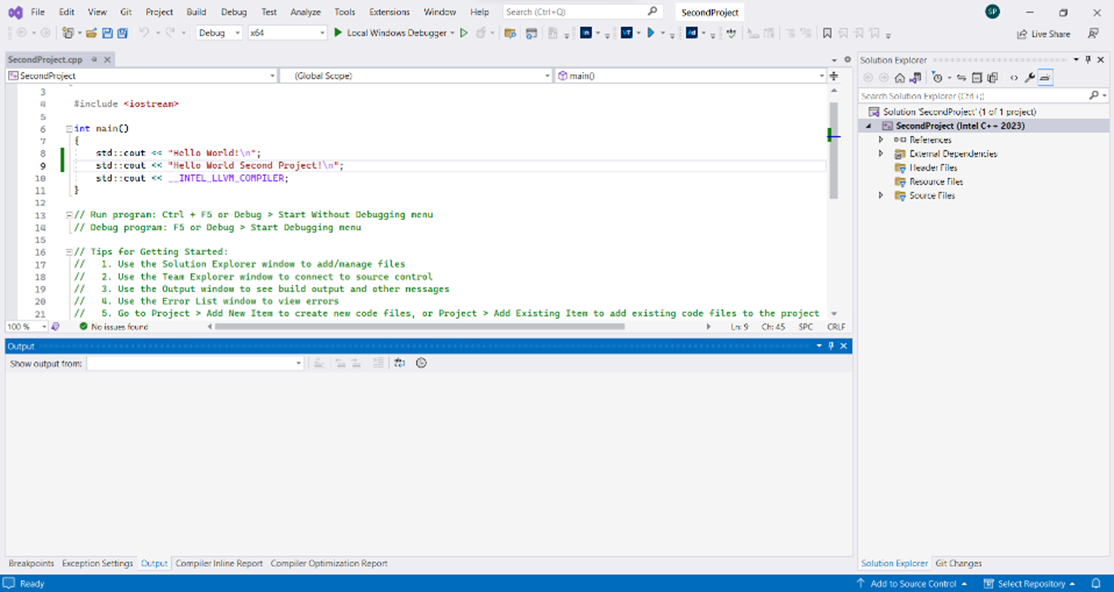
-
Navigate to Tools > Options > Intel Compilers and Libraries where you can change to the required version and adjust according to the required Target Platform, either Win32 or x64(windows).
• Since you are supposed to use the Intel C++ Compiler v2023.2 for firstProject, change it to v2023.2. You could also select any version of your choice, such as 2023.2 or a lower version (only if available).
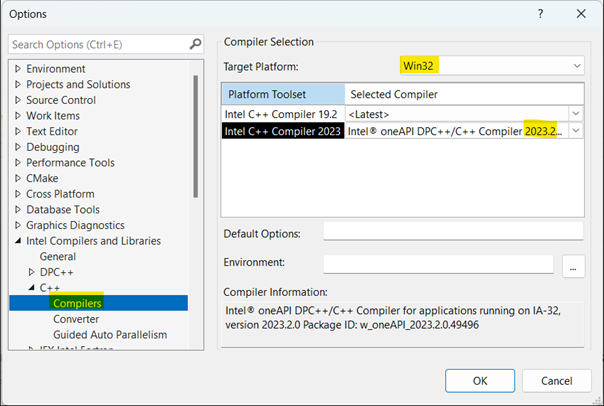
• For the SecondProject, set the version of the Intel C++ Compiler to a different one rather than the firstProject. Hence, you can change it to 2023.1.

-
In Project Properties > Configuration Properties > VC++ Directories, add the following path given for each project in the following mentioned fields as shown in the following screenshots:
• Executable Directories
• Include Directories
• Library Directories.
For firstProject:
As firstProject uses the 2023.2.0 version of the compiler, add the following path:
C:\Program Files (x86)\Intel\oneAPI\compiler\2023.2.0\windows\bin\intel64
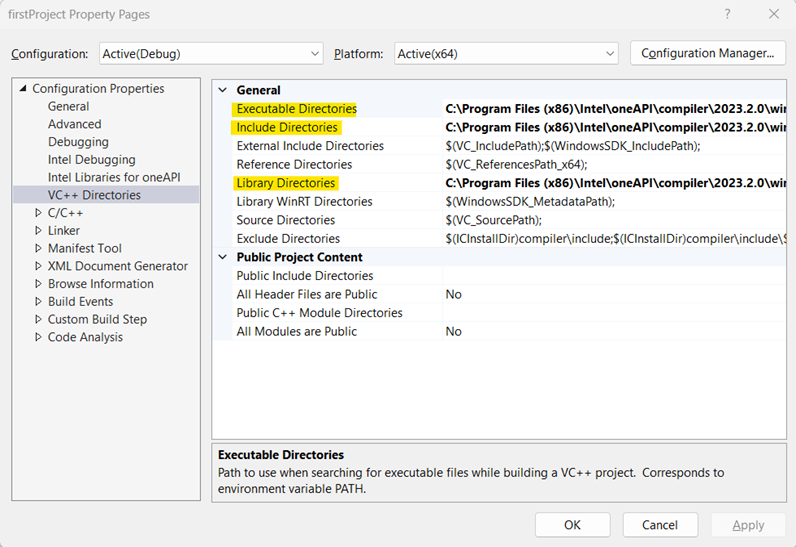
Figure 1. Add a specified path to firstProject.sln.
For SecondProject:
As the SecondProject uses the 2023.1.0 version of the compiler, add the following path.
C:\Program Files (x86)\Intel\oneAPI\compiler\2023.1.0\windows\bin\intel64
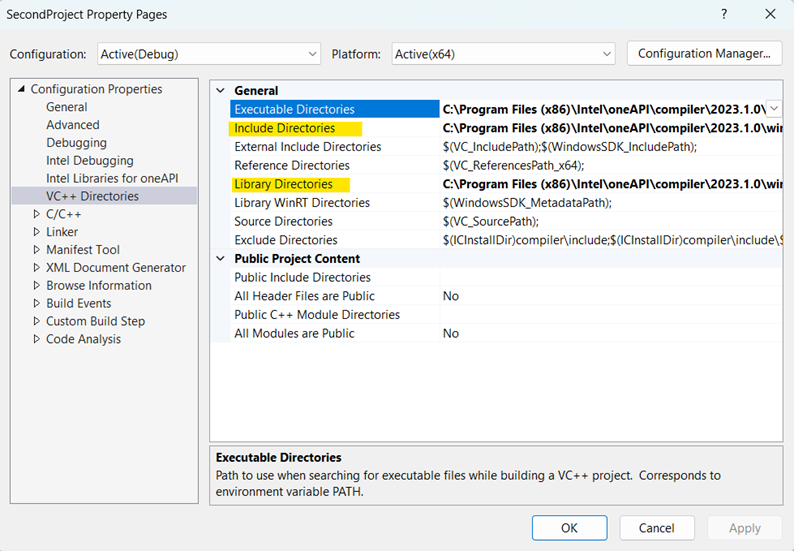
Figure 2. Add a specified path to SecondProject.sln.
-
To run the projects from the MSBuild command prompt (Tools > Command Line > Developer Command Prompt), open the MSBuild command prompt for firstProject.
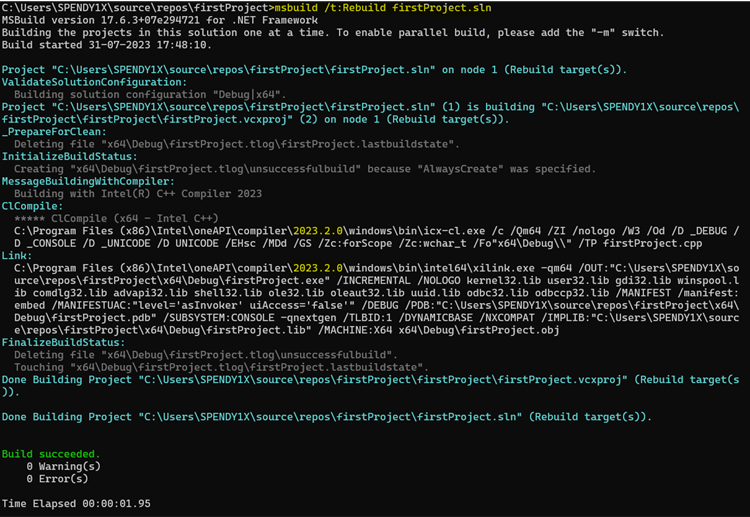
Now run both the projects in the MSBuild command prompt using the following commands:
Msbuild /t:Rebuild firstProject.sln
Msbuild /t:Rebuild ../SecondProject/SecondProject.sln
Running of the firstProject & SecondProject
firstProject Taking the 2023.2 Version
SecondProject Taking the 2023.1 Version
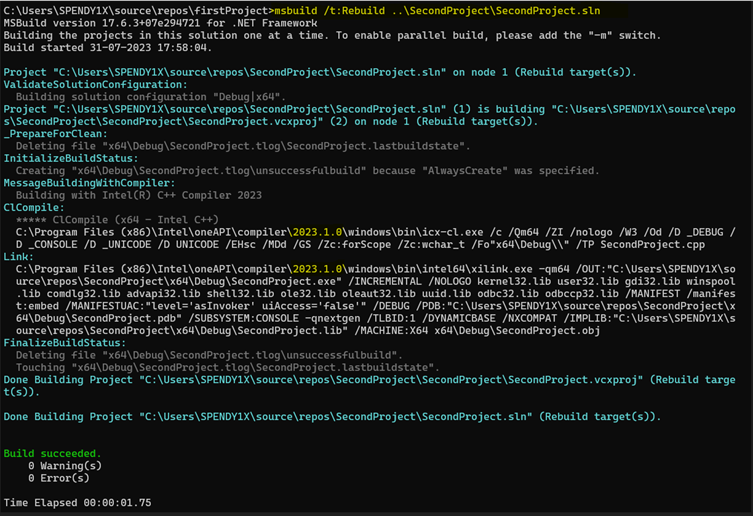
You can now observe that it takes two different versions of Intel C++ Compiler without Visual Studio GUI.