Overview
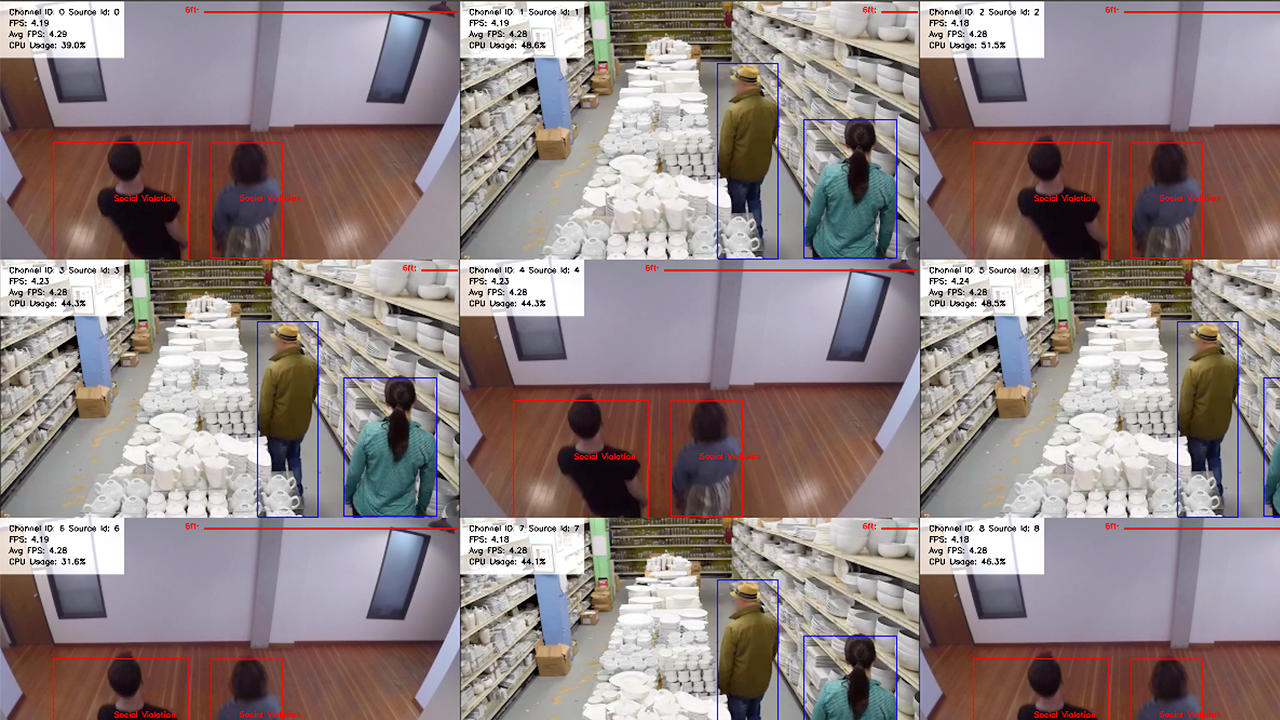
Social distancing and face masks are one of the most effective nonpharmaceutical way to prevent the spread of disease. This reference implementation gives a solution to prevent the spread of disease by using computer vision inference in the Intel® Distribution of OpenVINO™ toolkit to measure distance between people and store data to InfluxDB*. This data can be visualized on a Grafana* dashboard.
Select Configure & Download to download the reference implementation and the software listed below.
- Time to Complete: Approximately 20-30 minutes
- Programming Language: Python* 3.6
- Available Software: Intel® Distribution of OpenVINO™ toolkit 2021 Release
Recommended Hardware
The hardware below is recommended for use with this reference implementation. See the Recommended Hardware page for other suggestions.
- IEI* TANK AI/IoT Developer Kit (Intel® Core™ Processor)
- AAEON* UP Squared AI Vision X Developer Kit
- AAEON* UP Xtreme Edge Compute Enabling Kit
Target System Requirements
- Ubuntu* 18.04.3 LTS/CentOS 7.x
- 6th to 11th Generation Intel® Core™ processors with Intel® Iris® Plus Graphics or Intel® HD Graphics
- USB webcam
How It Works
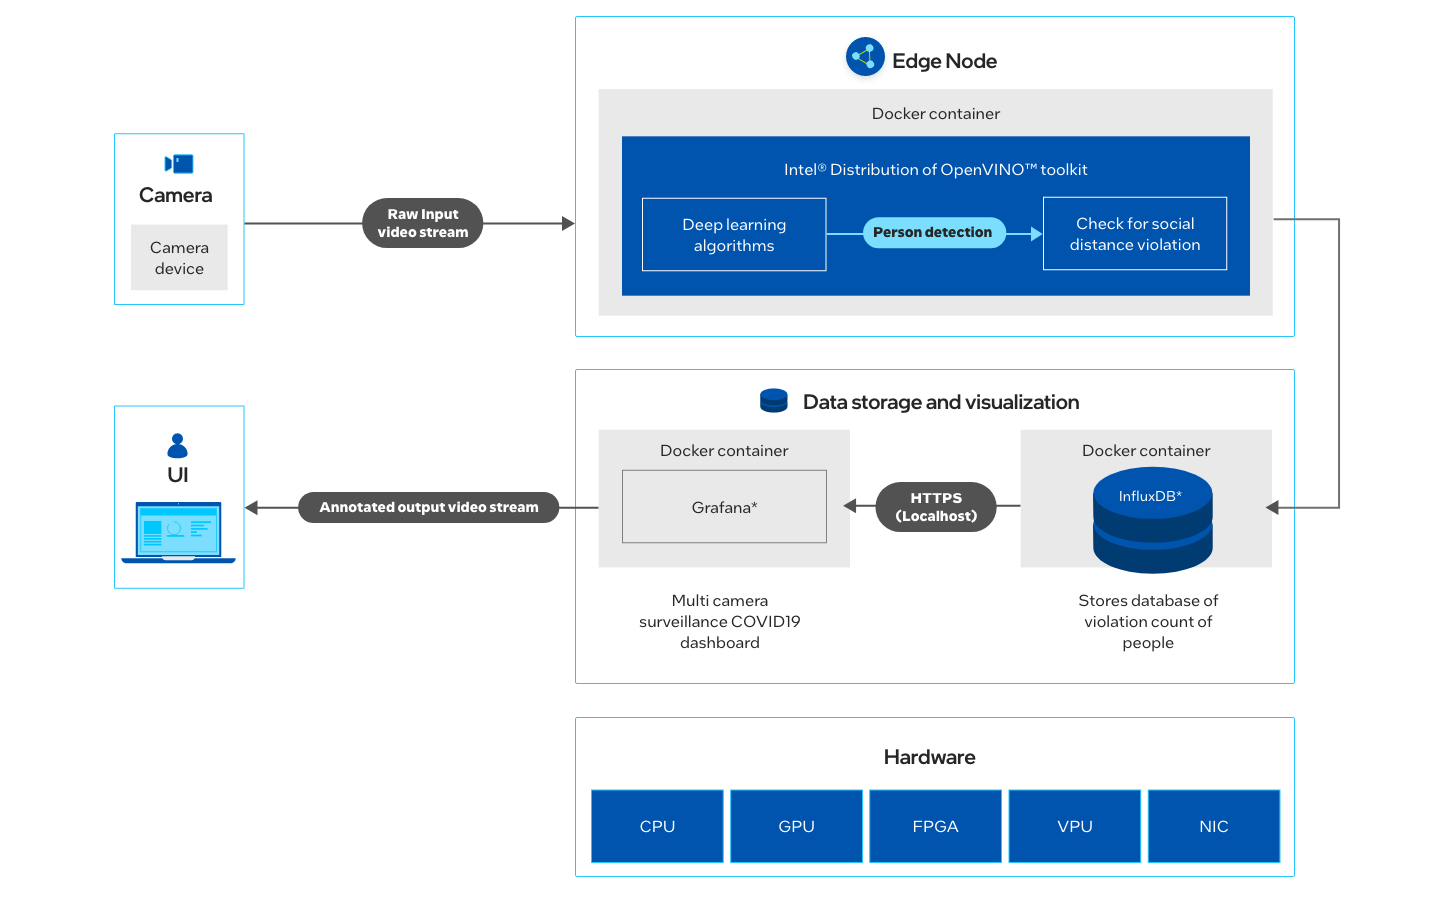
A social distancing detection solution demonstrates an end-to-end analytics pipeline to detect people and calculates social distance between people from multiple input feeds. Frames are transformed, scaled and normalized into BGR images which can be fed to the inference engine in the Intel® Distribution of OpenVINO™ toolkit. The steps below are performed for the inference.
-
Apply Intel's person detection model, i.e., person-detection-retail-0013 to detect people from all the video streams.
-
Compute Euclidean distance between all the people from the above step.
-
Based on above measurements, check whether any people are violating N pixels apart.
-
Store total violations count of social distancing data in InfluxDB.
-
Visualize the stored data of InfluxDB on Grafana dashboard.
Get Started
Step 1: Install the Reference Implementation
Select Configure & Download to download the reference implementation and then follow the steps below to install it.
- Open a new terminal, go to the downloaded folder and unzip the downloaded RI package:
unzip social_distancing_detection_for_retail_settings.zip - Go to social_distancing_detection_for_retail_settings/ directory:
cd social_distancing_detection_for_retail_settings - Change permission of the executable edgesoftware file:
chmod 755 edgesoftware - Run the command below to install the Reference Implementation:
./edgesoftware install - During the installation, you will be prompted for the Product Key. The Product Key is contained in the email you received from Intel confirming your download.
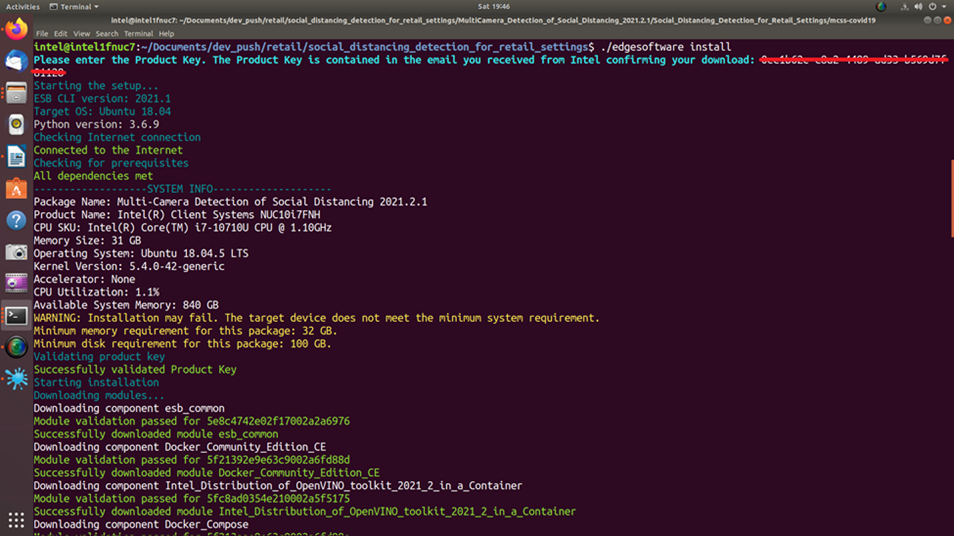
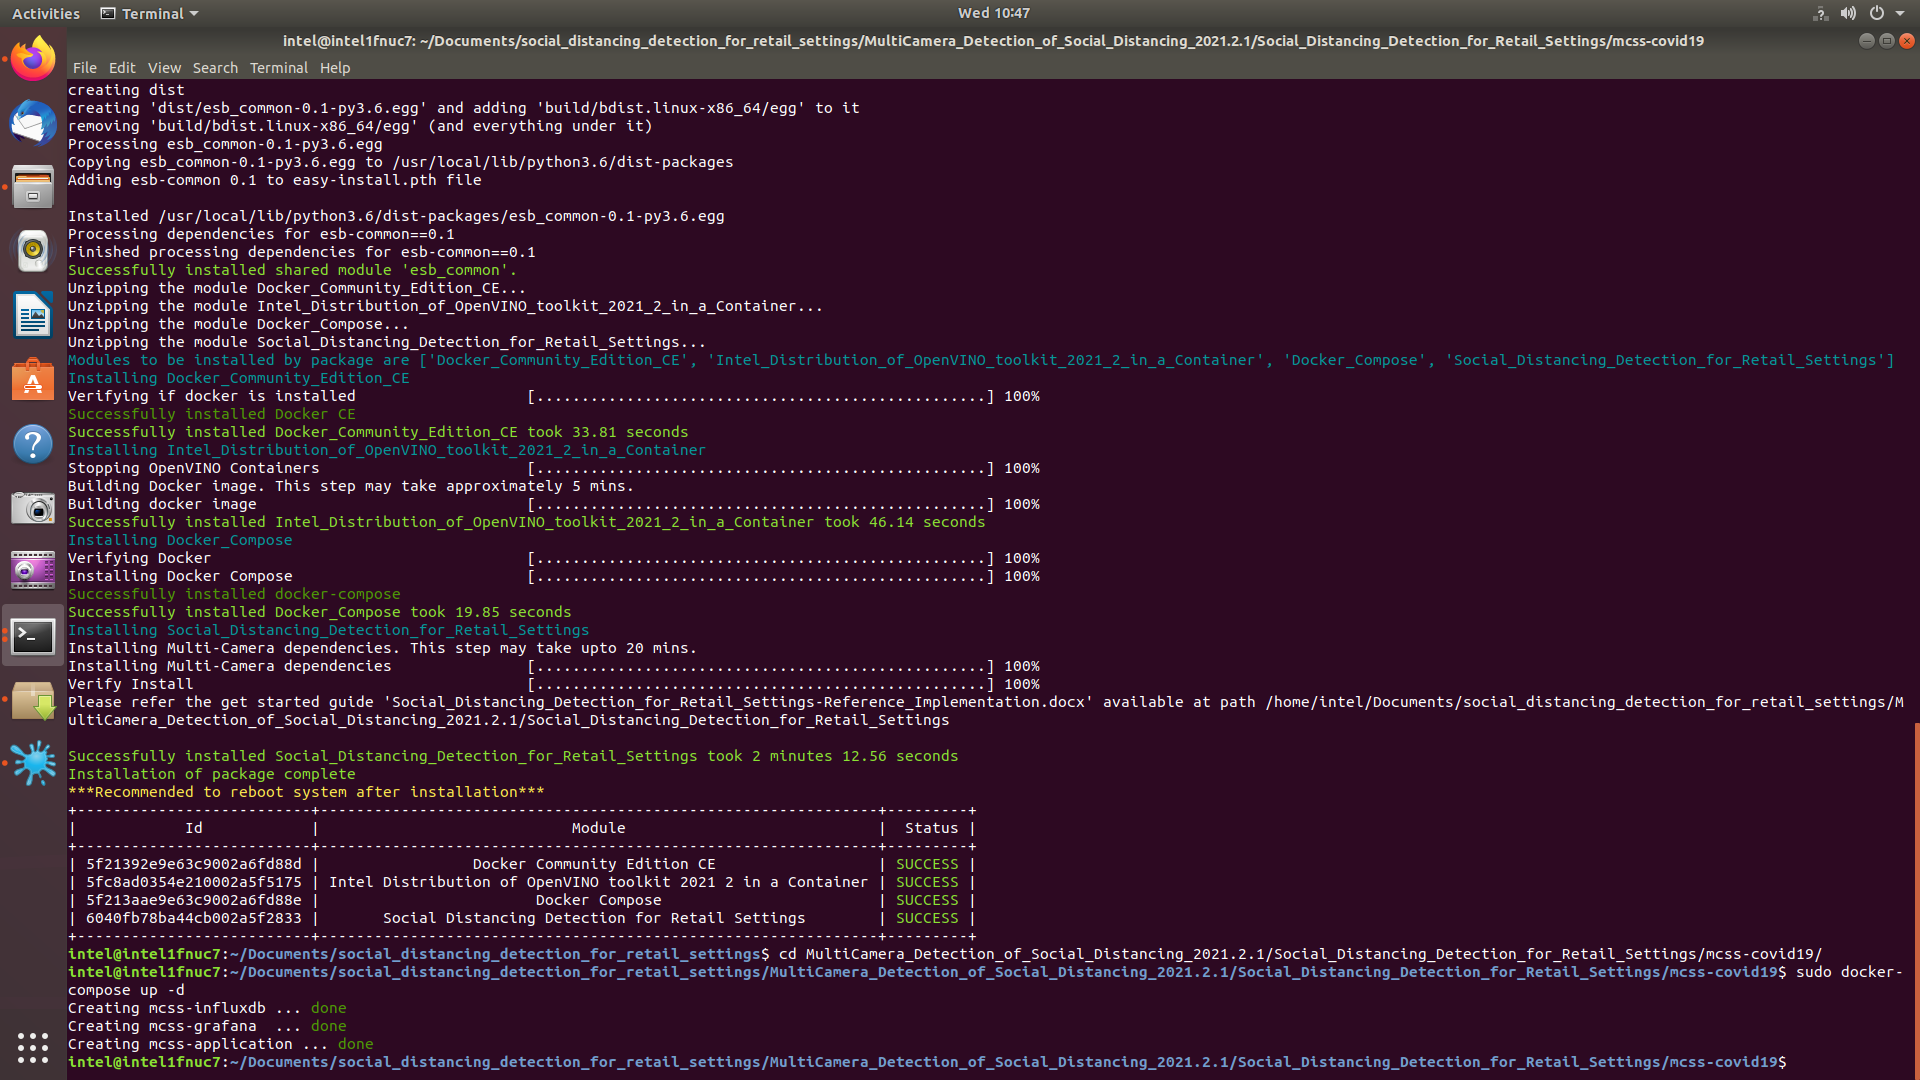
Figure 2: Product Key - When the installation is complete, you see the message “Installation of package complete” and the installation status for each module.
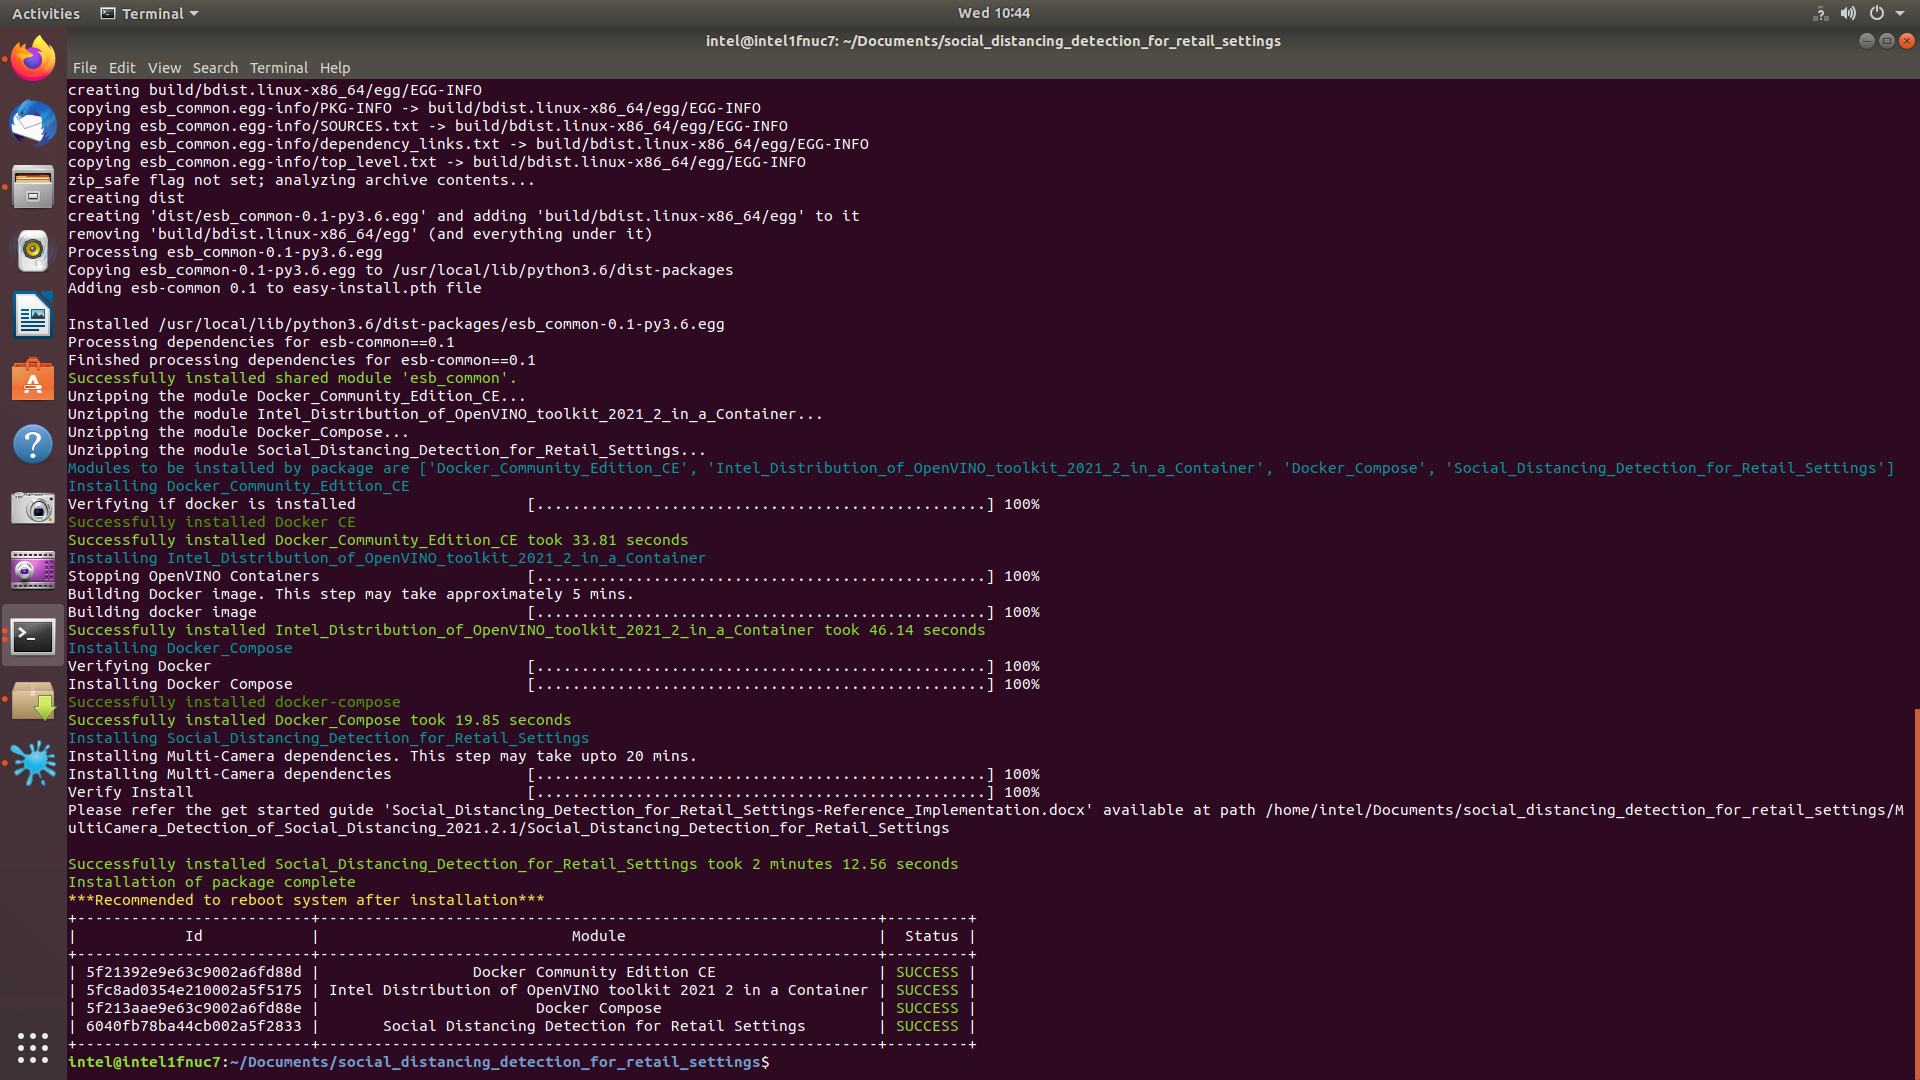
Figure 3: Install Success - Go to the working directory:
cd MultiCamera_Detection_of_Social_Distancing_<version>/Social_Distancing_Detection_for_Retail_Settings/mcss-covid19NOTE: In the command above, is the Intel® Distribution of OpenVINO™ toolkit version.
Step 2: Download the Input Video
The application works better with input feed in which cameras are placed at eye level angle.
Please download sample video at 1280x720 resolution and place it in the “resources” directory. (Data set subject to this license. The terms and conditions of the dataset license apply. Intel® does not grant any rights to the data files.)
Step 3: Run the Application
NOTE: For instructions on how to run the application with feed from a camera or how to configure other inputs, see the Optional Steps section.
To start the application, run the command below:
sudo docker-compose up -d
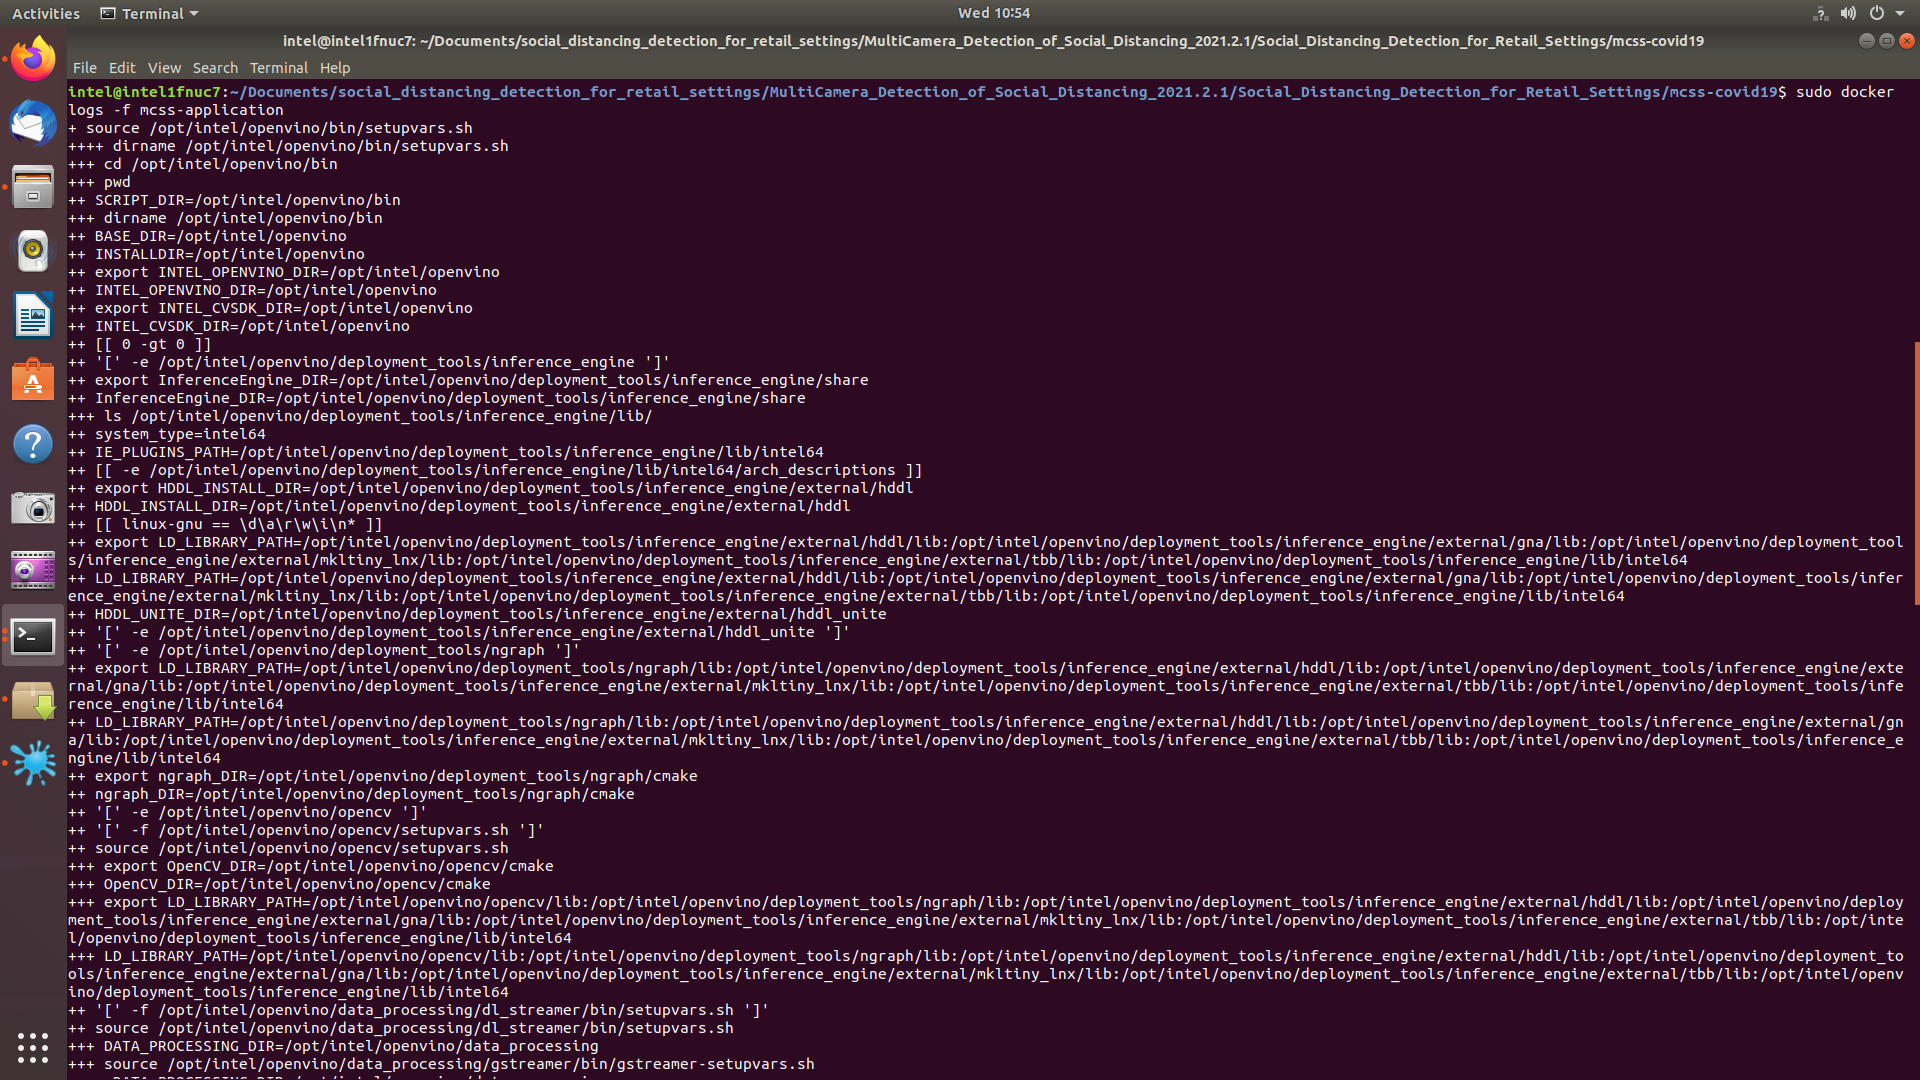
To check the logs of the application:
sudo docker logs -f mcss-application
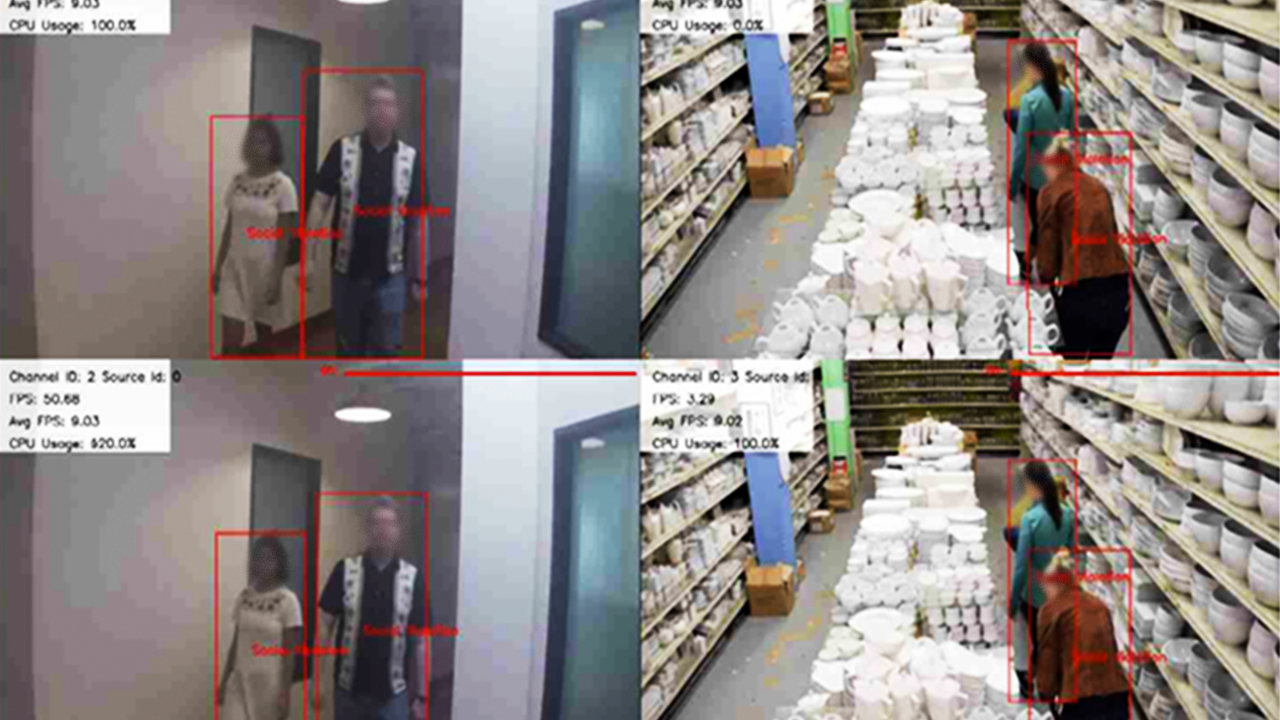
Optional Steps
Configure the input
The configuration.env file on the mcss-covid19/app/ directory contains all the necessary default configurations. If you wish to change the input, edit configuration.env file and add the required information. The role of main elements in the configuration.env file are:
- NUM_CHANNELS: Number of channels
- INPUT_SOURCE1: Path to the input video
- NOTE: Input videos should always be placed in /app/resources folder.
- To use camera stream instead of video, replace the video file name with /dev/video0
- To use RTSP stream instead of video, replace the video file name with the RTSP link.
- NOTE: To add more input sources, add a new line with INPUT_SOURCE2=, INPUT_SOURCE3= and so on.
- MIN_SOCIAL_DIST1: Social Distance value
- NOTE: For different video, you may need to calibrate value of this variable to get accurate social distance violation results.
- NOTE: If more input sources are added, add a new line with MIN_SOCIAL_DIST2=, MIN_SOCIAL_DIST3= and so on.
- PERSON_DETECTOR: Model path for person detection
- DEVICE1: Hardware Device to be used for person detection
- NOTE: Supported hardware devices are CPU, GPU, HDDL and MYRIAD. Also combination of these using MULTI, e.g., MULTI:CPU,HDDL.
- DECODE_DEVICE: Hardware Device to be used for decoding the video
- NOTE: Supported hardware devices are CPU, GPU, HDDL and MYRIAD. Also combination of these using MULTI, e.g., MULTI:CPU,HDDL.
Restart the mcss-application container:
sudo docker restart mcss-application
NOTE: If any of the device value in configuration.env has MYRIAD, add the following line to mcss-covid19 service in docker-compose.yml file:
privileged: true
Stop the application
To stop all the containers:
sudo docker-compose down
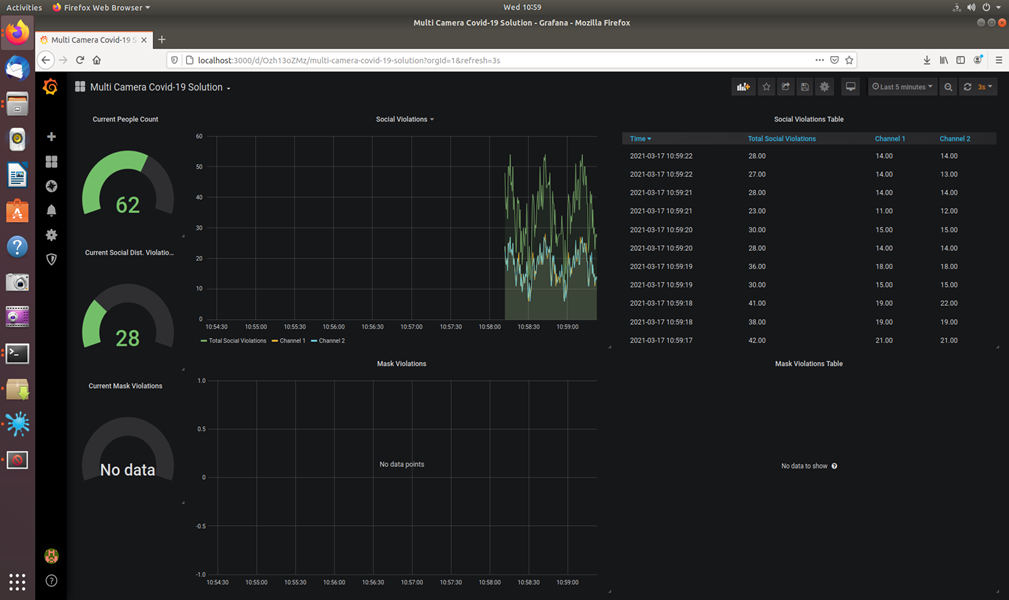
Visualize the MapUI on Grafana
1. Navigate to localhost:3000 on your browser.
NOTE: If accessing remotely, go to http://:3000. Get host system ip using:
hostname -I | cut -d' ' -f1
2. Login with user as admin and password as admin.
3. Click Home and Select the Multi Camera Covid-19 Solution to open the main dashboard.
Summary and Next Steps
This application successfully leverages Intel® Distribution of OpenVINO™ toolkit plugins for detecting and measuring distance between the people and storing data to InfluxDB.
Create a Microsoft Azure* IoT Central Dashboard
As a next step, you can create an Azure* IoT Central dashboard for Multi-Camera Detection of Social Distancing, run standalone Python code to fetch telemetry data from Influx DB, and send data to the Azure IoT Central dashboard for visualizing telemetry data. See Connect Edge Devices to Azure IoT* for instructions.
Learn More
To continue learning, see the following guides and software resources:
Troubleshooting
Address already in use for Grafana
If running the application results in Error starting userland proxy: listen tcp4 0.0.0.0:3000: bind: address already in use, use the following command to check and force stop the process:
sudo kill $(pgrep grafana)
NOTE: If the issue persists, it may be possible that Grafana is running in a Docker container. In that case, stop the container using:
sudo docker stop $(sudo docker ps -q --filter expose=3000)
Address already in use for InfluxDB
If running the application results in Error starting userland proxy: listen tcp4 0.0.0.0:8086: bind: address already in use, use the following command to check and force stop the process:
sudo kill $(pgrep influxd)
NOTE: If the issue persists, it may be possible that InfluxDB is running in a Docker container. In that case, stop the container using:
sudo docker stop $(sudo docker ps -q --filter expose=8086)
Unable to initialize server
If running the application results in Unable to init server: Could not connect: Connection refused, use the following commands to solve this issue:
1. Stop the containers:
sudo docker-compose down
2. Allow access to X server:
xhost +
3. Start the containers again:
sudo docker-compose up -d
Support Forum
If you're unable to resolve your issues, contact the Support Forum.