Intel® Optimization for TensorFlow* is a ready-to-run optimized solution that uses oneAPI Deep Neural Network Library (oneDNN) primitives. This solution works with Intel® Advanced Vector Extensions instructions on 3rd generation Intel® Xeon® Scalable processors (formerly code named Ice Lake) for performance improvement.
This quick start guide provides instructions for deploying Intel Optimization for TensorFlow to Docker* containers. The containers are packaged by Bitnami on Microsoft Azure* for Intel® processors.
What's Included?
Intel Optimization for TensorFlow includes the following precompiled binaries:
| Intel®-Optimized Library | Minimum Version |
| oneDNN | 2.5 |
Prerequisites
- A Microsoft* account with Azure subscription for resource management and billing purposes. For more information, see Create Your Azure Free Account.
- 3rd generation Intel Xeon Scalable processor
- oneDNN (included in this package)
Deploy Intel Optimization for TensorFlow
- Launch a Linux* virtual machine (VM) that's running on Ubuntu* 20.04 LTS:
Note The minimum version of Ubuntu that Docker supports is Ubuntu Bionic 18.04 (LTS). For more information on requirements, see Install Docker Engine on Ubuntu.
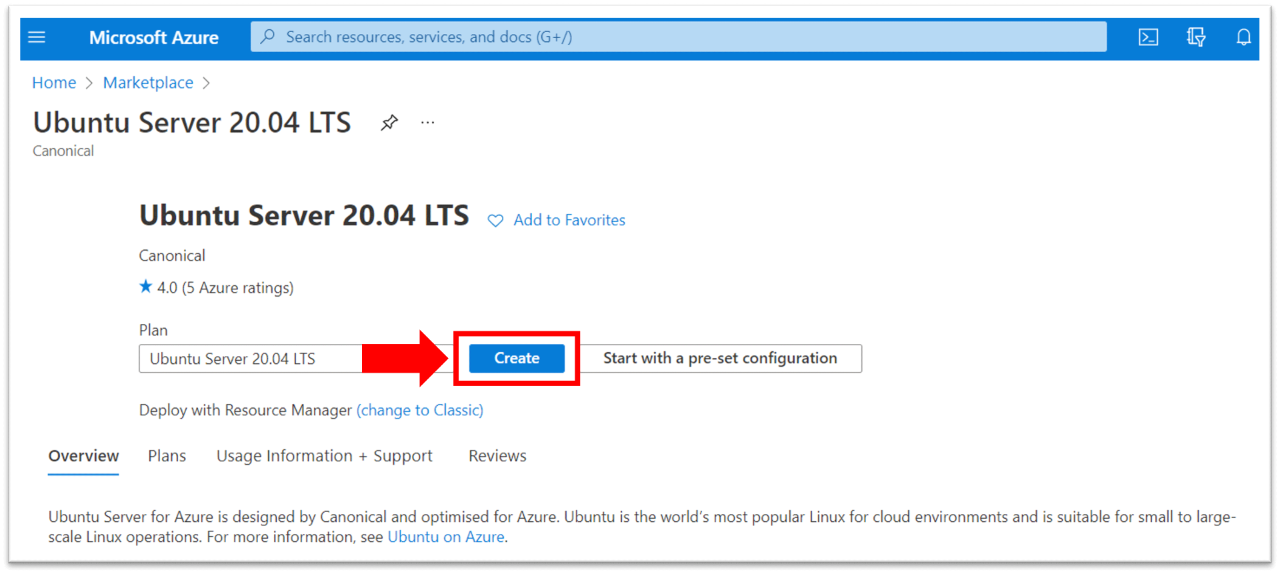
a. Go to the appropriate Azure Marketplace page.
b. Select Create.
- To validate the required parameters and create the VM on Azure:
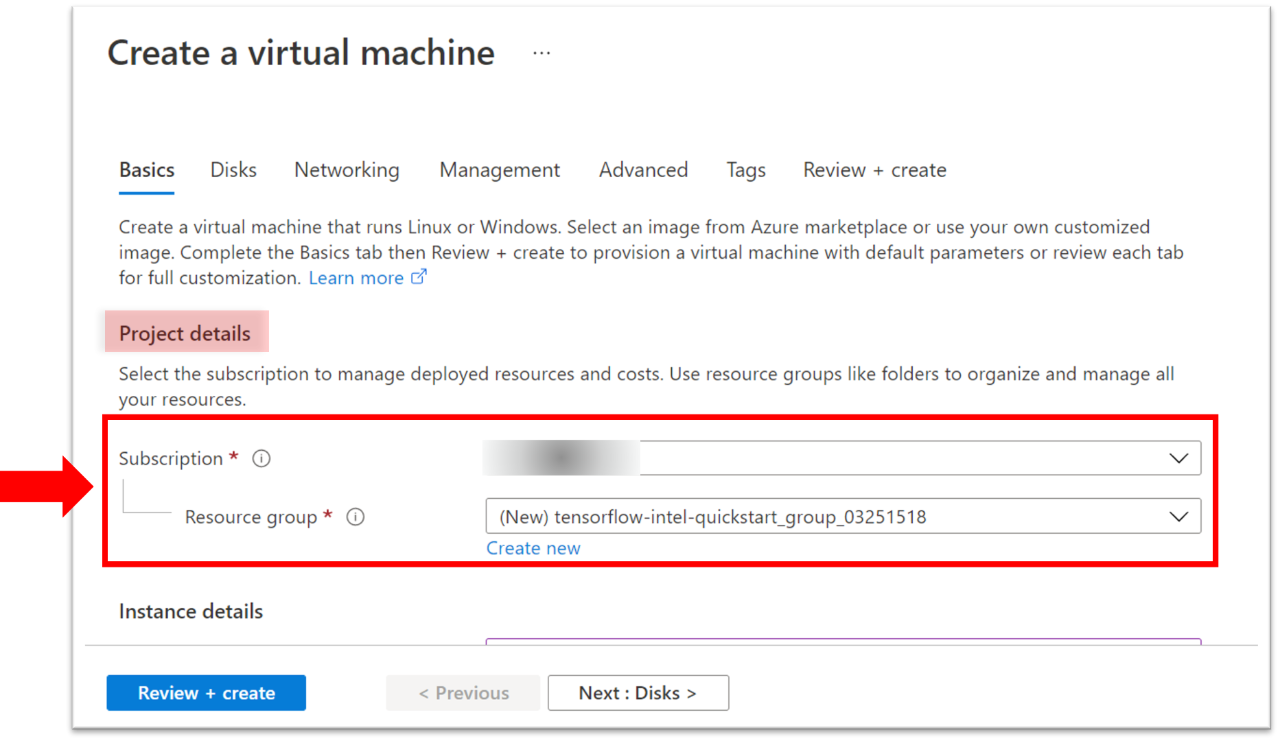
a. On the Basics tab, under Project details set Subscription and Resource group for resource management and billing purposes.
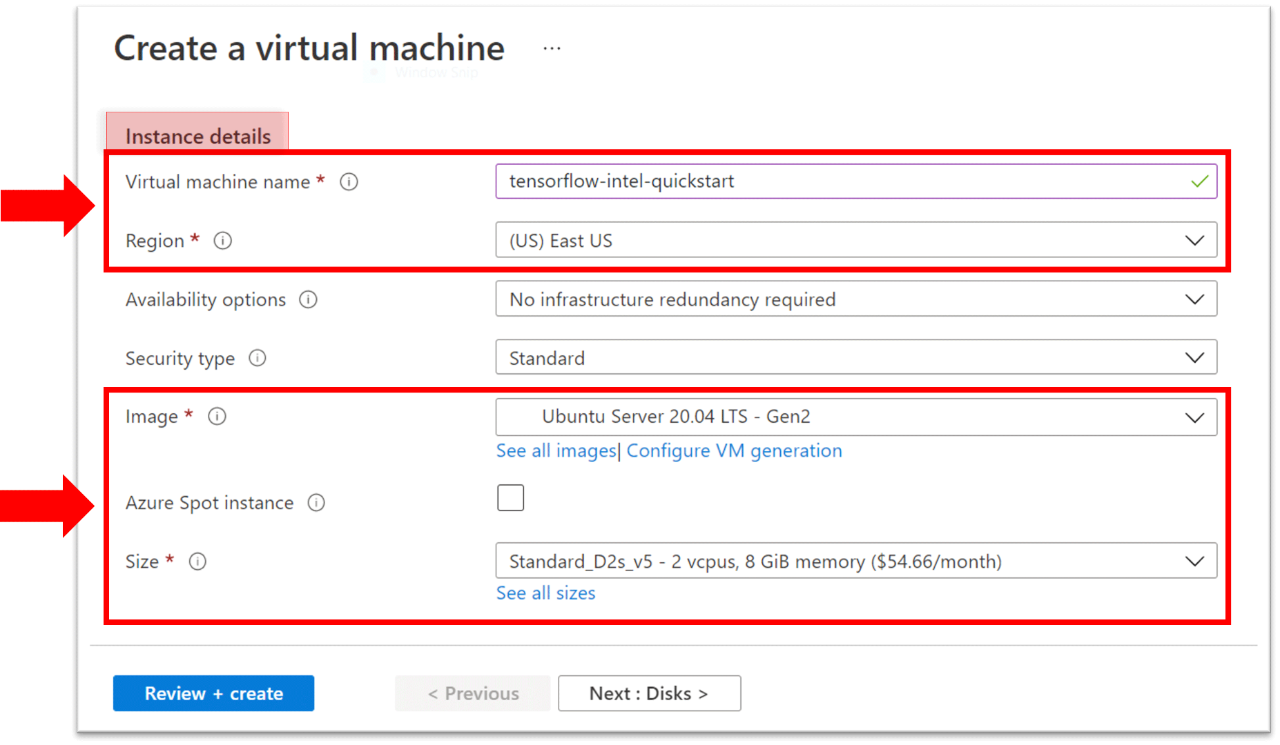
b. To deploy the VM on an Intel Xeon Scalable processor, scroll down to Instance details, and then enter the following:
- Virtual machine name: Name for the image
- Region: Indicates processor availability. The instances on Azure are:
- Dv5 and Dsv5-series
- Ddv5 and Ddsv5-series
- Edv5 and Edsv5-series
- Ev5 and Esv5-series
Tip To verify the available regions, see Products Available by Region.
- Image: The image you previously selected appears by default. You can select other versions from the list.
- Size: The size of the VM
c. Scroll down to Create a virtual machine. To configure the VM instance for the administrator account, enter the Username and Key pair name.
Note Write down the user name. You'll need it later.
d. Under Inbound port rules, select None.
Note These instructions use Azure Bastion, which provides a fully managed SSH access to the VM. If you access the VM using your terminal, select SSH .
- Review required settings for Disks, Networking, Management, Advanced, and Tags.
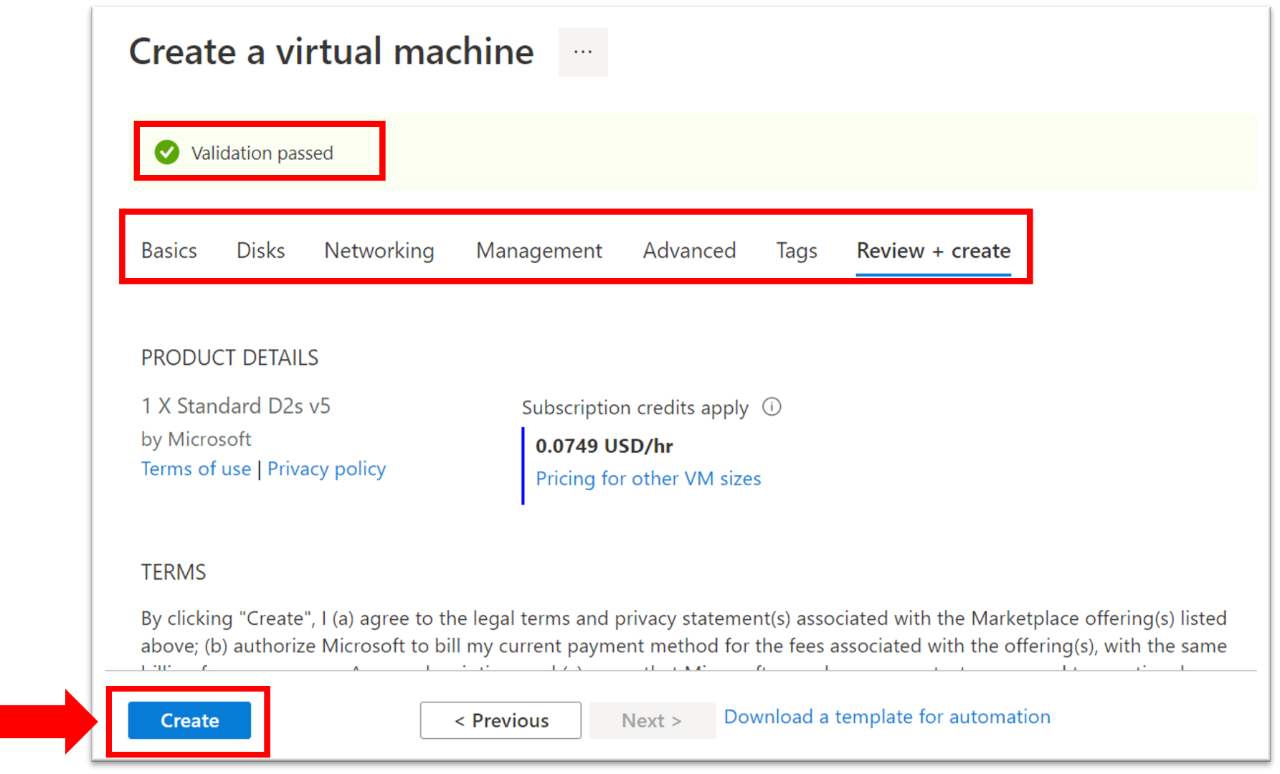
- Select the Review + Create tab. Azures verifies the configuration. If it passes, Validation passed appears. Otherwise, an error appears that indicates what needs to be corrected.
- After your validation passes, select Create. A prompt for generating a new key pair appears.
6. Select Download private key and create resource. (Use this key later to connect to the VM.)
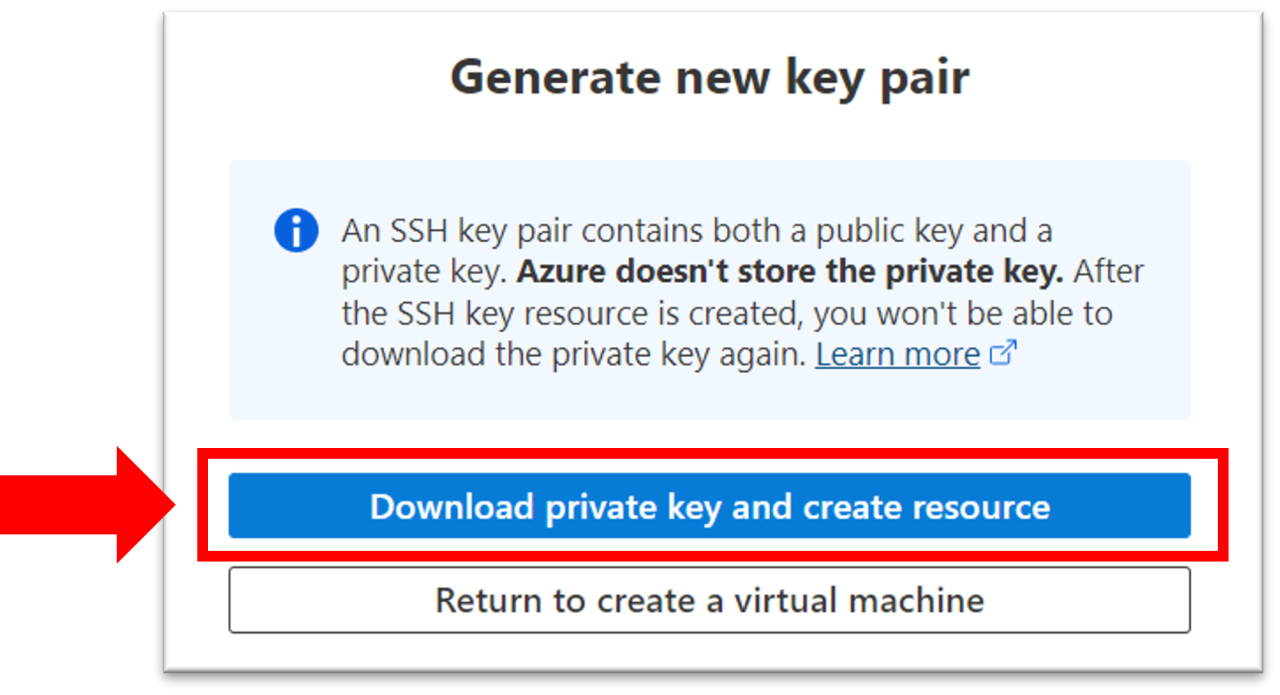
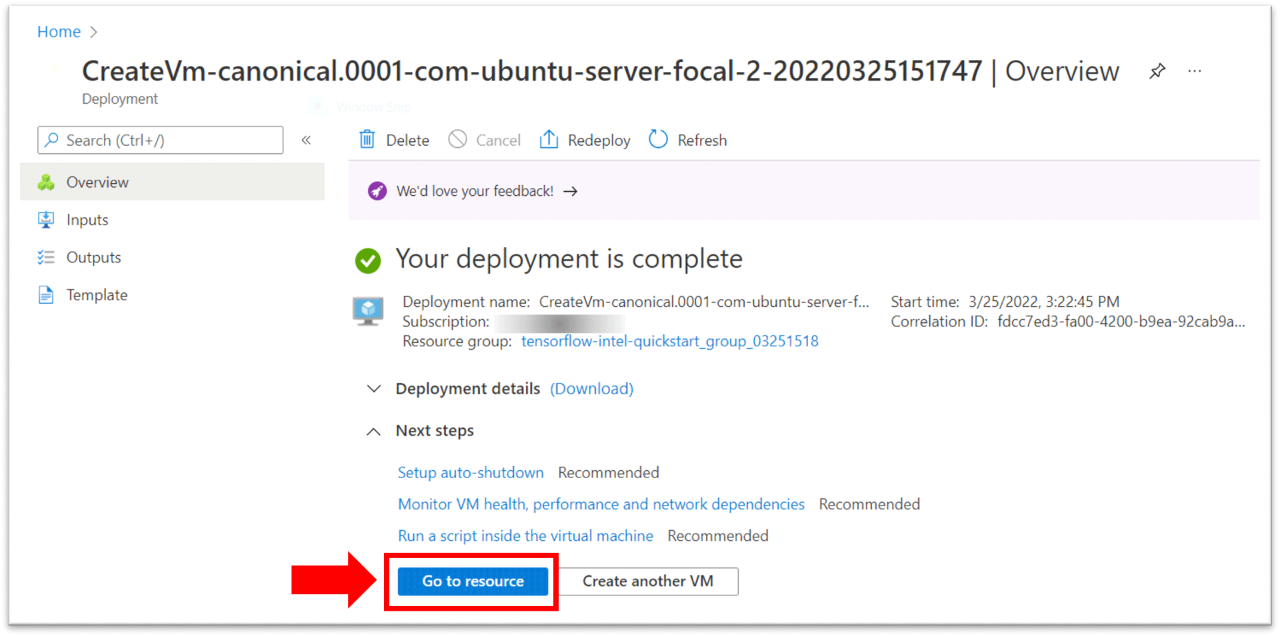
This resource initiates the deployment process. After the process successfully finishes, Create page appears and shows the deployment details and next steps.
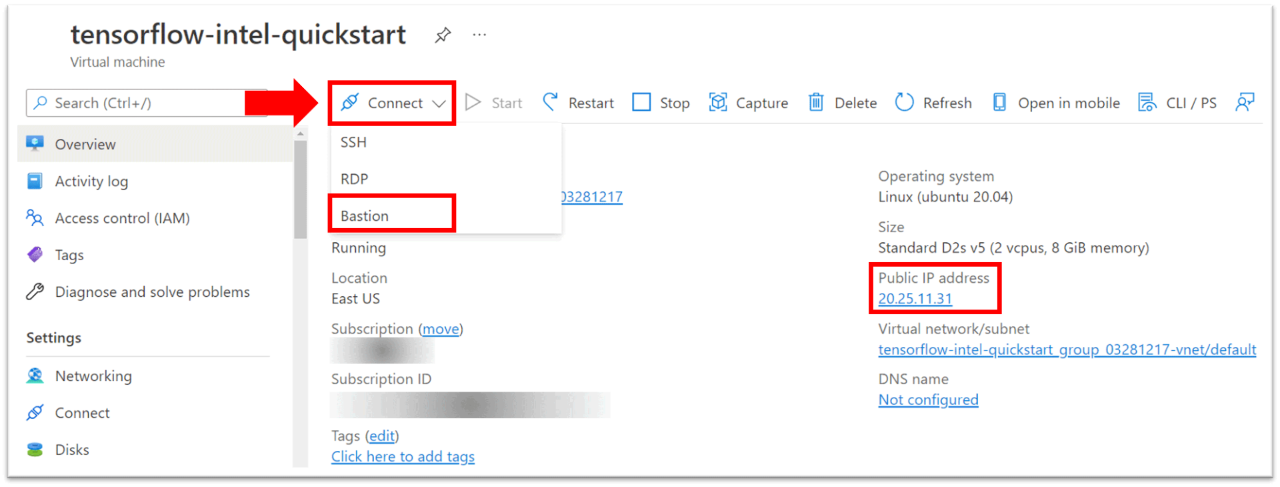
- Select Go to resource. The resource management page appears, and shows the details of the VM instance.
- Select Connect, and then select Bastion. A page for creating a Bastion instance for the VM appears.
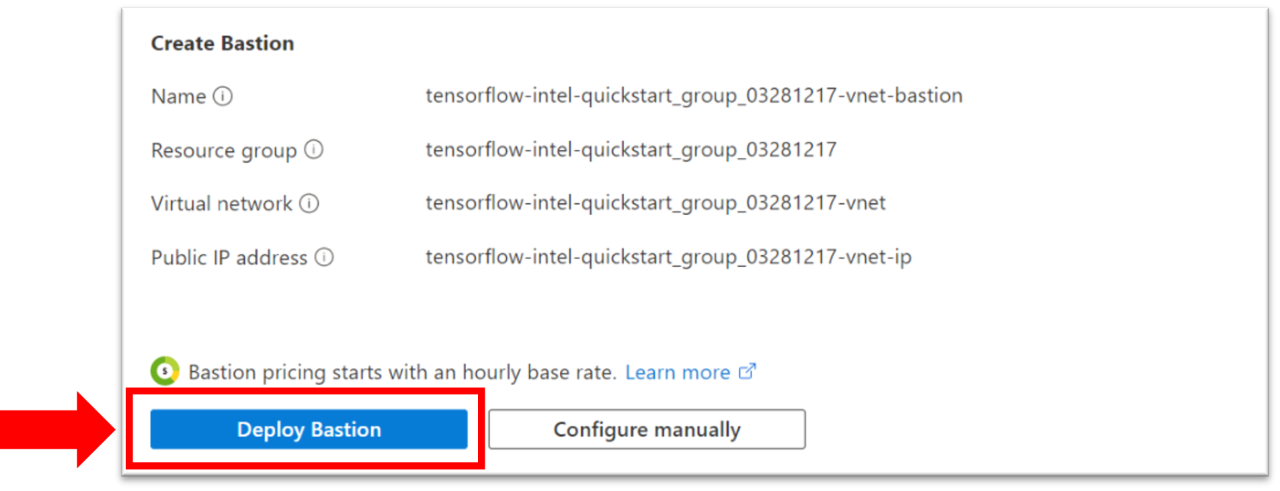
- Select Deploy Bastion. The Bastion page appears.
Note It may take a few minutes to complete provisioning
- Enter the following information:
a. In Username, enter the user name you created in Step 2.
b. Select SSH Private Key from Local File.
c. In Local File, browse to the private key you downloaded in Step 6.
11. Select Connect. After Bastion connects to a browser-based terminal, you can deploy Intel Optimization for TensorFlow to a Docker container:
a. If needed, install Docker.
b. To use the latest Intel Optimization for TensorFlow image, open a terminal window, and then enter this command: docker pull bitnami/tensorflow-intel:latest
Note Intel recommends using the latest image. If needed, you can find all versions in the Docker Hub Registry.
3. To test Intel Optimization for TensorFlow, start the container with this command: docker run -it --name tensorflow-intel bitnami/tensorflow-intel
Note tensorflow-intel is the container name for the bitnami/tensorflow-intel image.
For more information on the docker run command (which starts a Python* session), see Docker Run.
The container is now running.
4. Import Intel Optimization for TensorFlow into your program. The following image demonstrates commands you can use to import and use the TensorFlow API.

For more information about using TensorFlow and its API, see TensorFlow Introduction and TensorFlow API.
Connect
To ask product experts at Intel questions, go to the Intel Collective at Stack Overflow, and then post your question with the intel-cloud tag.
For queries about the Intel Optimization for TensorFlow image on Docker Hub, see the Bitnami Community.
To file a Docker issue, in the Docker Hub, see the Issues section.
For more information, see:
Upgrade Your Infrastructure with Azure VMs