Intel® Neural Compressor is an open source Python* library designed to help quickly optimize inference solutions on popular deep learning frameworks (TensorFlow*, PyTorch, Open Neural Network Exchange [ONNX*] runtime, and MXNet*). Intel Neural Compressor is a ready-to-run optimized solution that uses the features of the 3rd generation Intel® Xeon® Scalable processor (formerly code named Ice Lake) to get a breakthrough performance improvement.
This quick start guide provides instructions for deploying the Intel Neural Compressor to Docker* containers. The containers are packaged by Bitnami* on the Google Cloud Platform* service for Intel Xeon Scalable processors.
What's Included
The Intel Neural Compressor includes the following precompiled binaries:
|
Intel®-Optimized Library |
Minimum Version |
|---|---|
|
2.7.3 2.5.0 |
|
|
1.9.0 1.10.0 |
|
|
1.8.0 1.6.0 |
Prerequisites
- A Google* account with access to the Google Cloud Platform service. For more information, see Get Started.
- An Intel Xeon Scalable processor.
Deploy from the Google Cloud Platform Service
To deploy the Intel Neural Compressor on a Docker container using the Google Cloud Platform service, launch a Linux* virtual machine (VM) that is running Ubuntu* 20.04 LTS.
- Go to Ubuntu* on the Google Cloud Marketplace.
The minimum Ubuntu version supported by Docker is Ubuntu Bionic 18.04 (LTS). For the requirements, see Install a Docker Engine on Ubuntu.
- Select Launch.
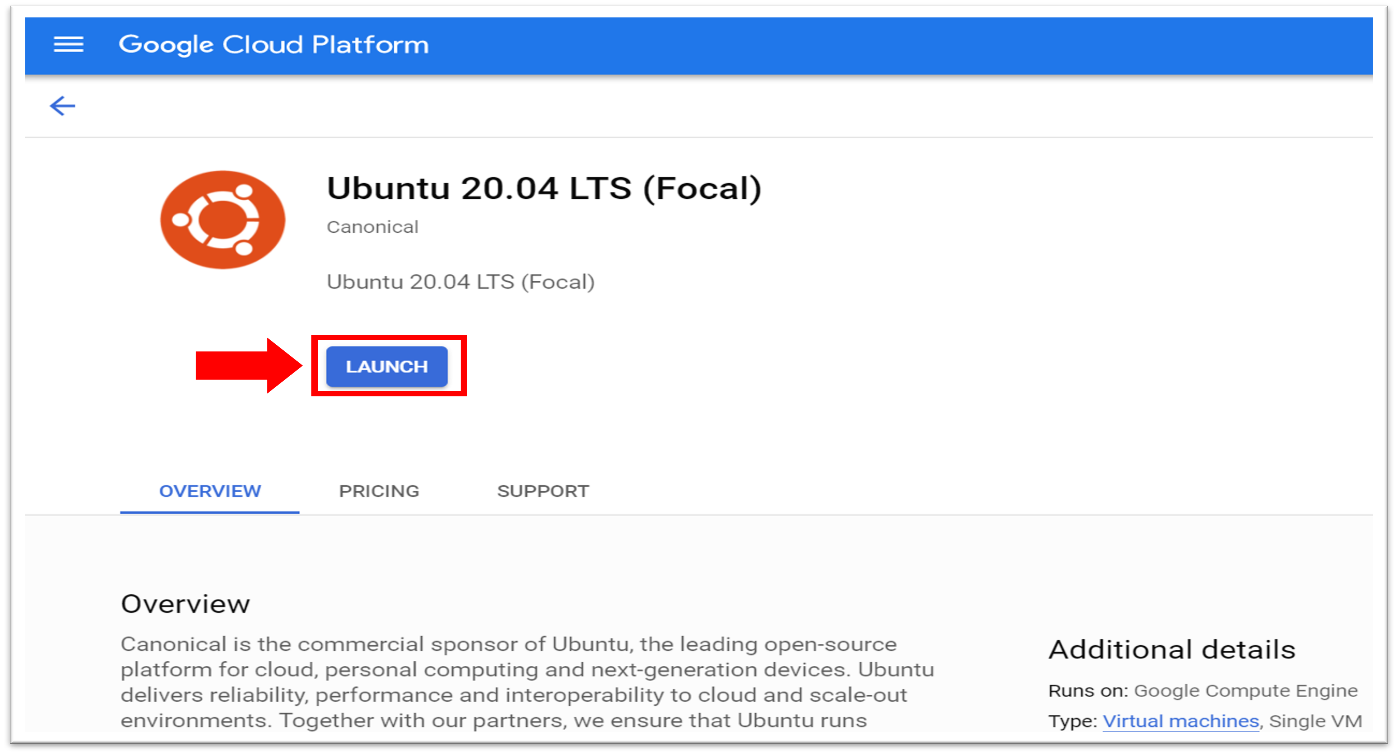
- To configure Intel Neural Compressor for deployment on an Intel Xeon Scalable processor:
- Select a region for the Intel® processor. The processor is available in:
• us-central1-a
• us-central1-b
• us-central1-c
• europe-west4-a
• europe-west4-b
• europe-west4-c
• asia-southeast1-a
• asia-southeast1-b
Note For the latest information on availability, see Regions and Zones.
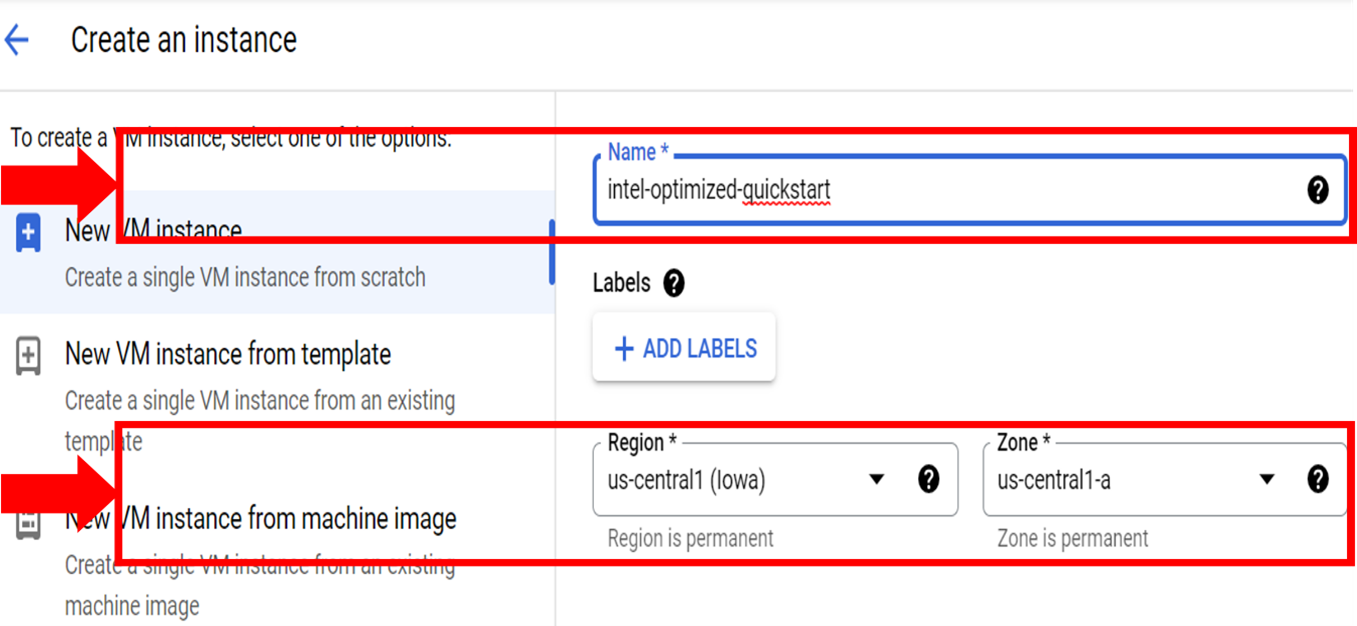
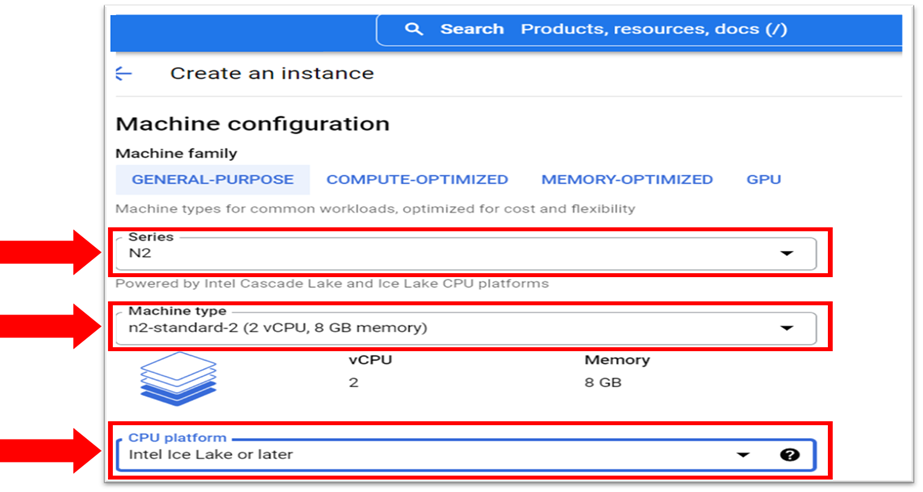
- For Series, select an N2 series. This series provides the hardware for the optimized libraries in the Intel Neural Compressor.
- For Machine Type, select an option.
N2 standard, N2 high-mem, and N2 high-cpu are machine types that offer instance sizes between 2 vCPUs and 128 vCPUs.
N2 instances that range from 2 vCPUs to 80 vCPUs can be Ice Lake processors. N2 instances with over 80 vCPUs are only the formerly code named Ice Lake processors.
- If you select a machine type ranging from 2 vCPUs to 80 vCPUs, in CPU platform select between Automatic and Intel Ice Lake or later. This selection guarantees that the instance runs on an Intel Xeon Scalable processor. For the latest information on supported instances, see CPU Platforms.
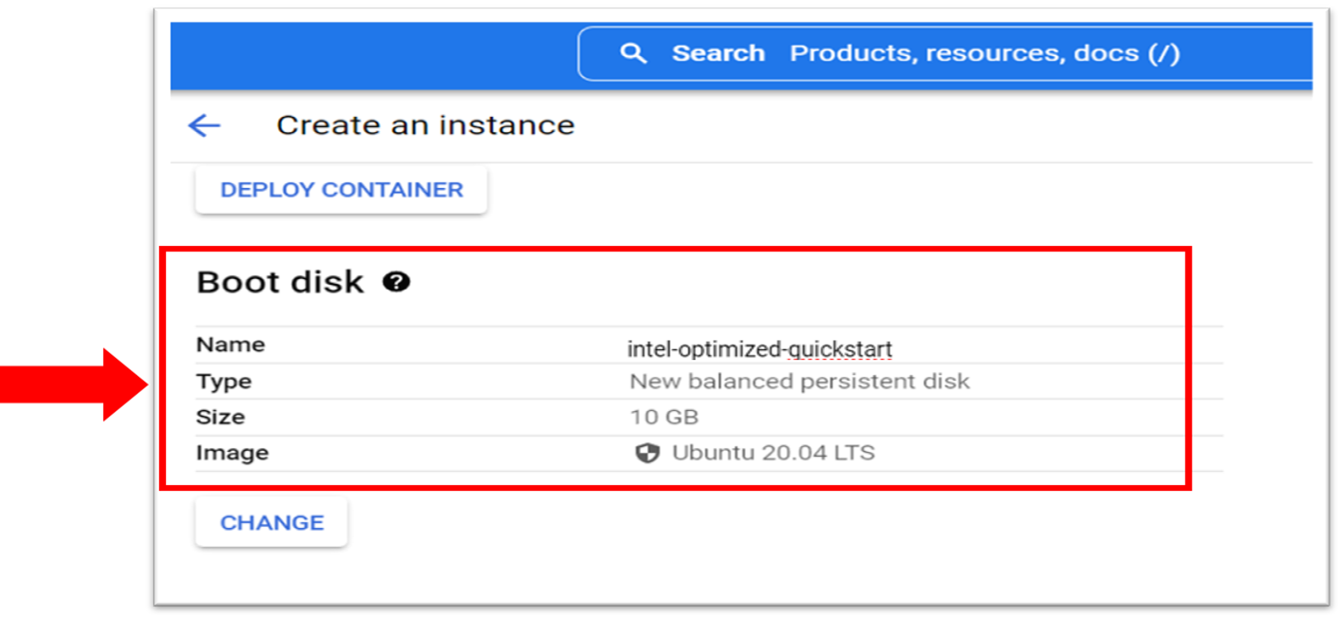
- Configure Boot Disk according to your needs for the Intel Neural Compressor.
- Configure Identity and API access, Firewall, and Networking according to your VM software needs.
- Select a region for the Intel® processor. The processor is available in:
- Select Create. This initiates the deployment process.

- When the deployment process is complete, you can view the created VM Instances List.
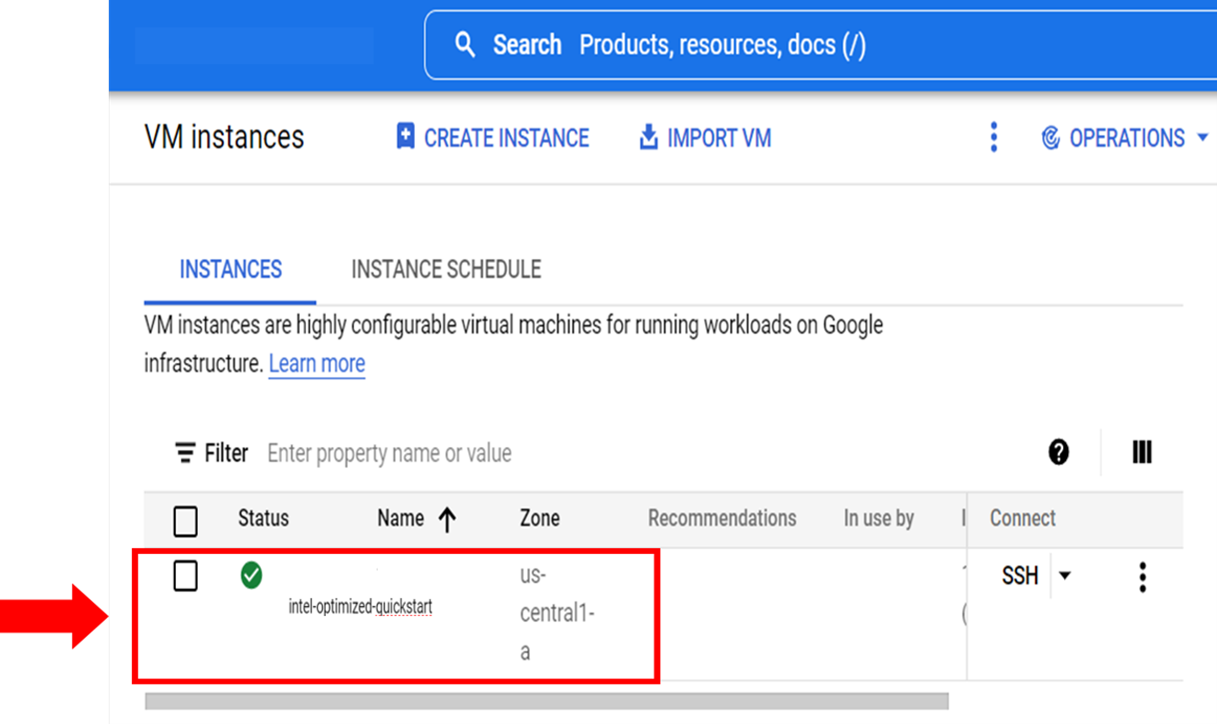
To view basic information about the VM, scroll down the VM instances.
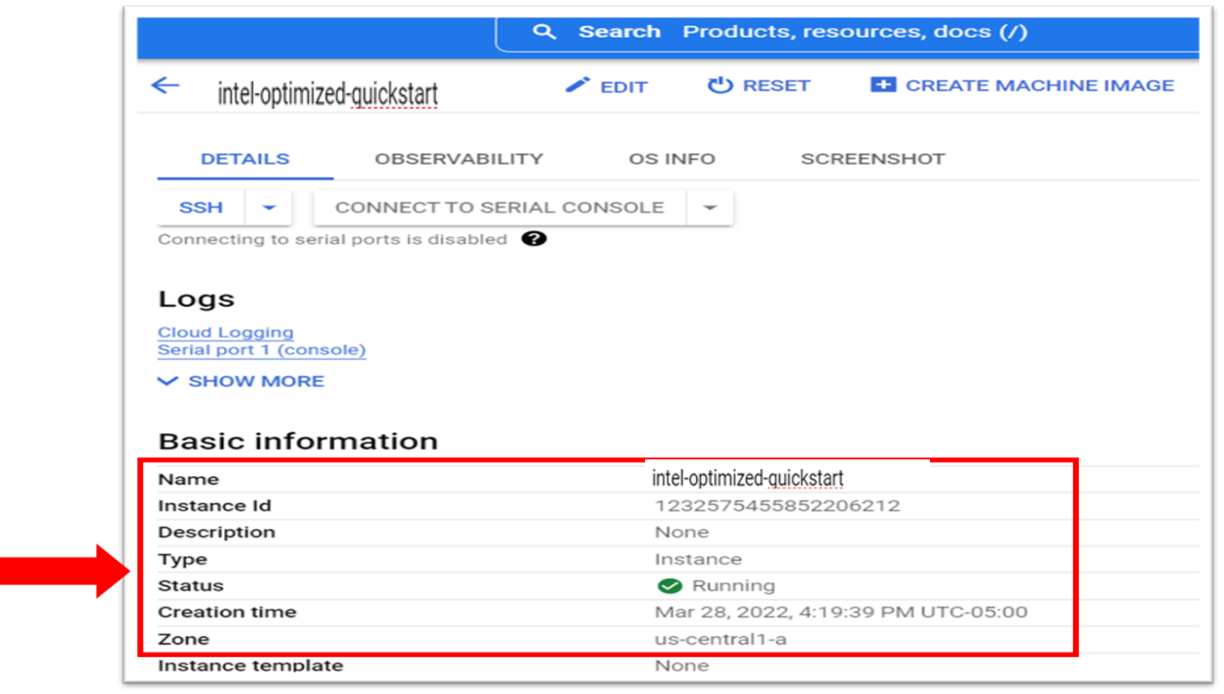
- To manage the VM resources and connection:
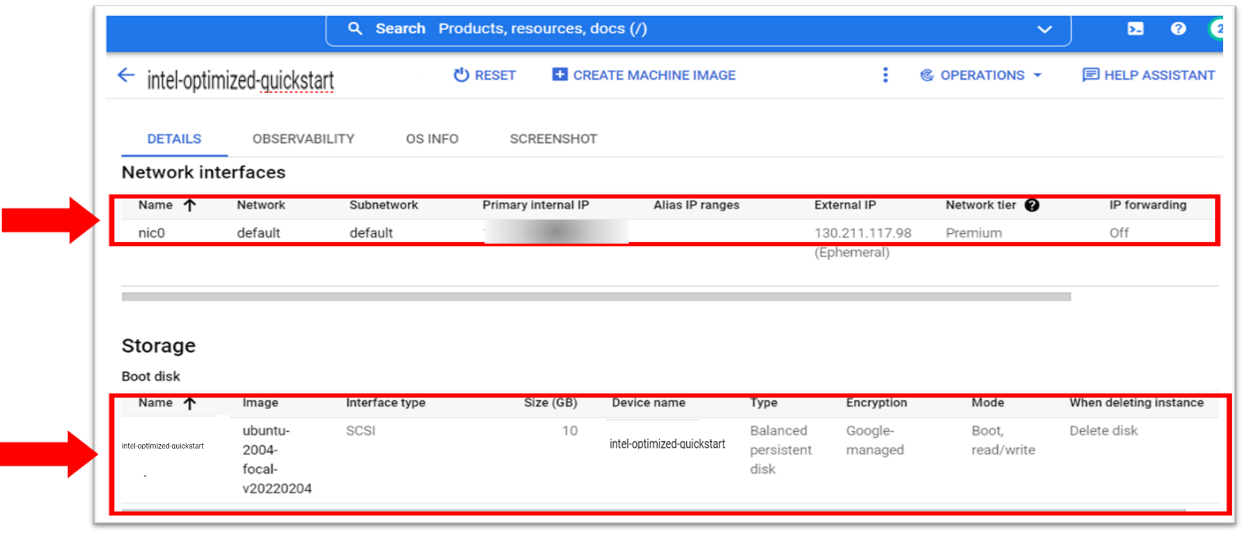
- For network interfaces and storage details, scroll down to External IP.
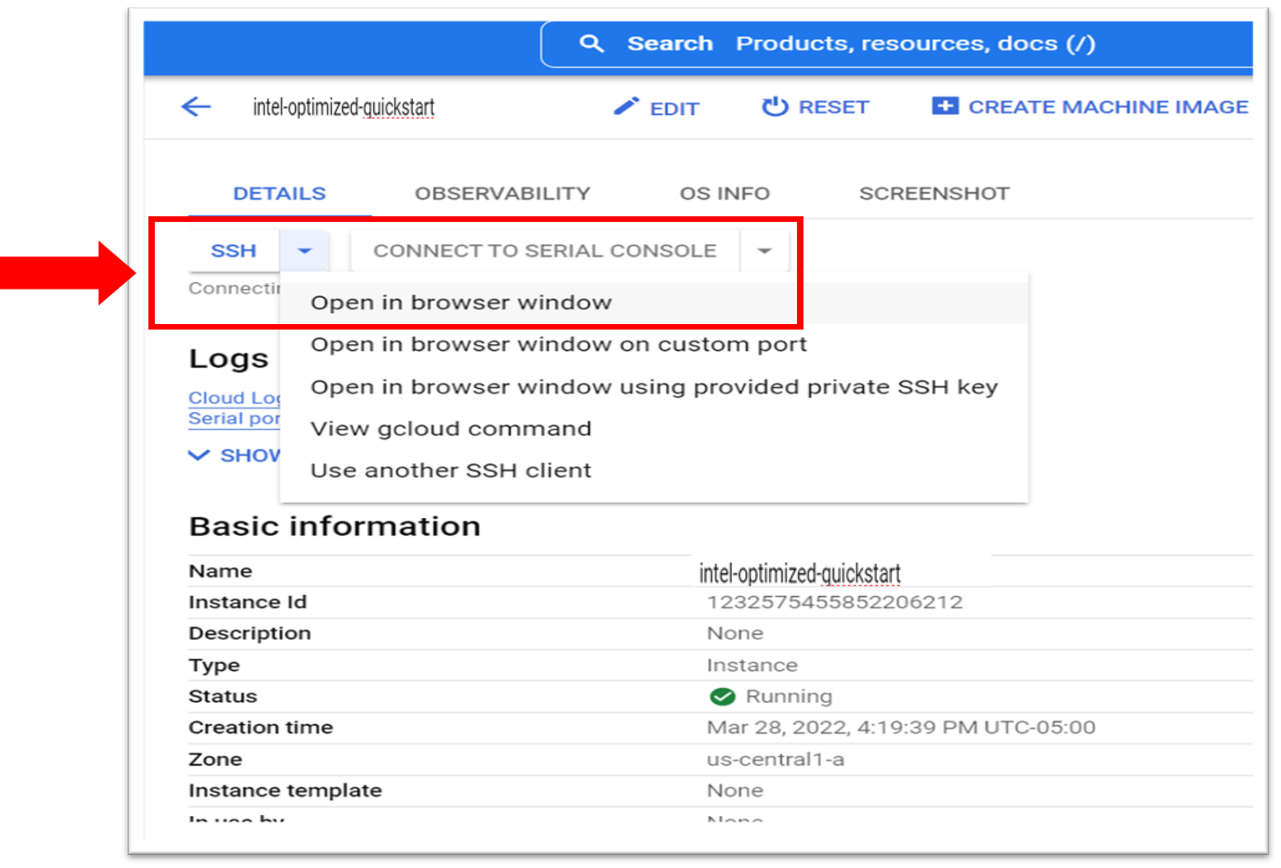
- Select the SSH drop-down menu, and then select open in browser window. The SSH connects to the VM in the browser-based terminal.
- For network interfaces and storage details, scroll down to External IP.
- To deploy the Intel Neural Compressor image:
- If needed, Install Docker on Ubuntu.
- To pull the latest prebuilt Intel Neural Compressor for a Docker container image, enter the following command: docker pull bitnami/INC-intel:latest
Note Intel recommends using the latest image. If needed, you can find older versions in the Docker Hub Registry.
- To test Intel Neural Compressor, start the container using the command: docker run -it --name INC-intel bitnami/INC-intel
Note inc-intel is the container name for the bitnami/inc-intel image. For more information on the docker run command, see Docker Run.
The command starts a Python session and the container is running.
- If needed, Install Docker on Ubuntu.
- To import the Intel Neural Compressor API into your program, enter following command: from neural_compressor. experimental import Quantization, common
For more information about using Intel Neural Compressor and the API, see Documentation.
Verify That the Instance Is Deployed
- Go to your project's Compute Engines List.
- Select the instance that you created. This displays the Instance Details page.
- Scroll to the Machine configuration section. The CPU Platform must display Intel Ice Lake. If another processor name appears, fix it with the Google Cloud Command-Line Interface.
Connect
To ask product experts at Intel questions, go to the Intel Collective at Stack Overflow, and then post your question with the intel-cloud tag.
For questions about the Intel Optimization for TensorFlow image on Docker Hub, see the Bitnami Community.
To file a Docker issue, see the Issues section.