In this demo we are showcasing the use of Intel® Xeon Phi™ processor, to do a 3D visualization of tumor in a human brain. This can help advance research in medical field by getting precise detection and removal of something like tumor in human brain.
More information
The tool used for visualization is Paraview, with OSPRay as the rendering library.
Pre-requisites
Intel® Xeon Phi™ processor system with CentOS 7.2 Linux* (internet enabled)
Open a terminal, in your work area directory and follow the steps below:
- Create directory for the demo
mkdir Intel_brain_demo - Change directory
cd Intel_brain_demo - Create two directories under this
mkdir paraview
mkdir ospray - Access the files from Dropbox:
https://www.dropbox.com/s/wj0qp1clxv5xssv/SC_2016_BrainDemo.tar.gz?dl=0
- Copy the Paraview and Ospray tar files into the respective directories you created in steps above
mv SC_2016_BrainDemo/paraview_sc_demo.tgz paraview/
mv SC_2016_BrainDemo/ospray.tgz ospray/ - Untar each of the *tgz directories in the respective area
tar –xzvf *.tgz - Point the library path
Export
LD_LIBRARY_PATH=$LD_LIBRARY_PATH:<…../Intel_brain_demo/ospray/install/lib64> - Optional step: set graphics system to a random variable, only if Paraview doesn’t load normally
export QT_GRAPHICSSYSTEM=gtk - Change directory to paraview/install where the binaries are
cd paraview/install - Run Paraview
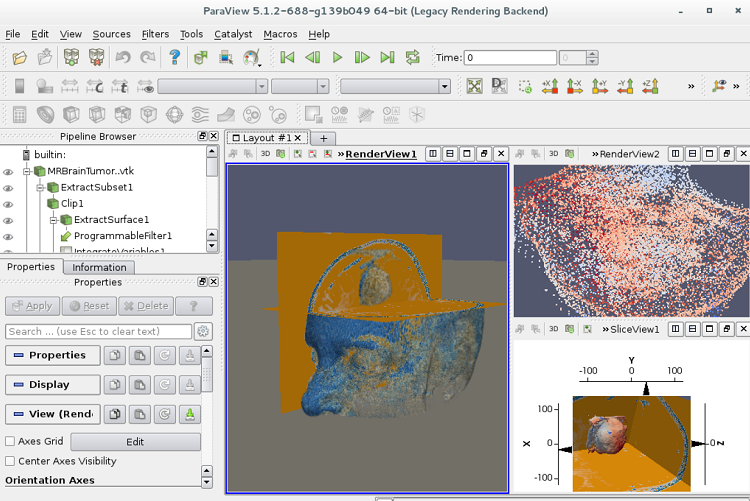
./bin/paraview - Once Paraview loads
Select File/Load State
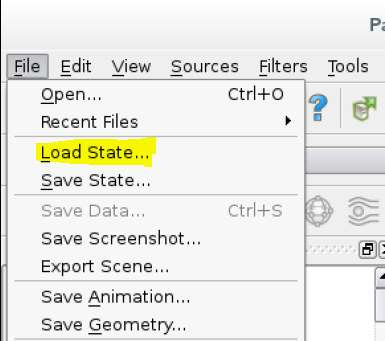
- Then load the brain_demo.psvm file from the SC_2016BrainDemo that you sync’d in step above
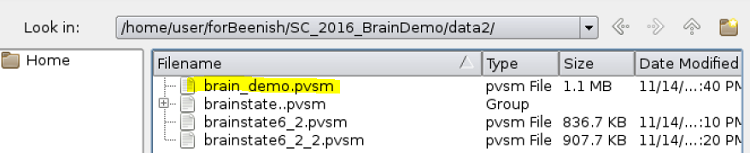
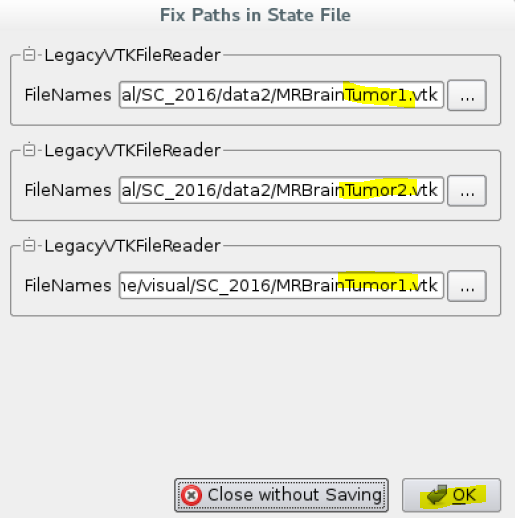
- Then it will ask you to load VTK files, click the “...” button to select the appropriate *tumor1.vtk file, then *tumor2.vtk file and then *Tumor1.vtk file in order on your local machine. Then click OK.
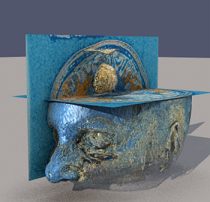
- An Output Messages pop window will show with warnings. Ignore the warnings and click close, and you should see something like following:
- Now you can go to File/Save State and save this state. Now every time you load you can load to this state file to skip the previous step of having to locate the data files.
- Then on properties tab on left side, enable Ospray for every view (all the rendewViews1/2/2 by selecting that view and clicking enable Ospray)
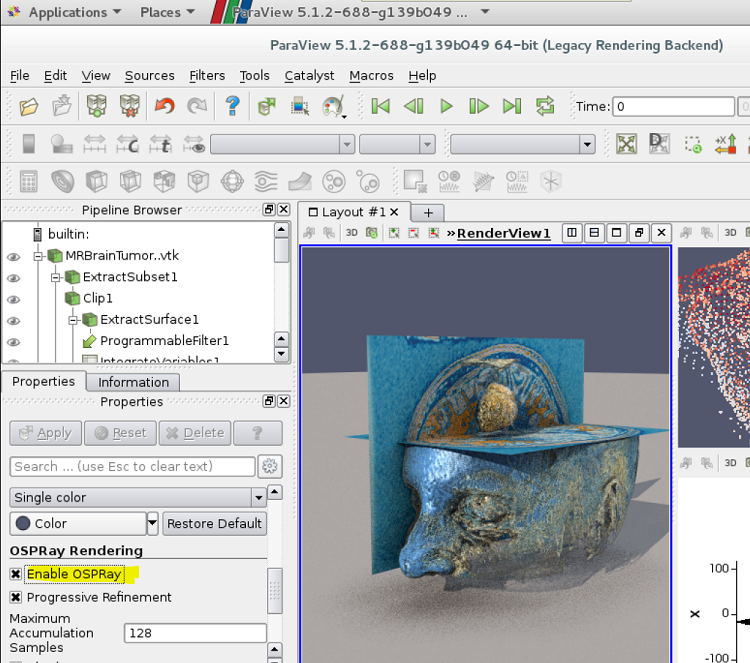
- Once you do that you should see the images for all three views look as below:
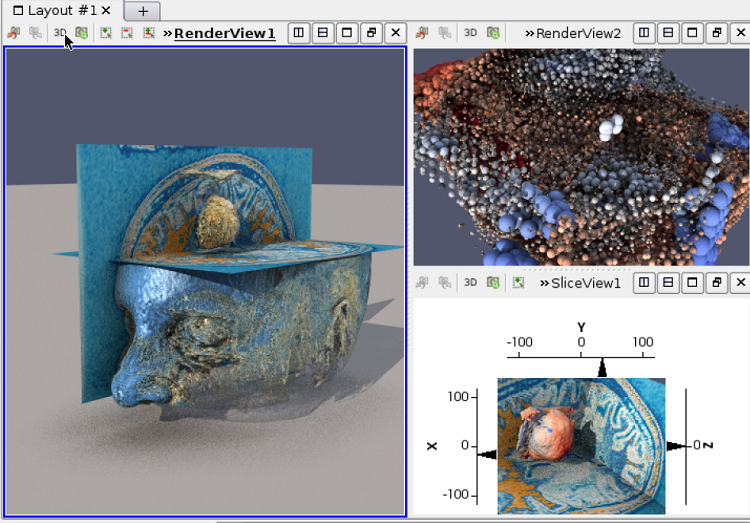
- You can also rotate the views and see how they look.
A few issues and how to resolve
Missing OpenGL, install mesa for OpenGL
Sudo yum –y install mesa-libGL
 Sudo yum –y install mesa-libGL-devel
libQtGui.so.4 error, install qt-x11 package
yum –y install qt-x11
Acknowledgements
Special thanks to Carson Brownlee and James Jeffers from Intel Corporation for all their contributions and support. Without their efforts, it wouldn’t have been possible to get this demo running.
References
- http://www.intel.com/content/www/us/en/processors/xeon/xeon-phi-detail.html
- https://software.intel.com/en-us/blogs/Intel-Parallel-Studio-XE-2016
- https://gitlab.kitware.com/carson/paraview
- https://gitlab.kitware.com/carson/vtk
- http://www.ospray.org
- http://www.ospray.org/getting_ospray.html
- http://dap.xeonphi.com
- https://ispc.github.io/downloads.html
- https://www.threadingbuildingblocks.org
- https://en.wikipedia.org/wiki/Software_rendering