User Guide for Intel® Compute Stick STK1AW32SC
The User Guide for Intel® Compute Stick STK1AW32SC helps you setup and use your Compute Stick.
Click or the topic for details:
Product Description
| Symbol | Description |
| HDMI* | HDMI connector |
| Power LED | Power LED - blue |
| MicroSD* | MicroSD memory card slot |
| Security | Security cable opening |
 | USB 3.0 port |
 | USB 2.0 port |
 | Power connector |
 | Power button |

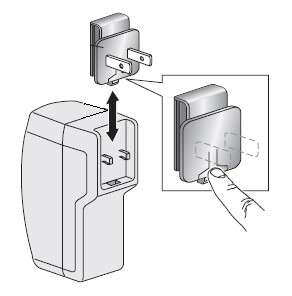
Choose the Power Plug
Select the power plug attachment for your region. All plug attachments may not be included in the box.| Country | Plug Attachment |
| United States, Japan |  |
| United Kingdom | 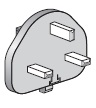 |
| Argentina | 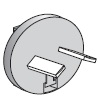 |
| Australia | 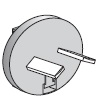 |
| Brazil | 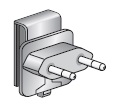 |
| China | 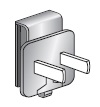 |
| European Union | 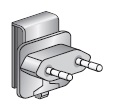 |
| India | 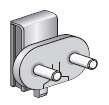 |
| South Korea |  |
Slide the plug attachment onto the power adapter.
The included power adapter and cable must be used to power the Intel® Compute Stick. Use of any other power adapter, power source, or cable isn't supported.
Connect a Keyboard and Mouse
Intel® Compute Stick supports any of the following:| USB wired keyboard and mouse, connected to the ports on the Intel Compute Stick. |  |
| USB wireless keyboard and mouse, using a USB dongle. | 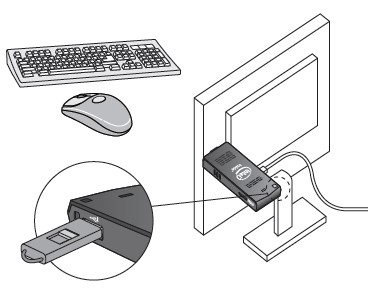 |
| Bluetooth* keyboard and mouse. Follow the instructions that came with the keyboard and mouse to pair them to the Intel Compute Stick’s onboard Bluetooth device. To pair Bluetooth, you may need to temporarily connect a wired mouse and keyboard to the Intel Compute Stick in order. |  |
| Note | Keyboard and mouse aren't included. |
Find compatible keyboards and mice at the Intel Product Compatibility Tool.
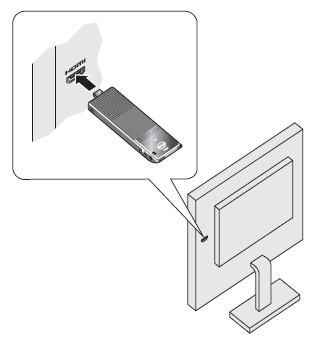
Connect Directly to a Display
Plug the Intel® Compute Stick directly into a standard HDMI port on a television or monitor. The Intel Compute Stick will extend about 4.5 inches (113mm) out from the HDMI port.
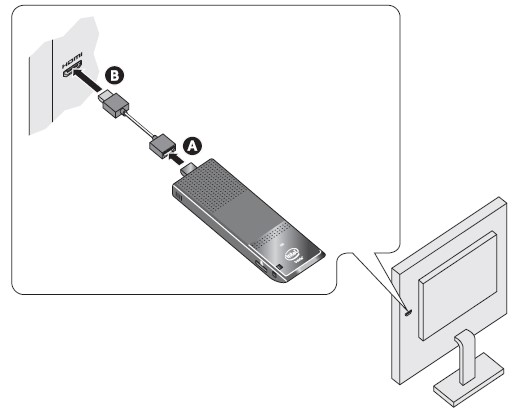
Connect to a Display with the HDMI Extender Cable
If there's limited space around the television or monitor HDMI port to plug the Intel® Compute Stick directly into the port, use the flexible HDMI extender cable. The extender cable came in the box.- Plug the Intel Compute Stick into the female end of the extender cable (A).
- Plug the male end of the extender cable into the HDMI port on the television or monitor (B).
Find compatible televisions and monitors at the Intel Product Compatibility Tool.
Powering the Device
Plug the power adapter into an AC power source (A). Connect the power cable (B) to the Intel® Compute Stick as shown.

The Intel Compute Stick will boot up automatically when power is applied.
Shut down the Intel Compute Stick using the normal shutdown process for Windows*.
Subsequent power-ups are done just by pressing the power button on the side of the Intel Compute Stick.
| Note | The Intel Compute Stick is designed to use up to 10W of power. USB ports on televisions or monitors don't supply enough power for the Intel Compute Stick. If you try to use a USB port on the television to power the Intel Compute Stick, these are the likely symptoms:
|
Use the USB Ports
Use the USB 2.0 or 3.0 port to:
- Install software from a CD or DVD in a USB optical drive.
- Back up or access media files (such as music and photos) on an external USB drive.
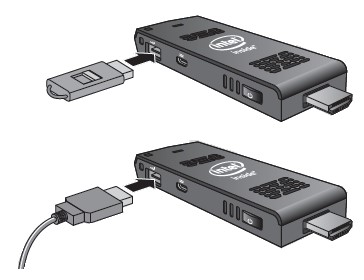
| Note | USB drive and USB cable aren't included. |
Find compatible USB devices at the Intel Product Compatibility Tool.
Connect a USB Hub to a USB Port
Connecting a USB hub to the Intel® Compute Stick provides additional USB ports. We recommend you use only powered USB hubs.
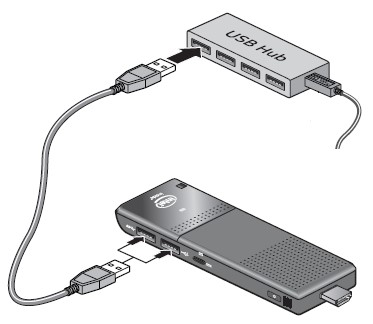
| Note | USB Hub and USB cable aren't included. |
Use the MicroSD* Card port
The Intel® Compute Stick supports MicroSD card sizes from 8 GB to 128 GB.
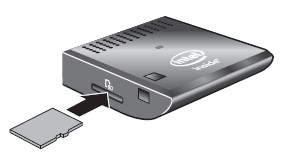
| Note | MicroSD card isn't included. |
Find compatible microSD cards at the Intel Product Compatibility Tool.
Secure the Intel® Compute Stick
Install a security cable loop in the security opening on the edge of the Intel® Compute Stick. The security opening is 3 mm x 3 mm.
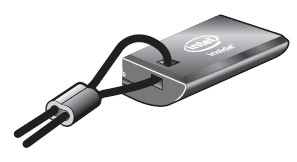
| Note | Security cable loop isn't included. You can build one—insert a length of quality wire rope (<3mm) through the security opening and then crimp the ends together with a cable sleeve. |

First Boot-Up
The first time you boot up the Intel® Compute Stick STK1AW32SC, Windows® 10 will guide you through the following steps:- Select your language.
- Accept the Windows license terms.
- Connect to a network (this step is optional).
- Choose Express Settings or Customize.
- Create an account name and password.
- Finished.
Connect to a Wireless Network
To connect to a wireless network:- Click the wireless network icon in the notification area of the taskbar.
- Click your network, and then click Connect.
- Type in the security key or passphrase.
Operating System Recovery
There is a Windows* recovery partition on the Intel® Compute Stick. You can use this to refresh, reset, or restore Windows. Here is what each of these actions do:| Refresh | If you're unable to troubleshoot why your PC is no longer performing well, refresh your PC without deleting any of your personal files or changing your settings. This is what happens with Refresh:
|
| Reset | If you want to giveaway, recycle, or start over with your PC, reset it completely. This process removed everything and reinstalls Windows. This is what happens with Reset:
|
| Restore | If you think an app or driver that you recently installed caused problems with your PC, you can restore Windows back to an earlier point in time. This is called a restore point. System Restore doesn’t change your personal files, but it might remove recently installed apps and drivers. |
Caution | Before performing this action, be sure to back up all personal data to external storage. |
To access the recovery media:
- If Windows boots, from Windows Start, type in Recovery and select Recovery Options. See How to refresh, reset, or restore your PC for complete details on how to use the recovery options.
- If Windows fails to boot, the recovery process should automatically start.
- If Recovery doesn't automatically start, try to initiate it by pressing F8 during boot. Be sure to press F8 when you see the prompt F8 to Activate Windows 8.1 Recovery Mode.
Follow the recovery steps.
| Note |
|
Keep BIOS and Drivers Current
BIOS
The latest BIOS updates are available on Download Center. Refer to BIOS Update Instructions for information on updating the Intel® Compute Stick’s BIOS.
Drivers
Graphics, wireless, and Bluetooth* drivers are available on Download Center. HDMI audio drivers are included in the graphics driver package.
Windows Updates* may install driver updates automatically.