This is part 3 of a 4-part tutorial series that shows you how to manage the DE10-Nano with Azure* IoT Edge and use container-based virtualization to reprogram the onboard FPGA from the Azure* Cloud.
About this tutorial
This tutorial provides instructions for creating an Azure* IoT Edge container application that sends accelerometer data from the DE10-Nano G-Sensor to the Azure* Cloud.
Objectives
In this tutorial, you will learn how to:
- Gather and patch G-Sensor and IoT Edge sample source code
- Build and push your IoT Edge Module to ACR
- Deploy your IoT Edge Module to the DE10-Nano
Prerequisites
- Complete the previous tutorial, Build an Azure Container-based Application using Microsoft Visual Studio Code.
- An Azure* IoT hub
- An IoT Edge device (DE10-Nano) with IoT Edge runtime installed
- An Azure* Container Registry (ACR)
Step 1: Before you Begin
The DE10-Nano board has a built-in 3-axis accelerometer, known as the G-sensor. Before you begin, test out the G-sensor on the DE10-Nano.
-
Open a console on DE10-Nano.
-
Input the following command:
Input:
/root/gsensorOutput:
[1]X=32 mg, Y=-40 mg, Z=916 mg
[2]X=20 mg, Y=-40 mg, Z=968 mg
Move the board to change the X, Y, Z accelerometer data. This g-sensor executable reads raw data from the sensor via I2C, processes that data, and then displays it as X, Y, and Z-axis values.
Step 2: Download Source Code from Terasic and GitHub
You will develop a container application that uses the DE10-Nano G-sensor by leveraging the source code provided by Terasic.
-
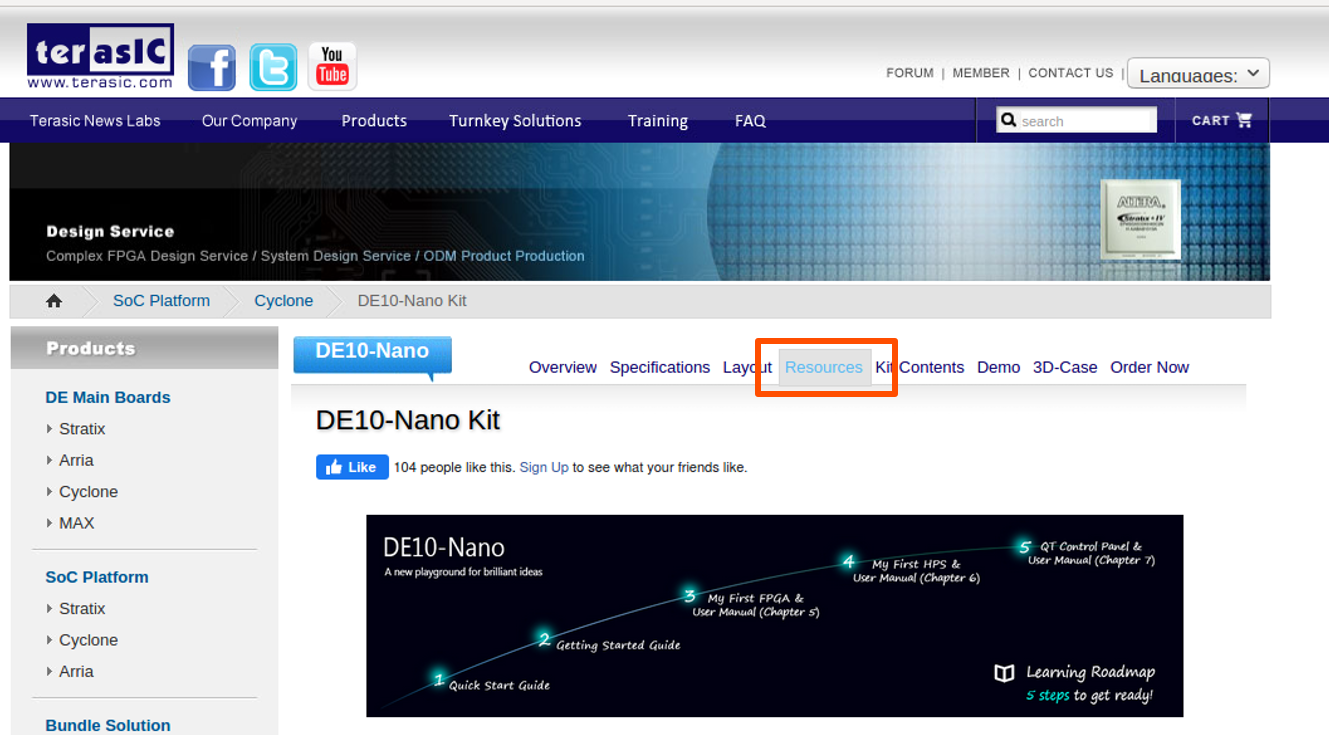
Open the DE10-Nano Kit resource page from Terasic's site and navigate to Resources.
Determine the DE10-Nano Board Revision
The DE10-Nano has different board revisions, and you need to download content according to your board's revision.
-
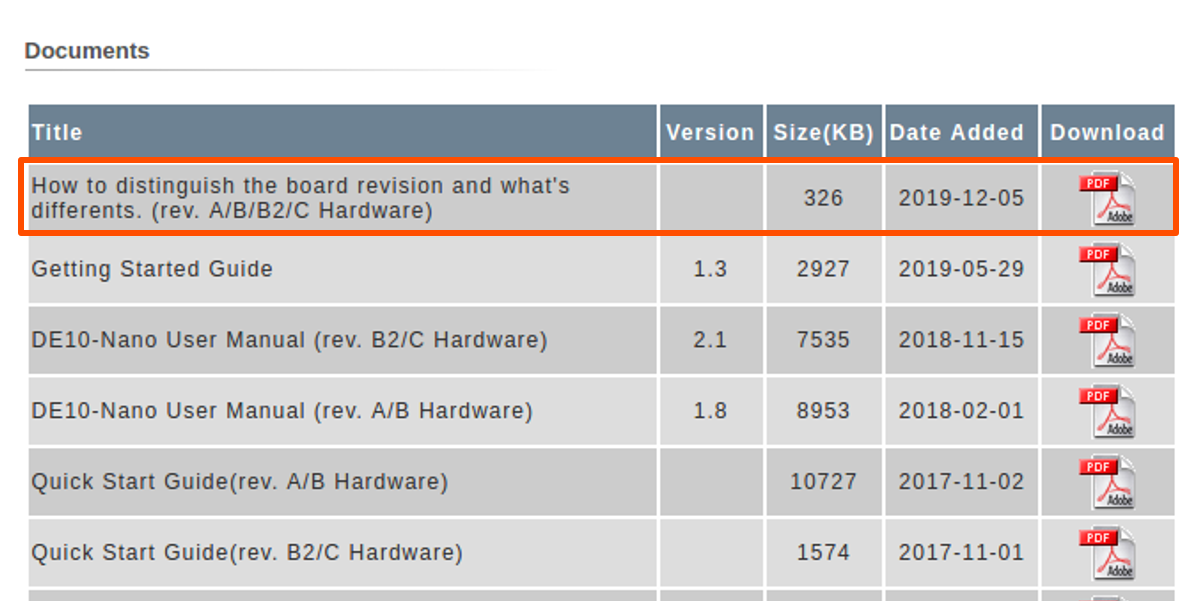
From the Resources page, navigate to Documents and open the How to distinguish the board revision and what's different pdf.
-
Read the pdf to determine your board's revision.
Download the CD-ROM for your Board Revision
-
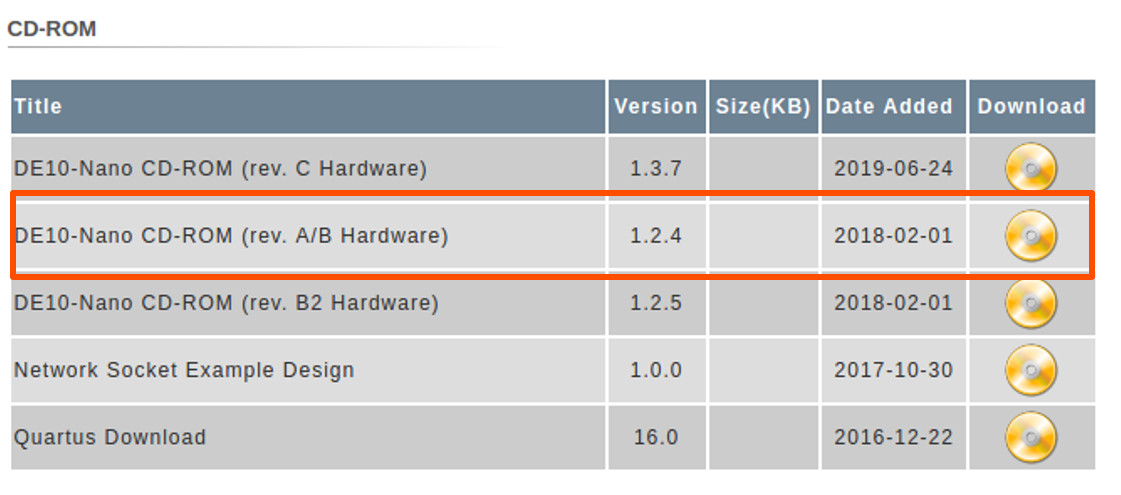
From the Resources page, navigate to CD-ROM, and download the CD-ROM for your board's revision.
In this example, the DE10-Nano board revision is B, and DE10-Nano CD-ROM (rev. A/B Hardware) is the appropriate download.
-
Open a console on your development PC.
-
Unzip the CD-ROM.
cd ~/Downloads mkdir de10nano unzip DE10-Nano_v.1.2.4_HWrevAB_SystemCD.zip -d de10nano/ -
Verify the contents in
de10nano.ls de10nano/ Datasheet Demonstrations Manual Schematic Tools Verify.md5 Verify.sfvThe G-sensor code is located in the
Demonstrationsfolder.
Get Source Code from GitHub
Open a terminal to get the source code.
sudo apt install git
cd ~/Download
git clone https://github.com/intel-iot-devkit/terasic-de10-nano-kit
This repository has not only the files for these tutorials (Module 3 and Module 4) but other tutorial files.
Step 3: Compile and Test the G-sensor Executable
Before creating a container application that uses the G-sensor, you need to compile and test the G-sensor executable. If you cannot run the executable, you cannot create a container that performs the same function.
Send the G-Sensor Code to your DE10-Nano
-
Open a console on your DE10-Nano and find the DE10-Nano IP address.
Input:
ip addrOutput:
2: eth0: <BROADCAST,MULTICAST,UP,LOWER_UP> mtu 1500 qdisc mq state UP group default qlen 1000
    link/ether f2:36:44:ac:08:7b brd ff:ff:ff:ff:ff:ff
    inet 192.168.100.145/24 brd 192.168.100.255 scope global dynamic eth0
      valid_lft 600184sec preferred_lft 600184sec
In this example, the address is 192.168.100.145.
-
Open a console on your development PC and send the folder that contains the G-sensor executable via SCP.
Input:
cd ~/Downloads/de10nano/Demonstrations/SoC
scp -r hps_gsensor root@<DE10-Nano IP address>:/root/Downloads
Output:
gsensor                          100%   11KB  11.3KB/s   00:00
ADXL345.h                        100% 3551     3.5KB/s   00:00
Makefile                         100%  546     0.5KB/s   00:00
ADXL345.c                        100% 2106     2.1KB/s   00:00
main.c                           100% 3121     3.1KB/s   00:00
Patch the G-sensor Code
The G-sensor code has unnecessary dependencies, and you need to patch the source code before compiling it.
-
Send the patch file to the DE10-Nano.
scp ~/Downloads/terasic-de10-nano/azure-de10nano-document/module03-gsensor-deploy-guide/hps_gsensor.patch root@<DE10-Nano IP address>:~/Downloads/hps_gsensor -
Open a console from DE10-Nano and patch the code.
cd ~/Downloads/hps_gsensor
patch < hps_gsensor.patch
Run the G-Sensor Executable
-
Generate the executable.
makeYou should see a G-sensor executable in the
hps_gsensorfolder. -
Run the executable.
Input:
./gsensorOutput:
===== gsensor test ===== id=E5h [1]X=20 mg, Y=-16 mg, Z=964 mg [2]X=20 mg, Y=-16 mg, Z=972 mg -
Clean the files (optional).
make clean
rm hps_gsensor.patch
Step 4: Download the Azure* IoT Device SDK for C
The Microsoft* Azure* IoT Device SDKs contain code that helps you build applications that connect to Azure* IoT Hub services. For details, see Understand and use Azure IoT Hub SDKs.
In this step, you prepare a sample code for using the IoT Edge API.
-
Open a console on the DE10-Nano and use git to download the Azure* IoT Device SDK for C.
cd ~/Downloads git clone https://github.com/Azure/azure-iot-sdk-c.gitNote: This example uses the SDK for the C language but Microsoft* provides SDKs for other languages. For details, see Azure IoT Hub Device SDK.
-
View the contents.
Input:
cd azure-iot-sdk-c
ls
Output:
build iothub_client SECURITY.MD build_all iothub_service_client serializer certs jenkins testtools CMakeLists.txt LICENSE thirdpartynotice.txt configs lts_branches.png tools c-utility provisioning_client uamqp dependencies.cmake provisioning_service_client umqtt deps readme.md version.txt doc samples -
Navigate to the
samplesfolder underiothub_client.This folder contains sample code for messaging IoT Edge modules or IoT Device applications to Azure* IoT Hub.
cd iothub_client/samples -
View the contents.
Input:
lsOutput:
CMakeLists.txt
ios
iotedge_downstream_device_sample
iothub_client_device_twin_and_methods_sample
iothub_client_sample_amqp_shared_methods
iothub_client_sample_module_filter
iothub_client_sample_module_method_invoke
iothub_client_sample_module_sender
iothub_client_sample_mqtt_dm
iothub_client_sample_mqtt_esp8266
iothub_client_sample_upload_to_blob
iothub_client_sample_upload_to_blob_mb
iothub_convenience_sample
iothub_ll_c2d_sample
iothub_ll_client_sample_amqp_shared
iothub_ll_client_shared_sample
iothub_ll_client_x509_sample
iothub_ll_telemetry_sample
readme.md
This tutorial uses sample code from iothub_client_sample_module_sender.
Step 5: Create a Development Container
Here, you use buildx to create a development container on your development PC and then send the container image to the DE10-Nano.
Note: You can build the container directly on the DE10-Nano but this takes a lot of time.
Build a Development Container with buildx
-
Open a console on your Development PC.
Note: Make sure your cross-compiling environment is enabled before completing this step. To enable cross-compiling, run the binfmt and inspect commands.
sudo su docker run --privileged docker/binfmt:820fdd95a9972a5308930a2bdfb8573dd4447ad3 docker buildx inspect --bootstrap -
Navigate to Downloads and edit
Dockerfile.arm32v7.cd ~/Downloads vim Dockerfile.arm32v7 -
Copy the code below into
Dockerfile.arm32v7.FROM arm32v7/ubuntu:xenial AS base RUN apt-get update && \ apt-get install -y --no-install-recommends software-properties-common && \ add-apt-repository -y ppa:aziotsdklinux/ppa-azureiot && \ apt-get update && \ apt-get install -y azure-iot-sdk-c-dev && \ rm -rf /var/lib/apt/lists/* FROM base AS build-env RUN apt-get update && \ apt-get install -y --no-install-recommends cmake gcc g++ make && \ rm -rf /var/lib/apt/lists/* WORKDIR /app -
Build the development container with buildx.
sudo su
docker build --rm -f $PWD/Dockerfile.arm32v7 -t de10nano/iotedgedev:arm32v7 $PWD
The build takes a few minutes to complete.
Send the Container Image to the DE10-Nano
-
Save the container image as a tar file on your development PC.
docker save de10nano/iotedgedev:arm32v7 -o de10nano-container.tar -
Send the tar file to the DE10-Nano via SCP.
scp de10nano-container.tar root@<DE10-Nano IP address>:~/Downloads/Note: You may need to change the file permissions of the tar file to send it to the DE10-Nano.
-
Delete the files on your development PC (optional).
rm de10nano-container.tar docker rmi de10nano/iotedgedev:arm32v7 rm ~/Downloads/Dockerfile.arm32v7 -
Open a console on the DE10-Nano.
-
Load the image.
docker load -i ~/Downloads/de10nano-container.tarLoading the image takes a few minutes. When the operation completes, use
docker imagesto see the container image.Input:
docker imagesOutput:
de10nano/iotedgedev arm32v7 7acdd7debb6b 2 days ago 298MB
-
You can remove the tar file from the
Downloadsfolder on the DE10-Nano (optional).rm de10nano-container.tar
Step 6: Set up VS Code for Remote File Access
Here, you will set up VS Code for remote file access, enabling you to use your development PC to develop code on the DE10-Nano. It is easier to modify code via VS Code rather than using vim on DE10-Nano.
Note: See Remote Development using SSH for Microsoft's tutorial on how to use the remote SSH extension.
To complete this step, the DE10-Nano and development PC must be on the same network. Also, make sure you can SSH into the DE10-Nano from your development PC. For instructions on how to set up an SSH connection, see Install the Azure IoT Edge Runtime.
-
Open a command palette (Ctrl+Shift+P) in VS Code.
-
To install the Remote Development extension pack, type and enter the following:
ext install ms-vscode-remote.vscode-remote-extensionpack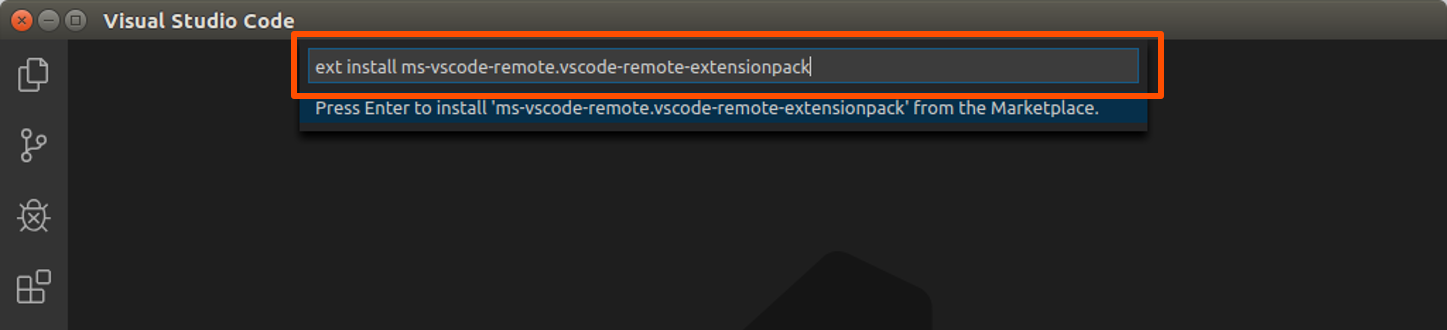
Connect to the DE10-Nano
-
Open a command palette (Ctrl+Shift+P) in VS Code.
-
Type and enter the command Remote-SSH: Connect to Host...

-
Enter the <username>@<ip address> of your DE10-Nano.
This example uses
root@192.168.100.145.Note: If you set a static IP for the DE10-Nano in Install the Azure IoT Edge Runtime, use it here.

-
Enter your root password.

-
Open a gsensor-module folder by clicking Open Folder and selecting the path
/home/root/Downloads/gsensor-module.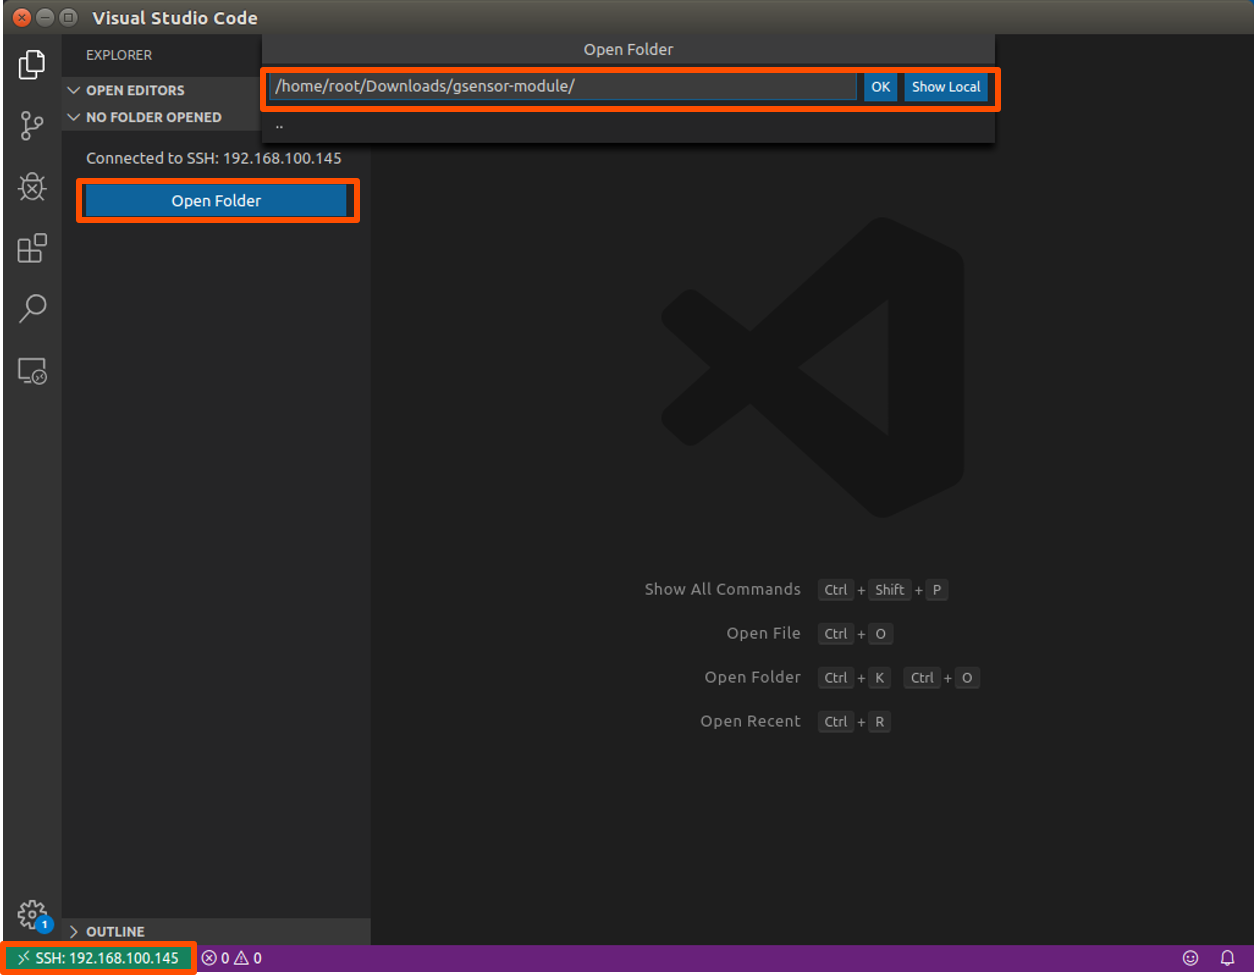
Send a Public Key to the DE10-Nano (Optional)
-
Open a console on your development PC and type:
ssh-copy-id root@<de10-nano IP address>
Step 7: Patch the Source Code
Copy Source Code to a Workspace
-
Open a console on your DE10-Nano.
-
Create a workspace.
mkdir ~/Downloads/gsensor-module -
Copy files in
iothub_client_sample_module_senderto your workspace.cp ~/Downloads/azure-iot-sdk-c/iothub_client/samples/iothub_client_sample_module_sender/* ~/Downloads/gsensor-module/ -
Copy files in
hps_gsensortoo.cp ~/Downloads/hps_gsensor/* ~/Downloads/gsensor-module/The G-sensor code and IoT Edge sample code are now located in the
gsensor-modulefolder.Input:
cd ~/Downloads/gsensor-module
ls
Output:
ADXL345.c
ADXL345.h
CMakeLists.txt
iothub_client_sample_module_sender.c
iothub_client_sample_module_sender.h
main.c
Makefile
You just gathered IoT Edge sample code from Microsoft* and G-sensor code from Terasic. You will use this code to develop an Azure* IoT Edge container application.
IoT Edge sample code G-sensor code iothub_client_sample_module_sender.c ADXL345.c iothub_client_sample_module_sender.h ADXL345.h CMakeLists.txt main.c Makefile
Apply a Patch to your Workspace
Apply the 'gsensor-module.patch' to your workspace folder.
-
Send the patch to the DE10-Nano by SCP.
scp ~/Downloads/terasic-de10-nano/azure-de10nano-document/module03-gsensor-deploy-guide/gsensor-module.patch root@<DE10-Nano IP address>:/root/Downloads/gsensor-module -
Open VS Code and connect to the DE10-Nano by a remote SSH extension.
-
Open a console on the DE10-Nano.
cd ~/Downloads/gsensor-module
patch < gsensor-module.patch
After patching the code, you need to set your IoT Edge connection string in
iothub_client_sample_module_sender.c. -
Open
iothub_client_sample_module_sender.cand replace<Your IoT Edge Connection String>with your connection string.Before:
static const char* connectionString = "<Your IoT Edge Connection String>";After:
static const char* connectionString = "HostName=de10nano-iothub.azure-devices.net;DeviceId=de10-nano-iotedge;SharedAccessKey=rPiy9a15CM4WQ54EAwXq6/XQ07diE0zUi0NXTCBmuic=";
Changes Made by the Patch File
The patch makes three major changes:
-
Integrates G-sensor and IoT Edge API sample code
The patch first integrates
main.c(G-sensor code) intoiothub_client_sample_module_sender.c. The key processes ofmain.c: open I2C for accessing the G-sensor, initialize the G-sensor, and read the G-sensor and convert to standard output. To read the G-sensor data, these steps must be ported toiothub_client_sample_module_sender.c. -
Modifies the Azure* IoT Edge API function
The patch changes Azure* IoT Edge API in
iothub_client_sample_module_sender.c. Specifically, it changes theIoTHubModuleClient_LL_CreateFromEnvironment(MQTT_Protocol)function toIoTHubModuleClient_LL_CreateFromConnectionString(connectionString, MQTT_Protocol)with your IoT Edge connection string.Before:
else if ((iotHubModuleClientHandle = IoTHubModuleClient_LL_CreateFromEnvironment(MQTT_Protocol)) == NULL)After:
else if ((iotHubModuleClientHandle = IoTHubModuleClient_LL_CreateFromConnectionString(connectionString, MQTT_Protocol)) == NULL)Note:
CreateFromConnectionStringis used becauseCreateFromEnvironmentcannot be easily used in the development container. Specifically, theCreateFromEnvironmentfunction uses environment variables that are generated when the IoT Edge Runtime deploys the container from Azure* cloud. If we use the API in the development container, an error will occur because the environment variables that are supposed to be provided by IoT Edge Runtime don't exist. Thus, the patch replaces it with theCreateFromConnectionStringAPI. Because this connection string is unique to a certain IoT Edge, it is not portable. After testing and debugging, it is necessary to return to the originalCreateFromEnvironmentAPI. -
Updates CMakeLists.txt
CMakeLists.txt, originally in theiothub_client_sample_module_senderfolder is supposed to be built in a higher folder as the Azure IoT SDK for C GitHub page describes. Therefore, you will get an error if you build theCMakeLists.txtonly due to the lack of some library dependencies. In the "SampleModule" that you created in the previous tutorial, there is CMakeLists.txt which works fine; we used most of it.
Step 8: Create and Test the G-sensor Executable
In this step, you create a G-sensor binary using your development container.
-
Open VS Code and connect to the DE10-Nano.
-
Open a DE10-Nano terminal in VS Code and navigate to the
gsensor-modulefolder.cd ~/Downloads/gsensor-module -
Run the development container.
docker run -it -v $PWD:/app de10nano/iotedgedev:arm32v7 -
Create the G-sensor executable.
cmake . makeNote: The
cmakeandmakecommands work because IoT Edge API packages are installed in the development container. If you try to generate the executable without running the container, an error will occur. -
Exit the container.
exit -
Test the executable.
Input:
./iothub_client_sample_module_senderOutput:
===== gsensor test =====
id=E5h
[1]X=8 mg, Y=-88 mg, Z=964 mg
IoTHubModuleClient_LL_SendEventAsync accepted message [0] for transmission to IoT Hub.
[2]X=16 mg, Y=-96 mg, Z=956 mg
IoTHubModuleClient_LL_SendEventAsync accepted message [1] for transmission to IoT Hub.
You can see that the messages are correctly sent to Azure* IoT Hub. In the previous tutorial, you used the Azure* CLI to monitor messages. Here, you use VS Code to monitor messages from your IoT Hub.
-
Open a new window in VS Code.
Note: Make sure that this window does not connect to the DE10-Nano. If the window connects to DE10-Nano, the Azure* IoT Hub tab will not appear.
-
Click the "..." button on the Azure* IoT Hub tab and then click Start Monitoring Built-in Event Endpoint.

You can see that the IoT Hub is receiving accelerometer data.

Step 9: Build and Push the G-sensor Module to Azure* Container Registries
Update the API
-
From a DE10-Nano terminal in VS Code, open
iothub_client_sample_module_sender.c.cd ~/Downloads/gsensor-module vim iothub_client_sample_module_sender.c -
Comment out the connection string variable declaration.
Before:
static const char* connectionString = "HostName=de10nano-iothub.azure-devices.net;DeviceId=de10-nano-iotedge;SharedAccessKey=rPiy9a15CM4WQ54EAwXq6/XQ07diE0zUi0NXTCBmuic=";After:
//static const char* connectionString = "HostName=de10nano-iothub.azure-devices.net;DeviceId=de10-nano-iotedge;SharedAccessKey=rPiy9a15CM4WQ54EAwXq6/XQ07diE0zUi0NXTCBmuic="; -
Update the API.
You need to change the API from IoTHubModuleClient_LL_CreateFromConnectionString() to IoTHubModuleClient_LL_CreateFromEnvironment().
Before:
else if ((iotHubModuleClientHandle = IoTHubModuleClient_LL_CreateFromConnectionString(connectionString, MQTT_Protocol)) == NULL)After:
else if ((iotHubModuleClientHandle = IoTHubModuleClient_LL_CreateFromEnvironment(MQTT_Protocol)) == NULL)
Build the Image
-
From a VS Code explorer, navigate to your
modulesfolder. -
Open a terminal in VS Code and copy the
gsensor-modulefolder tomodules.scp -r root@<DE10-Nano IP address>:/root/Downloads/gsensor-module <path to modules folder on your development PC>Example:
scp -r root@<DE10-Nano IP address>:/root/Downloads/gsensor-module ~/Documents/EdgeSolution/modulesNote: Make sure that the
gsensor-modulefolder is located at the same level asSampleModule.
-
Create
Dockerfile.arm32v7in thegsensor-modulefolder.cd <your SampleModule Path>/EdgeSolution/modules/gsensor-module vim Dockerfile.arm32v7 -
Copy and paste the following code into
Dockerfile.arm32v7.FROM arm32v7/ubuntu:xenial AS base RUN apt-get update && \ apt-get install -y --no-install-recommends software-properties-common && \ add-apt-repository -y ppa:aziotsdklinux/ppa-azureiot && \ apt-get update && \ apt-get install -y azure-iot-sdk-c-dev && \ rm -rf /var/lib/apt/lists/* FROM base AS build-env RUN apt-get update && \ apt-get install -y --no-install-recommends cmake gcc g++ make && \ rm -rf /var/lib/apt/lists/* WORKDIR /app COPY . ./ RUN cmake . RUN make FROM base WORKDIR /app COPY --from=build-env /app ./ CMD ["./iothub_client_sample_module_sender"]
-
Create
module.jsonin the same folder.vim module.json -
Copy and paste the following code into
module.json.Note: Be sure to substitute the repository name with the name you used during setup. Besides the repository, you can keep everything else the same.
{ "$schema-version": "0.0.1", "description": "", "image": { "repository": "de10nano.azurecr.io/gsensor-module", "tag": { "version": "0.0.1", "platforms": { "arm32v7": "./Dockerfile.arm32v7" } }, "buildOptions": [] }, "language": "c" } -
Update
deployment.template.jsonto build the G-sensor module.Before:
"modules": { "SampleModule": { "version": "1.0", "type": "docker", "status": "running", "restartPolicy": "always", "settings": { "image": "${MODULES.SampleModule}", "createOptions": {} } }, "SimulatedTemperatureSensor": { "version": "1.0", "type": "docker", "status": "running", "restartPolicy": "always", "settings": { "image": "mcr.microsoft.com/azureiotedge-simulated-temperature-sensor:1.0", "createOptions": {} } } }After:
"modules": { "gsensor-module": { "version": "1.0", "type": "docker", "status": "running", "restartPolicy": "always", "settings": { "image": "${MODULES.gsensor-module}", "createOptions": { "HostConfig": { "Privileged": true } } } } } -
Change message routes.
Before:
"$edgeHub": { "properties.desired": { "schemaVersion": "1.0", "routes": { "SampleModuleToIoTHub": "FROM /messages/modules/SampleModule/outputs/* INTO $upstream", "sensorToSampleModule": "FROM /messages/modules/SimulatedTemperatureSensor/outputs/temperatureOutput INTO BrokeredEndpoint(\"/modules/SampleModule/inputs/input1\")" }, "storeAndForwardConfiguration": { "timeToLiveSecs": 7200 } } }After:
    "$edgeHub": {
      "properties.desired": {
        "schemaVersion": "1.0",
        "routes": {
          "SampleModuleToIoTHub": "FROM /messages/modules/* INTO $upstream"
        },
        "storeAndForwardConfiguration": {
          "timeToLiveSecs": 7200
        }
      }
    }
Set up buildx
Enable your cross-compiling environment to prepare for using buildx.
Open a console on your development PC and type:
sudo su
docker run -it --privileged docker/binfmt:820fdd95a9972a5308930a2bdfb8573dd4447ad3
docker buildx inspect --bootstrap
Build and Push the Module to ACR
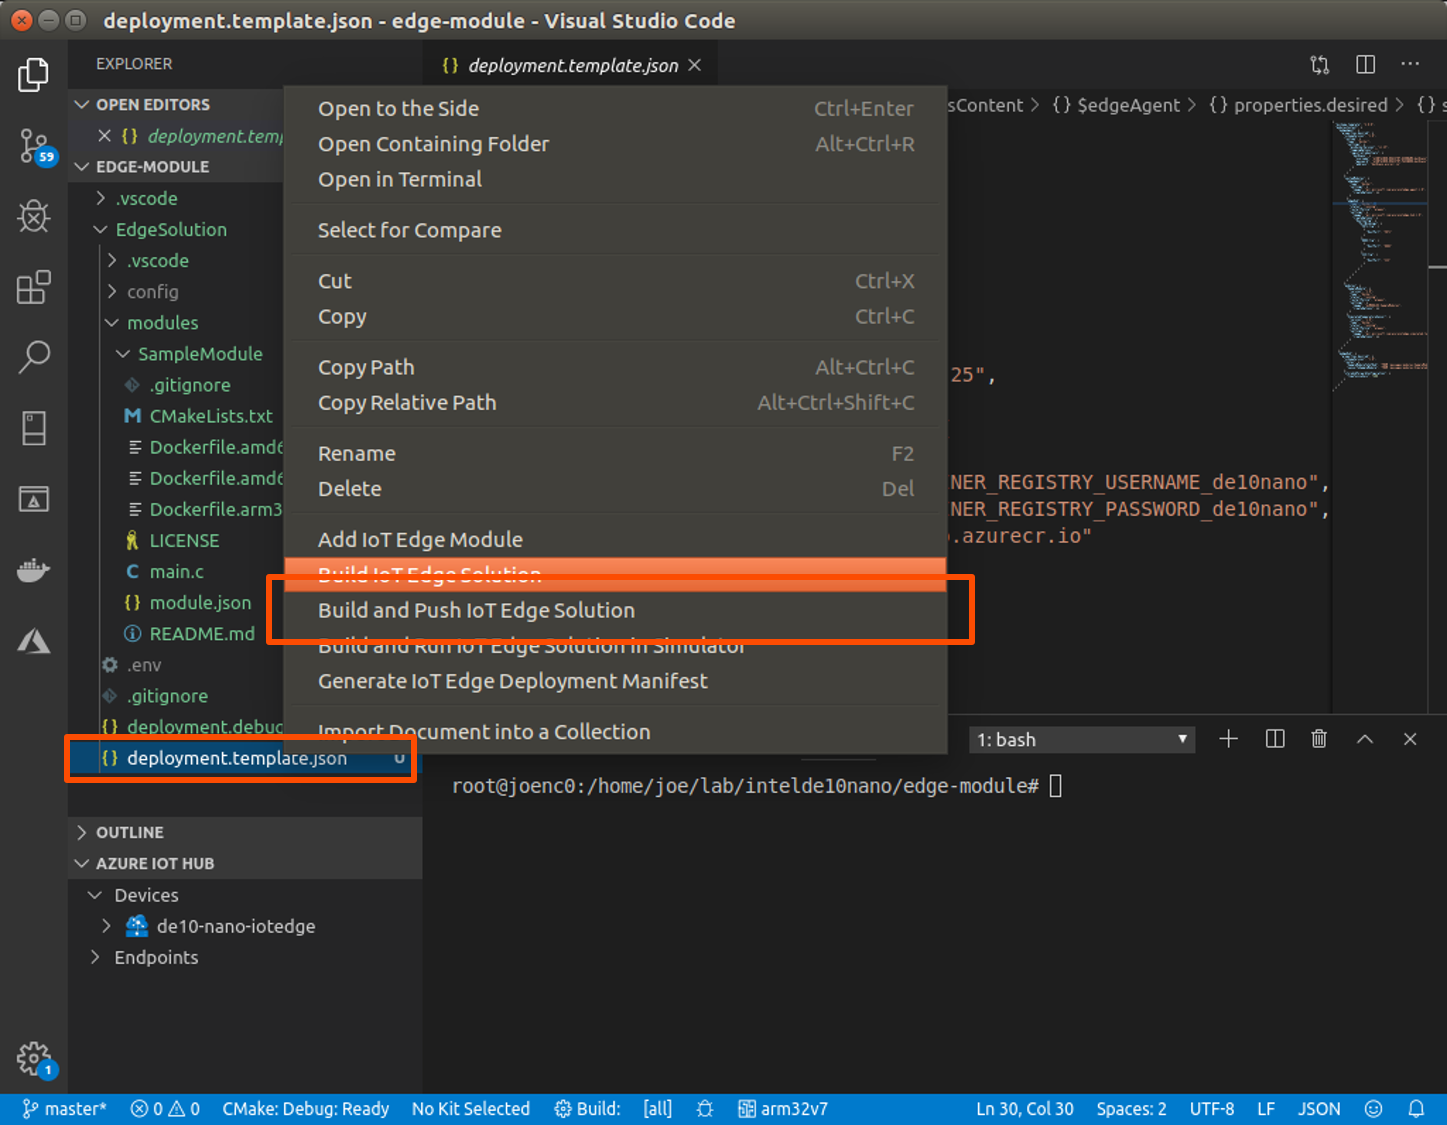
Right-click on deployment.template.json and then click Build and Push IoT Edge Solution.
Deploy the Module to DE10-Nano
-
To generate a manifest, right-click on
deployment.template.jsonand then click Generate IoT Edge Deployment Manifest.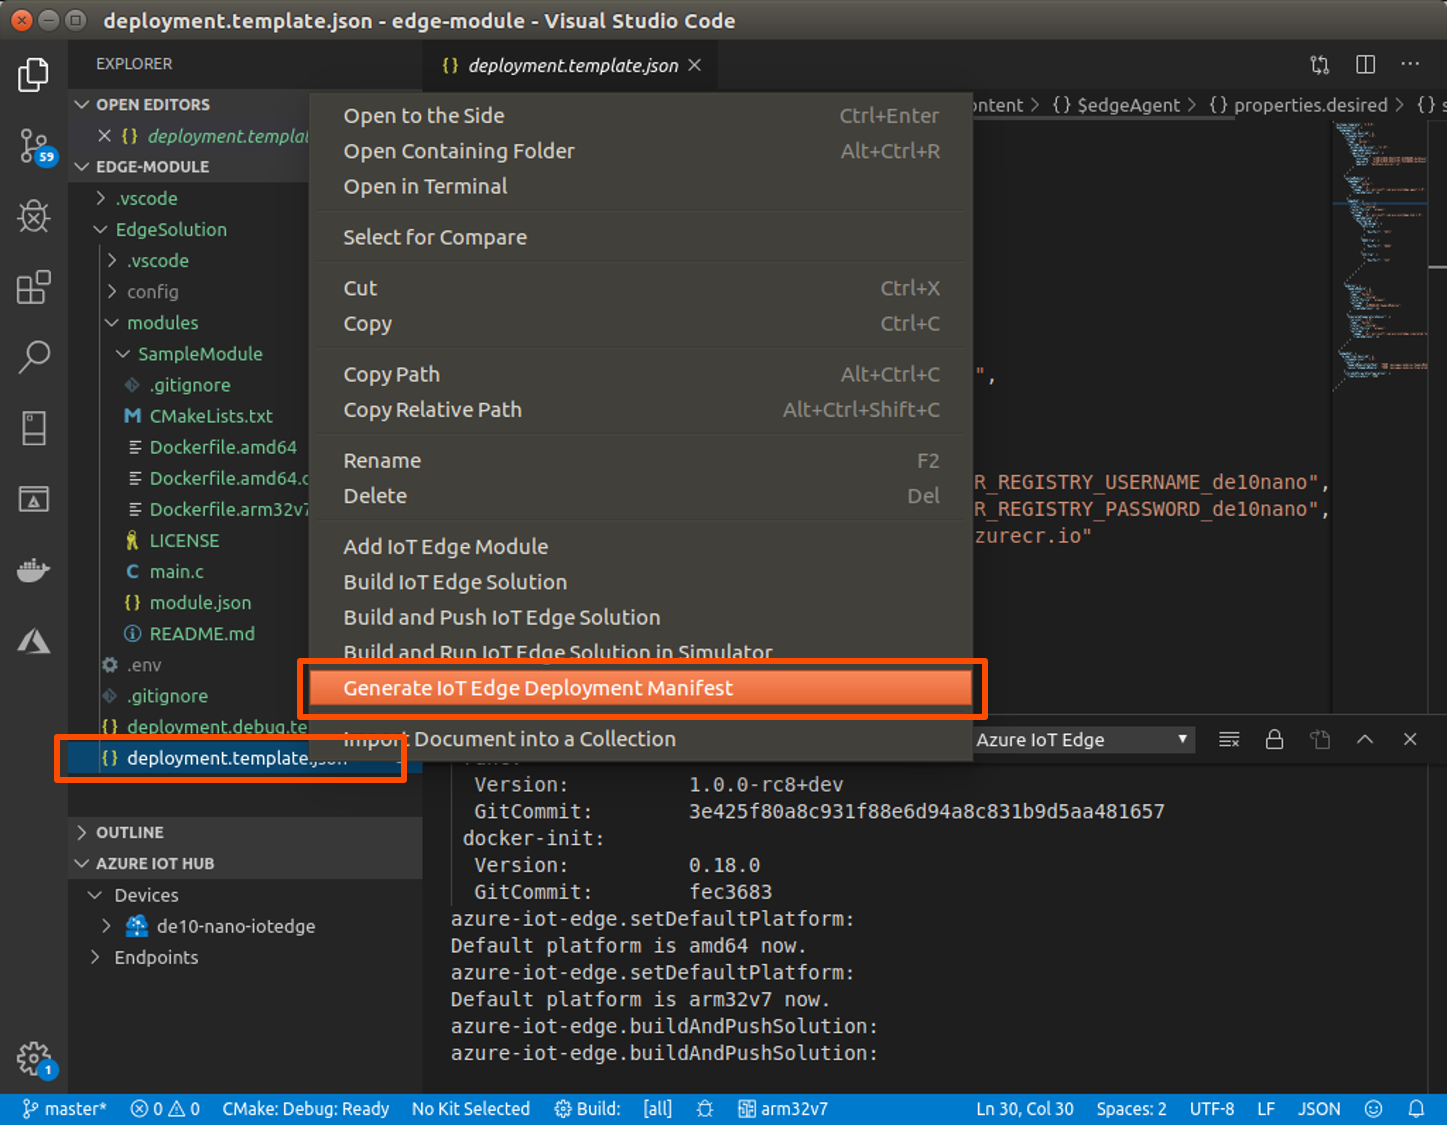
-
Navigate to the config folder, right-click on
deployment.arm32v7.json, and then click Create Deployment for Single Device.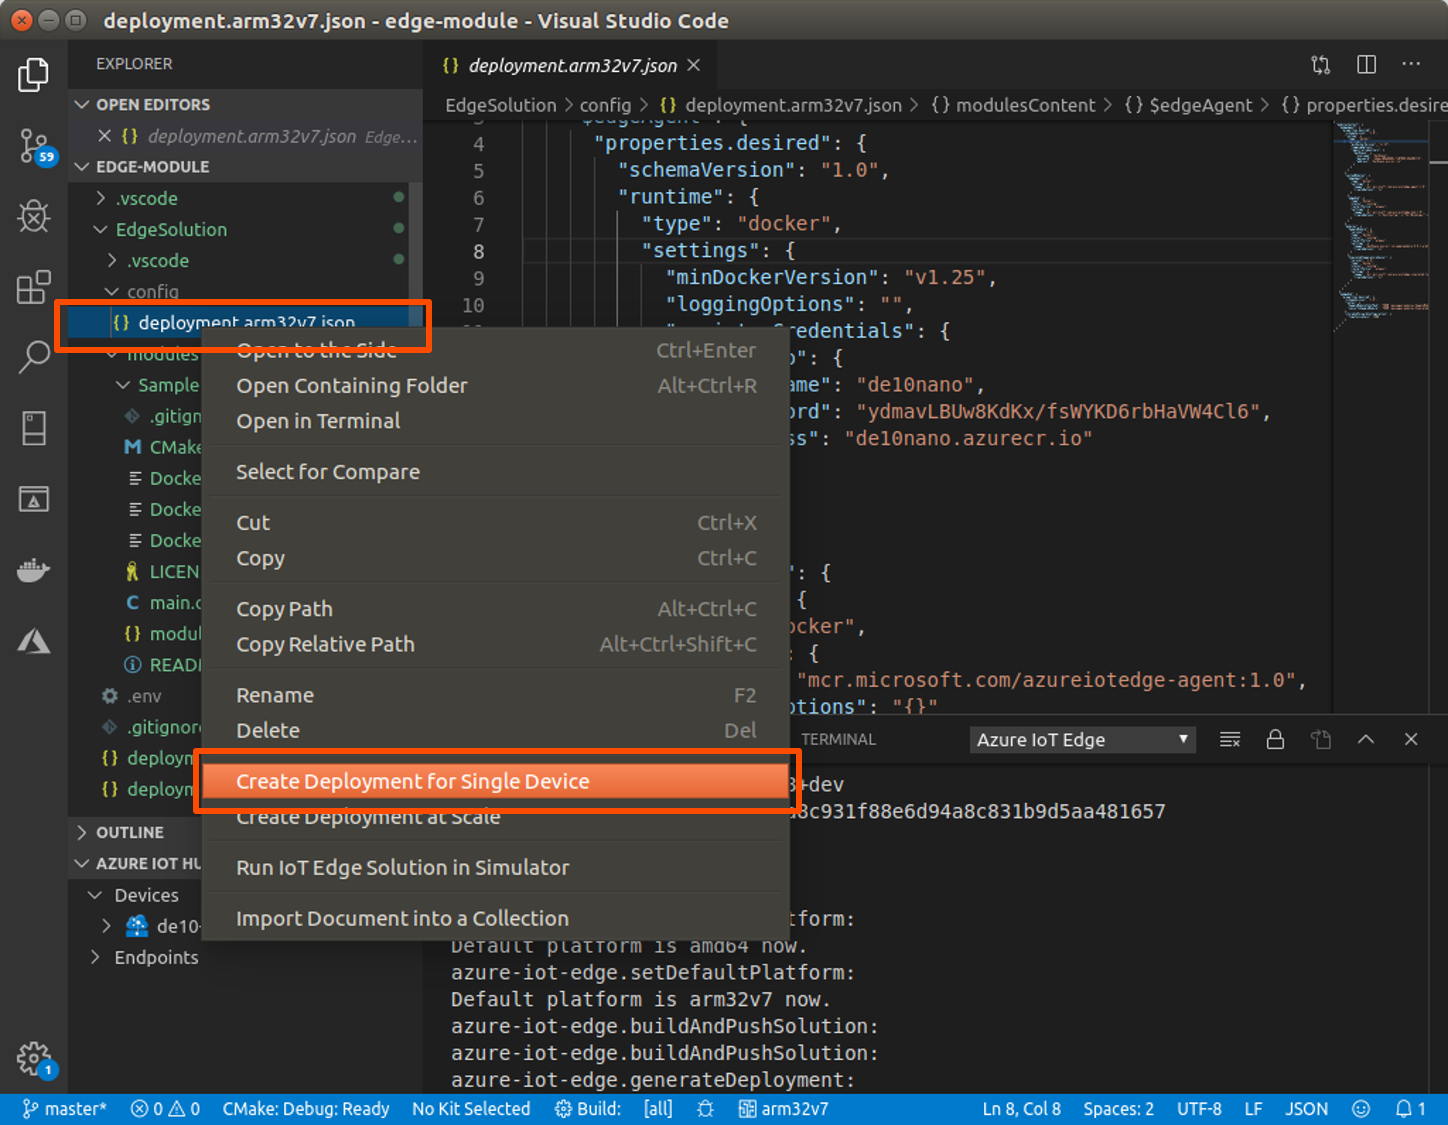
After a few minutes, the module will be deployed to the DE10-Nano and the G-sensor data will appear on the VS Code window.
Note: Make sure that in the Development PC VS Code you still have "Start Monitoring Built-In-Event Endpoint" enabled.
Note: If you cannot see any messages, you may have reached the maximum number of messages that can be sent per day. Try redeploying the module. Open a console on your DE10-Nano and use the command iotedge restart <module name>.
Next Steps
Congratulations! You have completed this tutorial. To continue to the next tutorial in this series, go to Reconfigure an FPGA from the Azure Cloud using a Container Application.
You can delete the resource group unless you plan to continue to the next tutorial. It will delete all Azure* services you associated with it.